Oct 21, 2022 | Blog
When we were kids, we all drew the same house with a steeply pitched roof, a front door, and two windows in the front— maybe even a chimney and a tree in the yard. 🏡 <– much like this.
While that cookie-cutter version of a home is stuck in our minds, it’s definitely not the case of actual homes today. More specifically, a steeply pitched roof with two sides is not the go-to choice for the majority of modern homes. In fact, there are over a dozen different roof types and even more styles, materials, and colors than ever before.
Whether you are doing a new home build or just want to understand more about your home’s roof, we’re going to go through the most common roof types and styles, plus their pros and cons. This can help you understand your home and how it functions— giving you a leg up on other homeowners who assume every roof is the same.
THE 12 MOST COMMON ROOF TYPES + THEIR PROS AND CONS
These dozen roof types all have plenty of benefits, but also a fair share of downfalls, which can make or break it for many homeowners. Certain roof types just aren’t ideal for different styles of homes, which we’ll get into as well. But knowing what types of roof there are can help you determine which your current home has, or what you may want in the future.
1) GABLE ROOF
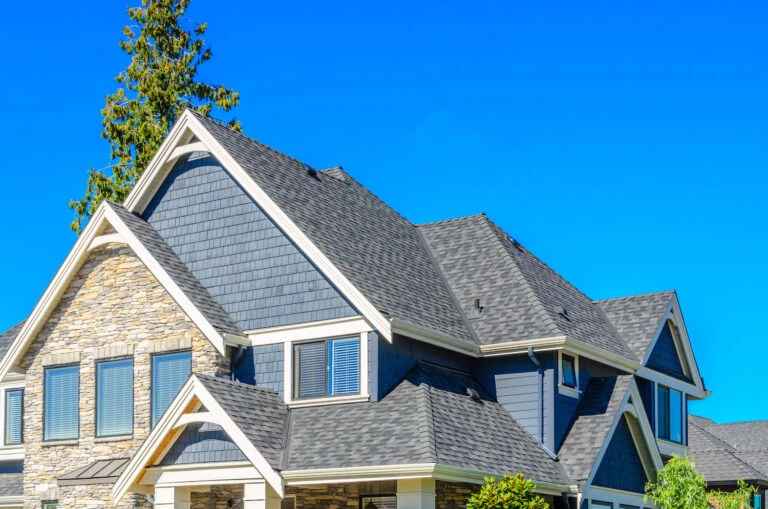
When you think of a generic house, a gable roof is probably the first one you imagine without even knowing it. Gable roofs are the most popular roof type for homes— making up about 40% of all roofs in America.
Gable roofs are defined by two sloped sides that come together at a ridge in the middle, creating a triangular shape. Many people think this is the most aesthetically pleasing roof type, but it also has plenty of functional benefits too.
✅ Gable Roof Pros
- Great at shedding water and snow, making it ideal for homes in colder climates.
- Easily altered with skylights or windows
- One of the most affordable types of roofs
- Allow more attic space and better ventilation
- Work with most home styles
❌ Gable Roof Cons
- Can uplift easily in high winds or hurricanes
- High pitches can make installation difficult
2) DUTCH GABLE
A Dutch gable is a cross between a gable and a hip roof. A gable roof, which encircles the top of a hip roof, adds more room and beauty to the design. Dutch gable roofs might be frequently used on cottage-style homes since they have a classic old-school style to them.
✅ Dutch Gable Pros
- Allow more natural sunlight in
- Can be used as a larger attic space or additional living space
- Works with most roofing materials
❌ Dutch Gable Cons
- Requires more materials
- Has more joints that can leak if not properly sealed
- Lower pitched gablets can collect snow and ice
- Requires more maintenance
3) CLIPPED GABLE
A clipped gable roof is a variation of the standard gable roof. It’s created by truncating or “clipping” the ends of the roof, creating an angled edge on each end. This gives the roof a bit more style and unique appeal.
✅ Clipped Gable Pros
- Extra space in the attic
- Can be used with a variety of home styles
- Reduces the strong force of wind at the roof’s peak
- Unique architectural design
- Showcases roofing materials
❌ Clipped Gable Cons
- The “clipped” ends have small joints at risk of leaks
- Complicates shingle installation
4) BUTTERFLY
A butterfly roof is definitely something you might see on a mid-century modern home or other uniquely designed architectural home. A butterfly roof is also like if you flipped a gable roof upside down as its valley goes down in the middle, rather than meeting up at a peak. They are usually low sloped but give a very unique dimension to the home.
✅ Butterfly Pros
- Ideal for gardeners with it’s convenient rain water collection
- Can withstand very high winds
- Allows for more natural light with higher walls on the outsides of the home
❌ Butterfly Cons
- Expensive to install and maintain
- Very susceptible to snow and ice issues (more ideal for warmer climates)
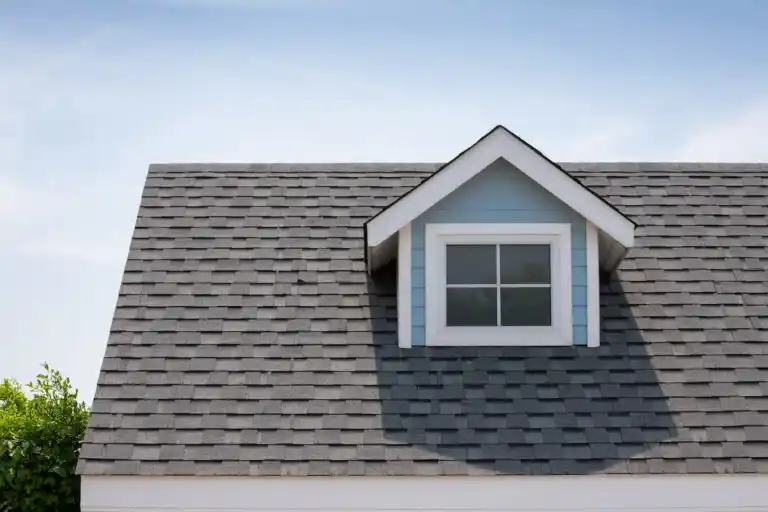
5) DORMER
A dormer roof is more of a roof accent in that it goes over a dormer window within a gable roof or other high pitch style. Dormers are a great way to let in more natural light and improve the ventilation in your home. They also give your home some extra curb appeal.
✅ Dormer Pros
- Allows for more natural light and improved ventilation
- Gives your home some extra curb appeal
- Creates unique little nooks in the upper floor of your home
- Increases functionality and space in your attic
❌ Dormer Cons
- Creates more joints that require flashing and sealant
- Complicated installation
- Won’t work with just any roof or home style
6) FLAT
You’ll most often find flat roofs on commercial structures, and less on residential buildings. However, it’s worth mentioning. Flat roofs are not actually 100% flat, but are very low-sloped to allow rain water runoff.
✅ Flat Roof Pros
- They offer a design unique
- Allows for big, open floor plans
- Possible to add on levels to a home
- Can be utilized as a roof-top garden or green roof
❌ Flat Roof Cons
- Very susceptible to leaks if not properly sealed
- Requires regular maintenance
7) GAMBREL
A gambrel roof is what you might find on a classic red barn. It has four surfaces that work their way up to the peak with four low slopes. This type of roof allows for a wider area and more head space in an upper floor attic or loft.
✅ Gambrel Pros
- More space in the upper floor
- Simple installation
- Opportunity to install more windows or dormers
- Works with most roofing materials
❌ Gambrel Cons
- Susceptible to wind damage
- Poorly ventilated
- Can collect snow and ice on it’s lower slope
8) HEXAGONAL
A hexagonal roof is just what it sounds like, a roof with six sides. They are most often found on unique homes, gazebos, or home additions. They give the structure some extra curb appeal and can be a great way to add an extra element to the roof design.
✅ Hexagonal Pros
- Unique architectural design
- Adds curb appeal
- DIY-friendly
- Highly durable and strong
- Ideal for gazebos or outdoor structures
❌ Hexagonal Cons
- Can be difficult to build, repair, and maintain
- Not ideal for a standard home
9) HIP
A hip roof has four sloping sides that come together to a ridge in the middle— kind of like a pyramid shape. The two sides that meet at the top will form a little flat ridge, while the other two converge and meet at a point. Hip style roofs are very stylish and very frequently utilized on older rambler single-level homes.
✅ Hip Roof Pros
- Very stable and resistant to strong winds
- Easy water shedding design
- Works with a large variety of roofing materials
- Stunning mid-century modern design appeal
❌ Hip Roof Cons
- Can be complex and expensive to install
- Don’t allow space for an attic
10) MANSARD
Mansard roofs are very complex and have multiple sides with different slopes and structures, making it quite unique. This type of roof is familiar in European design and you may think of a cute little wooded cottage when you see a Mansard roof.
✅ Mansard Pros
- A beautiful design aesthetic— very fancy
- Lends itself opportunity to expand upper floor living space
- Lots of head room in upper floors or attic
- Option to add more windows, skylights, or dormers
❌ Mansard Cons
- Very expensive to install
- Can be difficult to maintain and repair
- Requires a lot more material to build
- Insufficient water drainage
11) SALTBOX
A saltbox roof is very similar to a gable roof, because it has two sides that meet at the peak. However, a saltbox roof has one side longer and a different slope than the other, giving it an asymmetrical look. These roofs are proven to shed snow and ice well and are ideal for places that get lots of snow like in the Colorado mountains or the Upper Midwest.
✅ Saltbox Pros
- Gorgeous curb appeal
- Great snow and water shedding
- Easy installation
- Withstands strong storms and winds
- Tall slope gives a lot of added headspace
❌ Saltbox Cons
- The unique roof shape can shrink the width of an upper floor
- Can be costly based on how many materials are required to shingle
12) SHED
A shed roof is kind of like a lean-to and consists of just one single sloped roof. You’ll see this type of roof utilized on cabins, sheds, barns, or other similar structures. They are very low maintenance and cost-effective.
✅ Shed Roof Pros
- Low maintenance
- Easy to install and repair
- Never has standing water
- Works with most roofing materials
- Doesn’t need many materials to install
❌ Shed Roof Cons
- Won’t work on a standard home or other larger structures
- A good gutter system is required to prevent severe damage to landscaping under the slope
THE BEST ROOFING MATERIALS TO CHOOSE FROM 🏆
When you are ready to roof your home, it is important to choose the best roofing materials for your needs. There are many different roofing materials on the market, each with its own set of pros and cons. Here is a look at some of the most popular roofing materials to help you make an informed decision:
ASPHALT SHINGLES
The most common type of roofing material in the country is asphalt shingles. They are affordable, easy to install, low-maintenance, and have nearly endless color and style options to choose from. Hence, why homeowners choose it time and time again. Another benefit to asphalt shingles is that this material works with just about any of the roof types we’ve listed thus far.
METAL ROOFING
If you are looking for roofing materials that will last a lifetime, then metal roofing is the way to go. Metal roofing is incredibly durable, fire-resistant, and environmentally friendly. It is also one of the most energy-efficient roofing materials on the market. The only drawback to metal roofing is that it can be quite expensive upfront, but lasting 50+ years makes it a great investment. This type of material works great on shed, high pitched gable roofs, and hip roofs, especially.
CLAY OR CONCRETE TILE
Clay or concrete roofing tiles are another roofing material option that has been around for centuries. This roofing material is very popular in Europe and other parts of the world. Clay and concrete roofing tiles are beautiful, durable, and environmentally friendly. They are also fire-resistant and can help keep your home cooler in the summer months. Roofing tiles are ideal for lower slope hip roofs, clipped gables, and dormers.
WOOD SHAKES
Wood shakes are one of the most traditional roofing materials and have been used for centuries. Wood shakes are made from split logs, which give them their rustic charm. While wood shakes are beautiful, they are also quite fragile and require more maintenance than other roofing materials. This roofing material looks fantastic on cottage or colonial style homes with gable roofs, mansard roofs, or even tudors.
Ultimately, a professional contractor like MARS Roofing can help you determine which roofing material is best for your home’s style, roof type, and most importantly— your budget.
TIPS FOR CHOOSING THE BEST TYPE OF ROOF FOR YOUR HOME’S STYLE
Just as there are many types of roof shapes and materials, there’s just as many home styles based on architectural design. Craftsman homes are quite popular as well as the resurgence of mid-century modern— both of which lend themselves an opportunity to work with many different types of roofing materials.
But when you’re looking at a new build, it’s important to know which roof type would best suit the aesthetic you’re going for. Here, we’ve listed some of the most common home styles and which roof type is ideal.
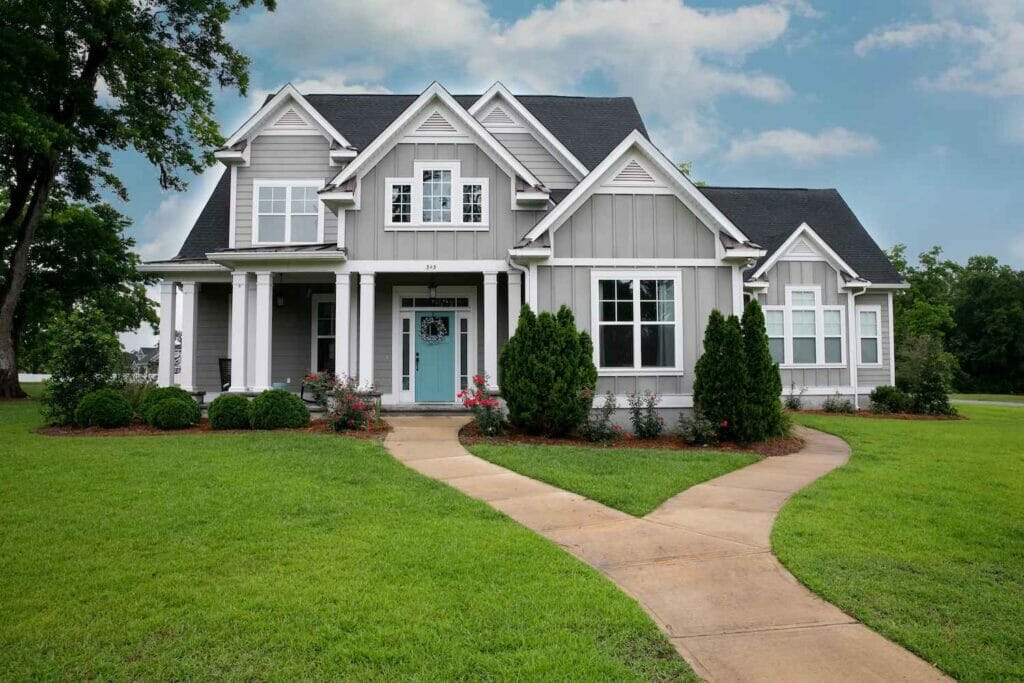
COLONIAL

Colonial homes are very traditional in design and are characterized by their symmetrical shape with equal windows on either side of the front door. The roof is usually a high-pitched gable roof with possibly some dormers on the sides or front.
COTTAGE
Cottages are small, charming homes that often have cozy interiors and exteriors. They frequently utilize mansard or high-pitch dutch gable roofs.
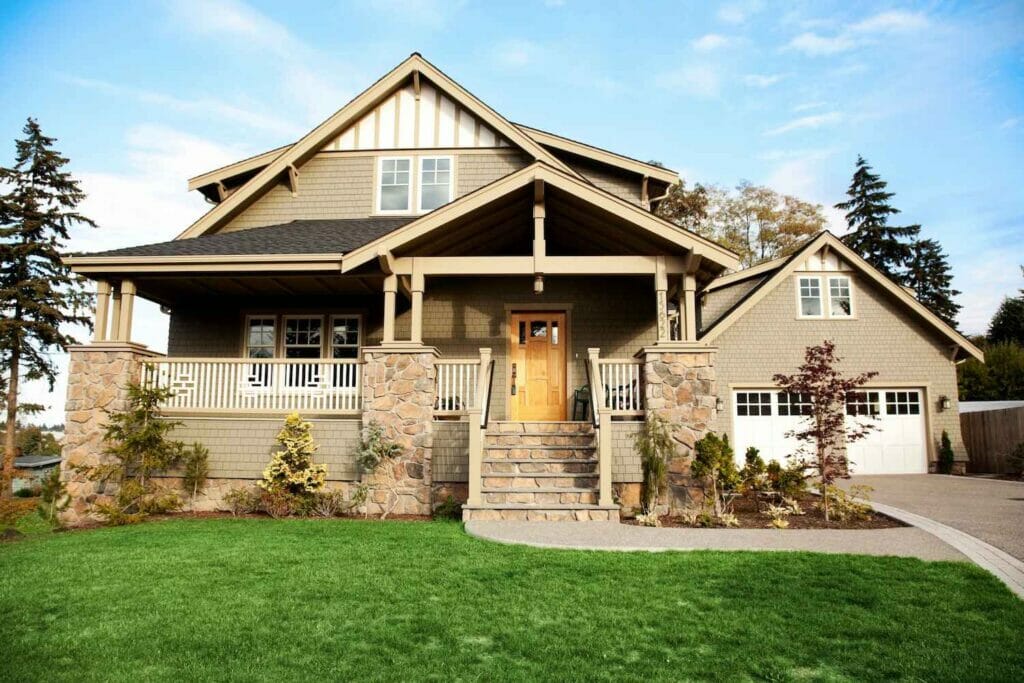
CRAFTSMEN
Gable roofing, hip roofs, and dormer roofs are the types of roofs most popular among craftsman style homes. These structures typically have several levels and design elements on their roof, which is where a combination of different types of roofing can give it a unique appeal.
FARMHOUSE
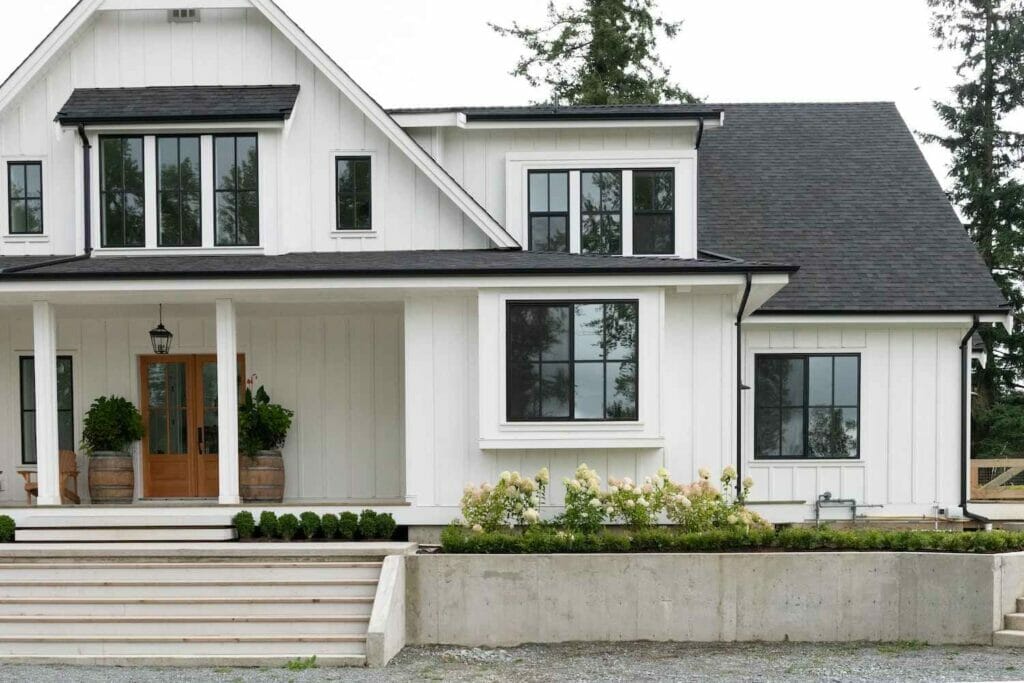
The gambrel roof is typical of a farmhouse. It’s the most common barn or farmhouse roof, or you may have just a simple gable roof with some dormers in the attic space.
MID-CENTURY MODERN
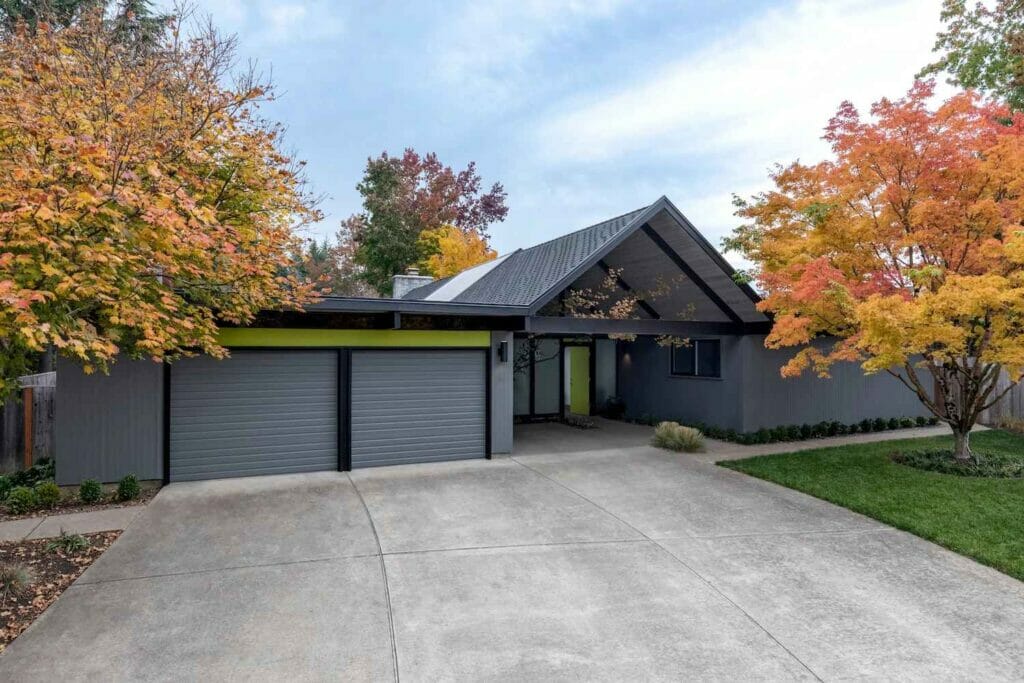
Mid-century modern homes are often one floor and they work great with shed, flat, hip, and even saltbox roofs. The uniqueness of this home style lends itself plenty of opportunity to use out-of-the-ordinary designs from the roof to the interior to fully embrace that mid-century modern feel.
TUDOR
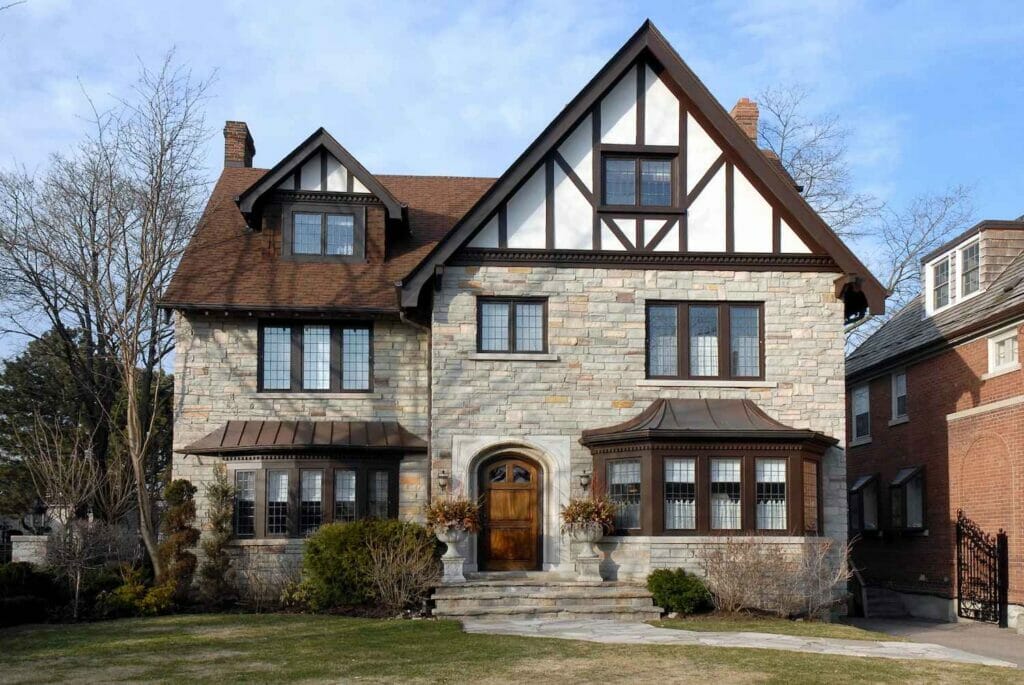
Tudor homes are often characterized by their steeply pitched gable roof, particularly on the front where the front door is. The steep pitch helps tudors utilize the open space and include design elements such as a half brick wall with timberings and other embellishments throughout the home’s exterior.
HOW TO GET A PROPER ROOF INSTALLED ON YOUR HOME
Now that you know all about roof types, styles, and which one is right for your home’s style— it’s time to get the roofing process started. Schedule a roofing inspection from a reputable roofing contractor like MARS Roofing.
We will be able to assess the condition of your roof and give you a better idea of what type of roofing system you need. We can’t wait to help you get the dream roof you always wanted. Let’s chat!
Oct 17, 2022 | Blog
Reliable roofs are essential in all residential homes, but roofs don’t last forever. Knowing when you need a new roof is tricky for most homeowners because the common signs are difficult to spot unless you inspect your roof regularly. And even if you do check your roof regularly, you may not know what signs to look for.
This guide will go over the most important signs that tell you when it’s time to get a roof replacement done. You can keep an eye out for them easily, as they’re not difficult to spot once you know what to look for. However, remember that the signs for new roofing may differ depending on the material of your home’s roof.
6 WARNING SIGNS THAT YOU NEED TO REPLACE YOUR ROOF ASAP
- Moss/Vegetation
- Damaged/Cracked/Missing Shingles
- Leaking Water
- Shedding Granules
- Outside Light Is Visible In Your Attic
- High Energy Bills
MOSS/VEGETATION
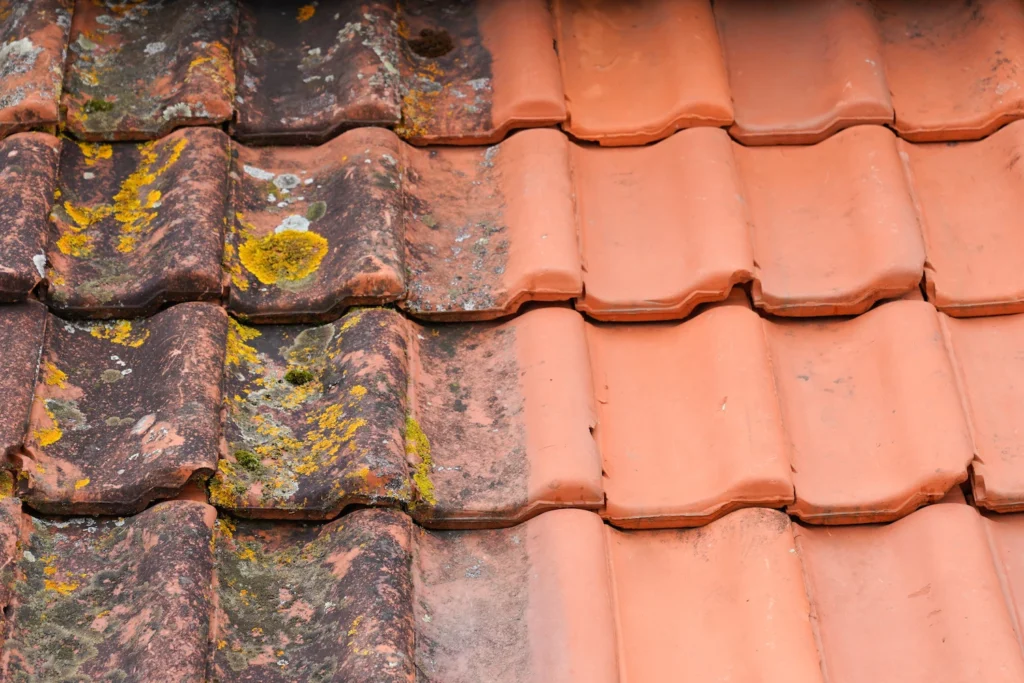
At first, moss may seem like a harmless byproduct of nature running its course on your roof over the course of a year. It grows gradually, which makes it difficult to catch early on unless you check your roof closely for moss and algae growth. The more it grows, the more likely it is to work its way into your roof’s shingles and tiles and cause severe breaks and cracks.
Because of this, you always want to eliminate moss and other vegetation growth when you come across it. One way to prevent moss growth is to cut away any low-hanging branches of nearby trees. That way, more sunlight can reach your roof. Moss needs moisture to grow, so the less moisture on your roof, the better the chances of it remaining moss-free.
Otherwise, you’ll be in the market for a new roof, as there’s little chance of salvaging a roof once it suffers further damage from moss.
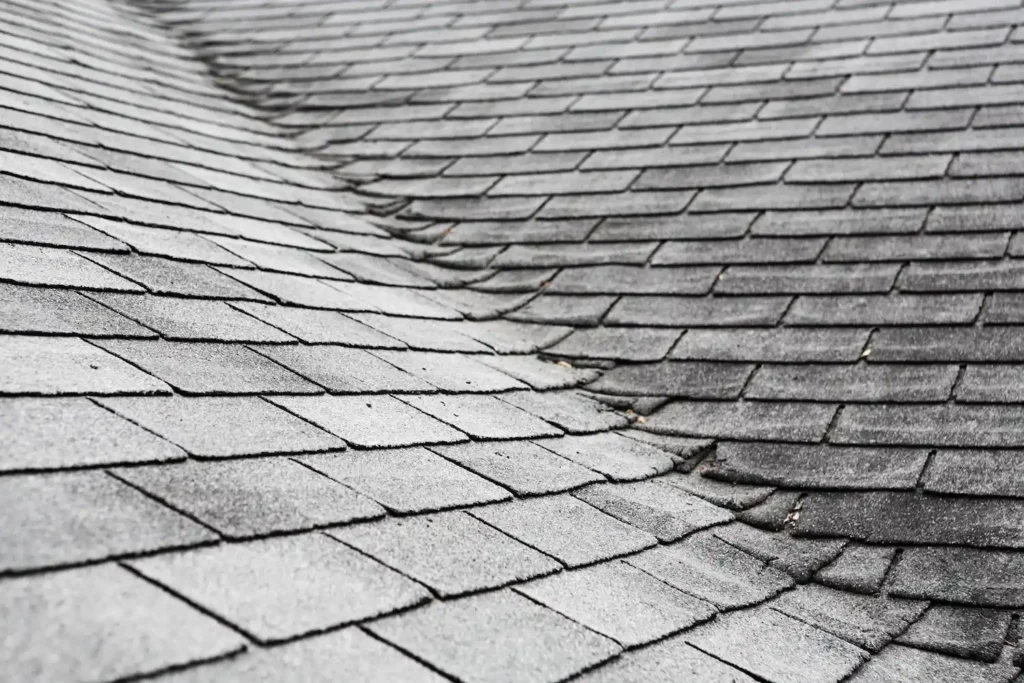
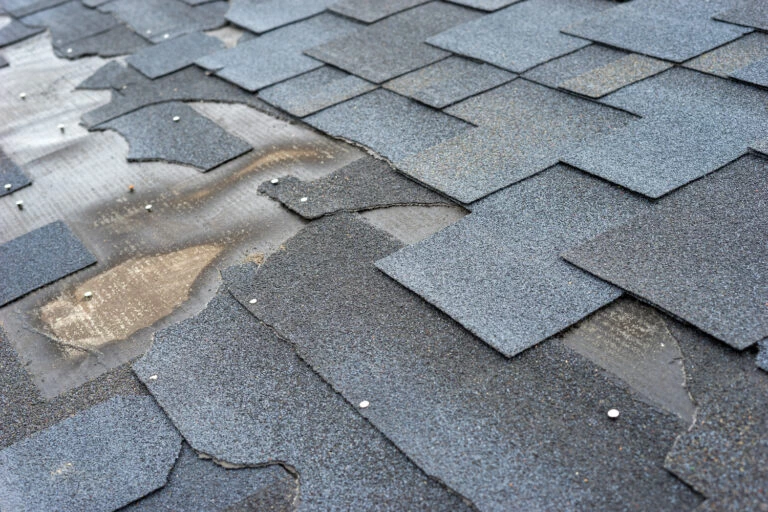
DAMAGED/CRACKED/MISSING ROOF SHINGLES
When you know what to look for, you can spot a cracked roof shingle from the ground. However, when you’re unfamiliar with checking your roof for damage, it’s always best to get a closer look at your many shingles to see their condition. You can fix a handful of cracked roof shingles by filling them in. Typically, a sealant is the best option for fixing cracked shingles that have cracks, so you don’t have to call a professional.
Help from a professional is only necessary when you’re dealing with a large number of damaged shingles. In the event that the majority of your roof’s shingles suffer from some damage, a full roof replacement with new shingles is often preferable to repairing each shingle.
Failing to conduct roof repair on a damaged shingle can cause many problems, the worst of which is a roof leak that can lead to even worse issues for the interior of your house.
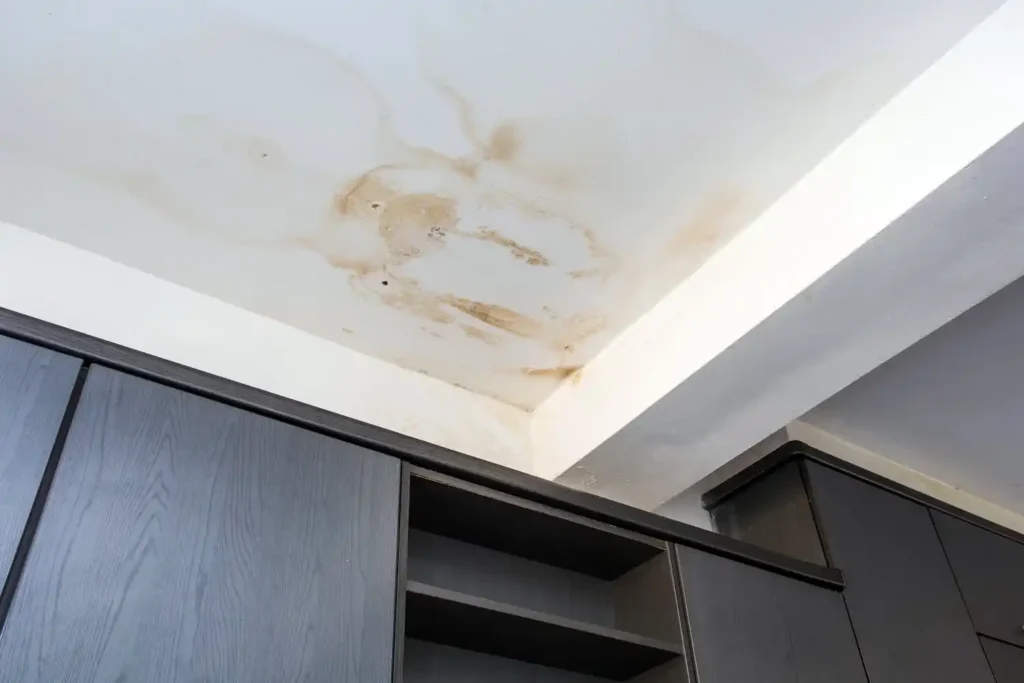
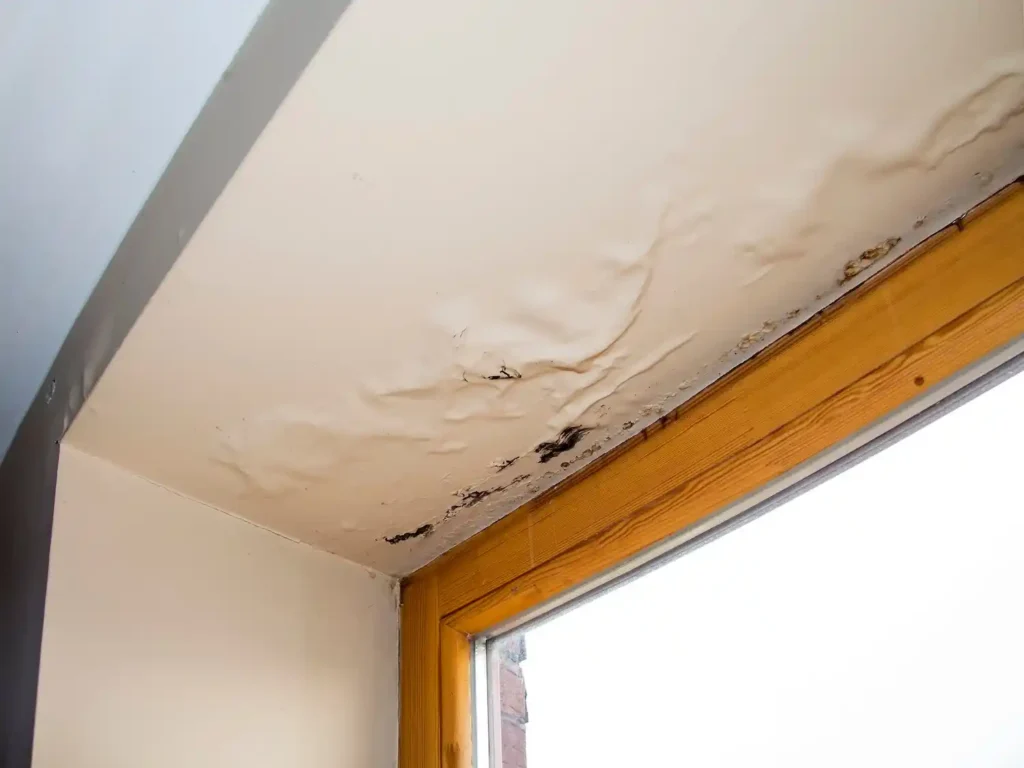
LEAKING WATER
On the topic of a leaky roof, leaks in the roof of your house are one of the most obvious signs that you need a new roof. The best time to check for leaks is when it’s raining or shortly after. Check for water leaking through the ceiling and puddles anywhere on the floor.
Even if you cannot determine where the water is leaking through, knowing there is a leak is good enough. Unfortunately, fixing a leaky roof is a task best left to professionals because doing it wrong will only make the situation worse.
After identifying the location of the leak, you can place a bucket beneath to catch any water, that way, you don’t have to deal with water leaking through the ceiling into the room below.

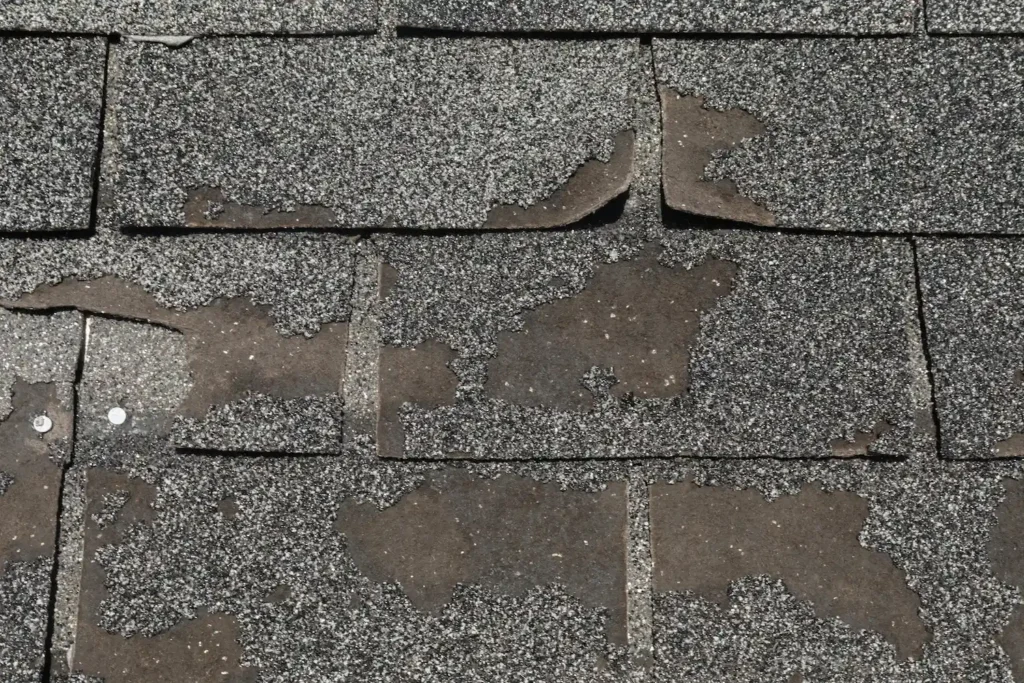
SHEDDING GRANULES
If you’re unfamiliar with granules, they’re the little bits of stone that you can see on an asphalt shingle. While they might look completely random to the untrained eye, roof granules have to be a specific size for them to go on many shingles. Protecting the asphalt from sunlight is their primary function, as sunlight causes further damage after it sits on asphalt for a long enough period.
Like anything else, granules start to wear out over time and eventually come off the shingles. Oftentimes, they fall into the gutters that run around your roof, and this causes clogging once enough of the granules buildup.
To avoid this issue, check your asphalt shingles regularly for granule loss and your gutters for granules. There isn’t a lot you can do to permanently stop asphalt shingles from shedding granules since shingles wear down, so try to keep an eye out for them and keep your gutters as clear as possible.
OUTSIDE LIGHT IS VISIBLE IN YOUR ATTIC
One thing you never want to see when you enter your attic is light coming in from the outside. It’s a surefire sign that you have a hole in your roof, and there’s no shortage of reasons which make that a significant issue.
Water can leak through a hole, and depending on the size of the hole, some debris may also be able to enter. You can attempt to repair the hole with various DIY fixes, but it’s best to opt for a more permanent solution to avoid having the hole reopen later.
Also, it would be advisable to have a full roof inspection of your roof to check for other small holes you may not see outside light coming in through.
HIGH ENERGY BILLS
Abnormally high energy bills are another indicator of a roof replacement being necessary. Unlike the other roof warning signs covered here, high energy bills are not as obvious as a sign because you can’t visibly see them by doing a roof inspection.
High energy bills can help you discover holes in your roof because they indicate your home’s HVAC system is working harder than usual. During winter, cold air can seep through your roof, and hot air can do the same in the summer, so you’ll have higher energy bills the more intense the weather becomes.
WATCH FOR MORE WARNING SIGNS YOU NEED A NEW ROOF
Responsible homeowners, look for many indicators to tell when you’re in need of a roof replacement, but these six are among the most common you’ll find. Outside of old age, they’re also some of the most troubling issues for your roof when left unattended.
Because of that, ensure you address them as soon as you discover them unless you want to deal with costly repairs to have your roof replaced with fresh roofing materials.


![4 Interior Signs Of Roof Damage To Watch For [Pictures]](https://mars-roofing.com/wp-content/uploads/2022/10/4-Interior-Signs-Of-Roof-Damage-To-Watch-For-Pictures.webp)