

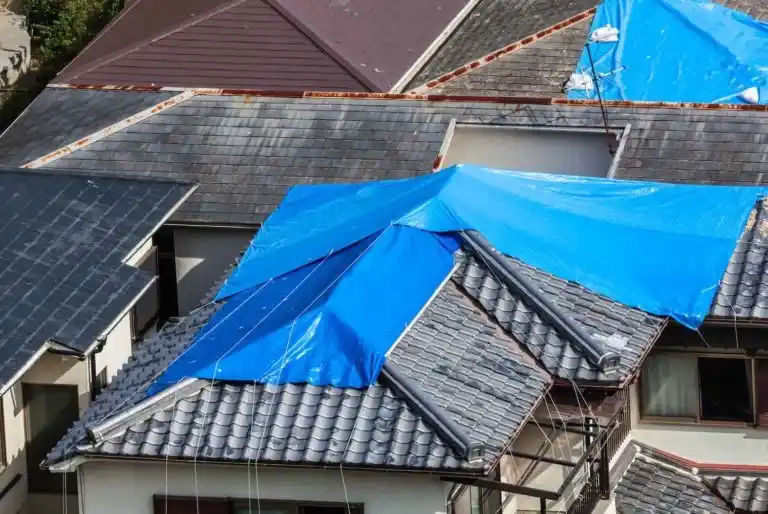
When harsh storms hit your home’s roof and leave you in need of emergency repairs, it’s unlikely that you’re the only one in the neighborhood with a problem. With that said, you might need to wait a few days before your roofing contractor can come to tend to any outstanding storm repairs. Fortunately, you can tarp a roof as a reliable but temporary fix for pressing roof damage.
Although it might only work temporarily, tarping the damaged area of a roof is often the best way to avoid further damage to both your home’s interior and exterior until you’re able to make the necessary repairs to your roof with the help of an expert residential roofing restoration company. If you need to learn how to tarp a roof until your preferred roofing professional can make it over to assess your property, keep following this simple seven-step guide to tarping a damaged roof and secure your home successfully.
WHAT LEADS TO A LEAKY ROOF?
While storm damage might seem like the most apparent reason that roofs require emergency repairs, those unpredictable moments aren’t the only time you might need to tarp a roof. Holes, leaks, and water damage can occur on the roof of your house at any time. Some reasons your roof might require tarping include:
- Old age
- Exposure to the elements
- Lack of maintenance
- Poor craftsmanship
- Cheap materials
- Bad weather
- Flying debris
- Poor insulation
As mentioned above, destruction from a storm is typically pretty obvious. However, there are several other more subtle signs that it might be time to wrap your roof in tarping until the pros can take control. Common signs of failing or damaged roofs include:
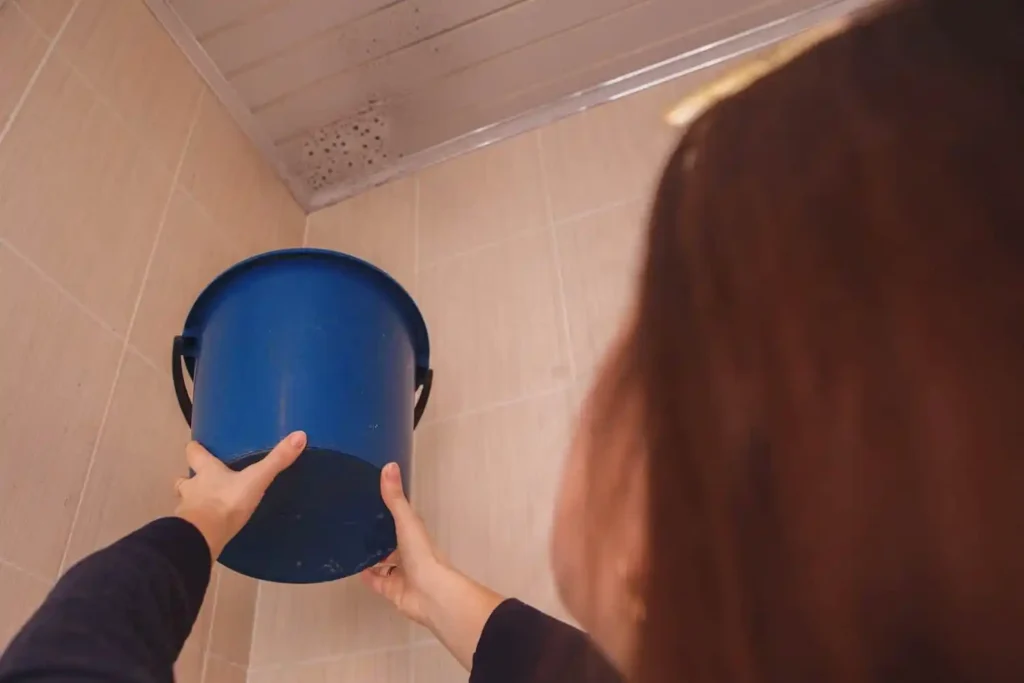
- Water damage in attics
- Higher energy bills
- Missing shingles
- Leaky roof areas
- Holes and gaps in roofing
- Sunken attic insulation
- Heating and cooling issues
- Excessive moisture
- Pest infestations
Do any of the issues listed above sound familiar, even with the most fervent attention to your annual roof maintenance? If you find yourself recognizing some of these common problems popping up on your own roof, it might be time to take a climb up the ladder and start tarping your roof. Keep reading to learn more about how to tarp a roof the right way until repairs can be made.
USING A ROOF TARP TO STOP ROOF LEAKS (TEMPORARILY)
It can often be challenging to fit into the schedule of a trusted roofing professional or gain quick approval to start emergency storm repairs from your insurance company after your roof becomes damaged. To safeguard your home’s interior and prevent water damage from wreaking havoc on your shingles, roof, and attic, you can tarp a roof until you can get a permanent fix. Simply follow these seven straightforward steps for installing a roof tarp:
STEP ONE: ASSESS THE DAMAGE
First and foremost, an essential thing you need to do after noticing leaks, failing shingles, and other signs of damage to your roof is to assess the extent of the issues. When you realize your roof needs attention, you can walk around your property to complete a visual inspection of the problem areas. Make sure to take a trip up into your attic as well, especially after rain, because a smaller leak you didn’t see from outside could become apparent up there.
STEP TWO: GATHER YOUR TOOLS AND EQUIPMENT
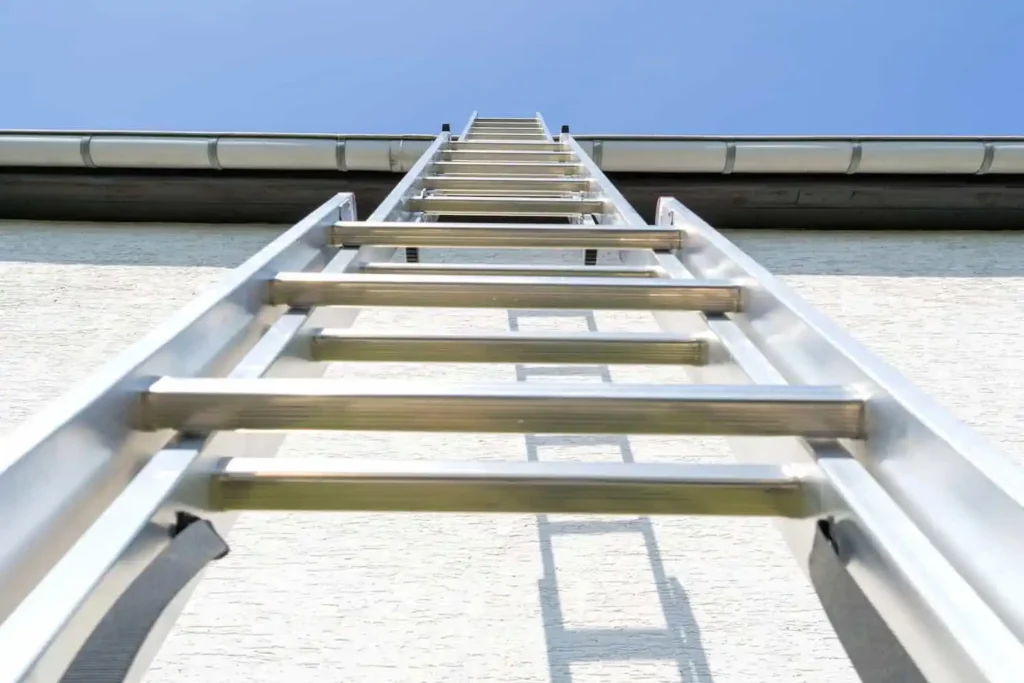
Once you’ve determined the extent of your roof damage and figured out the problem areas, you can start forming your arsenal of tools and equipment. If you’re about to climb and stand on a roof in order to get your repair job done, you don’t want to cut corners when it comes to safety precautions or leave yourself unprepared to complete the project. Who wouldn’t be apprehensive about wandering around a sloped and potentially wet surface several feet off the ground, especially if they’re ill-equipped to tackle the task?
Handy homeowners and experienced contractors alike must utilize the proper safety equipment and tools to ensure that the process of applying a roof tarp goes smoothly. Whether you’re working with a local roofing restoration company or feel competent enough to accomplish a roof tarp installation, you want to have the right items at your disposal during the project. Some of the most typical tools required to safely and successfully install a roof tarp include:
- Extension ladder
- Suitably sized tarps (preferably equipped with UV inhibitors)
- Wooden boards
- Cap nails and screws
- Tape measure
- Screw gun or cordless drill
- Rubber-soled shoes
- Mask and eye protection
- Safety harness
Safety is the most important thing to keep in mind when completing your own roof repairs. Even while using a safety harness to secure yourself while installing the roof tarp, you’ll still want to have a trusted spotter standing by the ladder to assist in an emergency slip or fall. You also want to avoid completing DIY roof restoration during bad weather since rain can make the shingles wet, slippery, and entirely unsafe to walk on. Wait for when the weather is clear, dry, and not excessively hot or cold to fix the damaged area of your roof with minimal risk.
Before starting your roof repairs, get your hands on some of the industry’s top safety harnesses and other essential tools from this Amazon bestseller list. Don’t try to tarp your roof without the proper safety gear because you can become seriously injured in the process. Professional roofers would never go without a reliable roofing harness, so why should you?
All of the other items listed above can be found easily at your local hardware or home improvement store. We’ll talk more about taking proper measurements in the next step, but be prepared to buy wood boards, cap nails, and enough tarping to cover your leaks or broken shingles before your trusted roofer comes to the rescue.
STEP THREE: START TO MEASURE
With your problem area identified, you can now move on to measuring how much of your roof needs to be covered with a tarp. Use a tape measure to find exact calculations for the area and record them in a notebook or your phone. This way, you can purchase the precise amount of tarp you need when taking a trip to your local home improvement store.
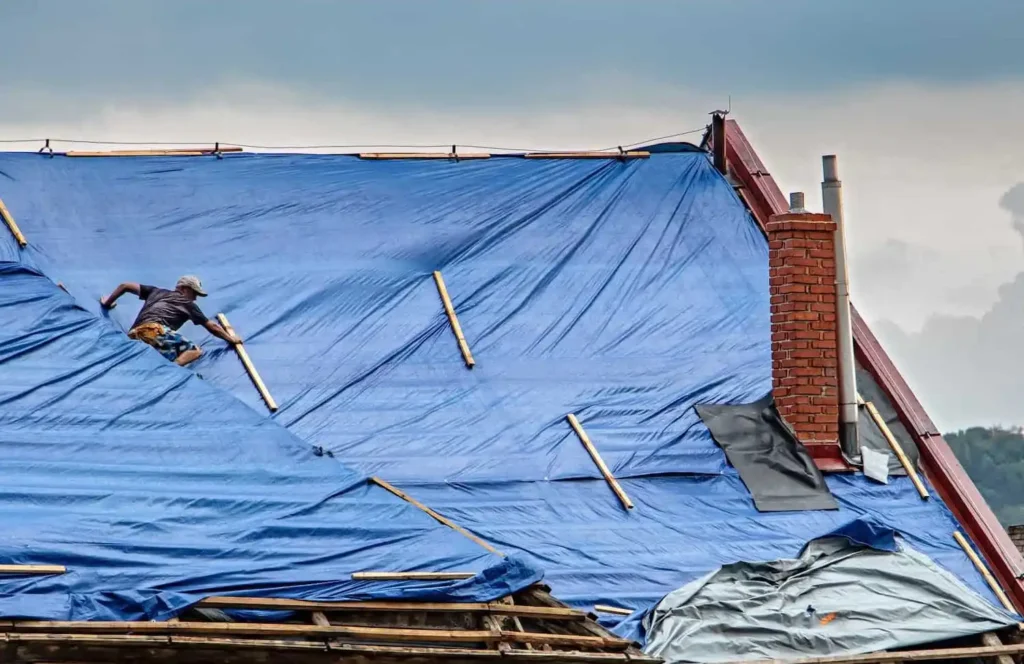
STEP FOUR: INSTALL THE TARP
Now that you have precise measurements in hand, you can start the initial installation of your roof tarp to prevent water from damaging your home’s roof, attic, and interior. After equipping yourself with a safety harness and spotter, climb your ladder and get to work!
Roll the tarp out in order to cover your roof surface. You want the tarp to lay flat against your roof and ensure the edges of excess tarp wrap over, extending past the roof’s peak side. Once you position the tarp correctly, you can start to secure the tarp using wooden boards.
STEP FIVE: POSITION PLYWOOD BOARDS
After you roll out the tarp and extend it to cover the affected area, use a sturdy piece of lumber to weigh down the tarp against the roof’s surface. You can use a hammer or screw gun to cleanly drive screws or felt-backed cap nails into each board and back through the tarp for added protection. Place the screws or nails about 16 inches apart for the most reliable amount of added security.
STEP SIX: INSPECT YOUR WORK
This step only applies to homeowners who decide to install a roof tarp themselves. After all the nails and plywood boards are in place, and the repair project is starting to wrap up, you need to make sure your handiwork is perfect. Take time to inspect the tarp and ensure all edges and any excess tarp are secured with sturdy screws or nails to reliable plywood boards. Although this is only a temporary fix, don’t be afraid to be critical of your own craftsmanship because installing a tarp can be crucial to protecting your home.
STEP SEVEN: MAKE SOME CALLS
Now that you know how to tarp a roof to protect your home from further damage, you can actually get the job done. However, for those who don’t want to get up on their roofs themselves, this is the time to start making some calls. If you’re not inclined to try your hand at a DIY repair project that places you several paces off the ground, put your trust in a local contractor like MARS Roofing to lay down a temporary roof tarp before restoration starts.
If your roofing issues are due to storm damage, you’ll also need to contact your homeowners’ insurance company for help. Your insurance company might even cover the costs of a roofing contractor coming to install your roof tarp until the repair project can be completed.
Are you more of a visual learner? After reading this useful guide, follow along with this in-depth video explaining how to tarp a roof the right way until your trusted roofer can come to save the day.
RELY ON MARS FOR YOUR ROOF REPAIRS
After discovering roof damage (after a storm or simply due to old age), you can avoid any other leaks or issues in your home by utilizing a roof tarp to cover the damaged area. Although a roof tarp might be handy right away, it’s essential to address your damaged roof and make repairs as soon as possible, so additional damage doesn’t impact your house in the long run. Working with a reliable roofing restoration company after a heavy storm can help reduce the likelihood of dealing with any further damage down the line.
Now that you know how to tarp a roof, you’re prepared to protect your home until a roofing contractor can come to assess the problem spots. Once you pull the tarp tight to protect your home from harm, make it your next priority to secure the help of professional roofers.
Work with the trusted team at MARS Roofing to repair any roof leak or level of damage. With Mars on your side, you can be rid of your unsightly boards and roof tarps and back to beautiful, reliable shingles in no time.