Feb 20, 2023 | Blog
If you’re reading this, it’s probably because your neighbor asked when you were going to get around to cleaning your roof. You also probably didn’t realize that your roof was “dirty” or that keeping your roof clean was a critical part of homeownership.
Well, keeping your roof clean is an important part of homeownership. Not only do you want to keep your home looking nice, but you also want to protect the very thing that stands between the inside of your home and the elements.
In this article, we’ll walk you through the steps of how to clean your roof shingles. We’ll also explain why it’s so important.
WHAT HAPPENS IF YOU DON’T CLEAN YOUR ROOF?

As mentioned, your roof serves as the first line of defense between you and the environment.
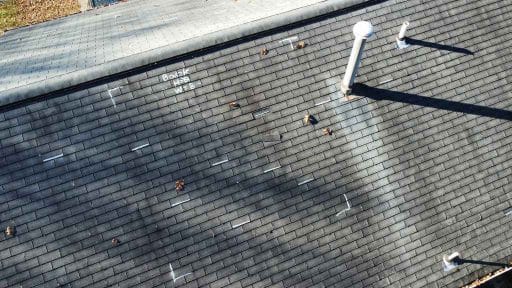
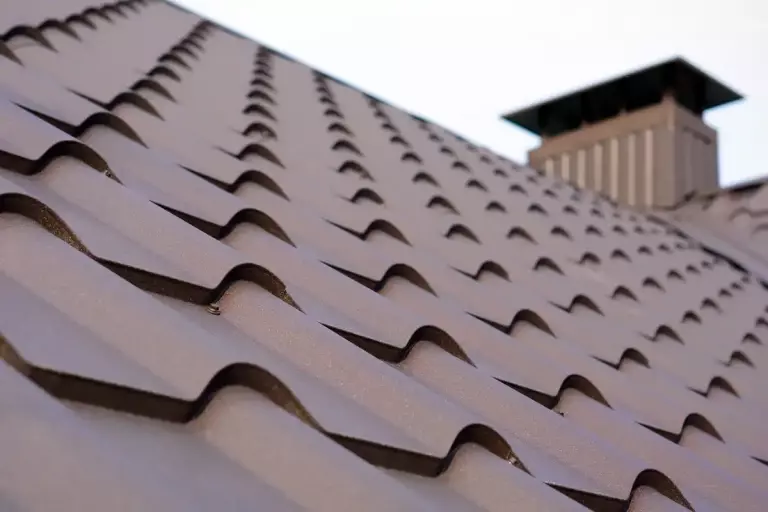
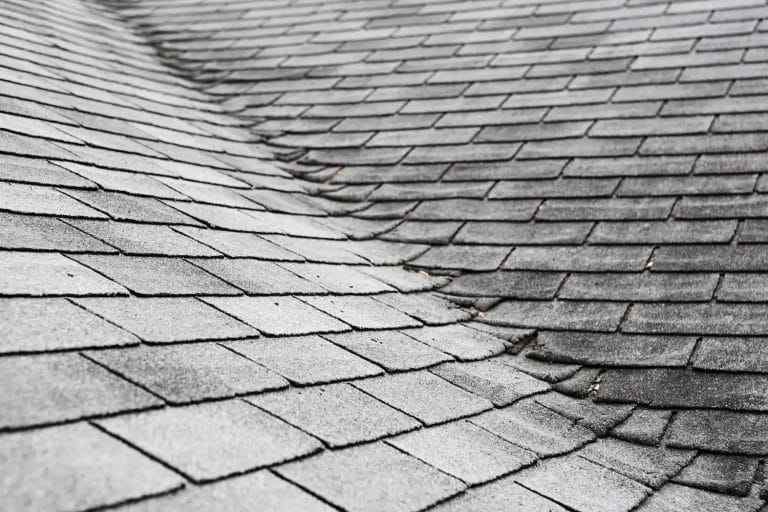
Over time, your roof can and will become covered with dirt, debris, fungus, moss, lichens, and algae. While high winds and storms can carry a lot of the dirt and debris over, birds are also responsible for transferring algae spores to your shingles. Overhanging trees also tend to provide the shade needed for algae and moss to grow as well as drop the debris that feeds them.
What’s more, where algae grows, mold will follow. This is because algae initially grows where water and moisture collect. Combine that with enough shade, and you have a breeding ground for various types of mold.
All of these things — which turn into stains — can end up damaging your roof through shingle deterioration. Eventually, this will lead to wood rot which will shorten the lifespan of your roof and demand expensive repairs.
More specifically:
- Shingle damage occurs because algae is a type of bacterium. This bacterium feeds off of asphalt and limestone. Algae strains also tend to absorb heat, which causes your asphalt shingle roof to bake from the inside out.
- Wood rot occurs because moss has the ability to hold in moisture. This can cause your roof shingles to lift and curl, which is usually the first sign of roof damage. This makes your roof extremely vulnerable to wood rot and leaks.
Additionally, if you have lichen colonies, their penetrating tentacles can create pockmarks where they grow. Eventually, they’ll take over and completely damage your roof’s shingles.
Fortunately, lichens, algae, and moss are easy to spot. Wood rot, on the other hand, is not as obvious. What’s worse is that even if you’re able to spot the signs of wood rot, you won’t know the extent of damage that has been done to your roof. This can be dangerous as it can cause mold growth inside your home.
Rotting wood is also easier for wood-gnawing creatures to bore holes into your home.
WHAT YOU NEED TO CLEAN YOUR ROOF
What you’ll need to clean your roof will depend entirely on the type of roof you have and the extent of the potentially damaging stains you see. Here’s a general list of the items you’ll need to complete the job:
- Roof cleaning solution, Sodium Hypochlorite, or chlorine bleach
- Laundry detergent or liquid dish soap (optional)
- A low-pressure garden sprayer and garden hose
- A ladder
- A nylon brush
- Plastic tarps
- A friend to help out in case things go wrong
The type of chemical mix you choose is entirely up to you. It should be noted, however, that store-bought bleach isn’t as potent as what professional roof cleaners use. So, you may have to give your roof a few washes before seeing results.
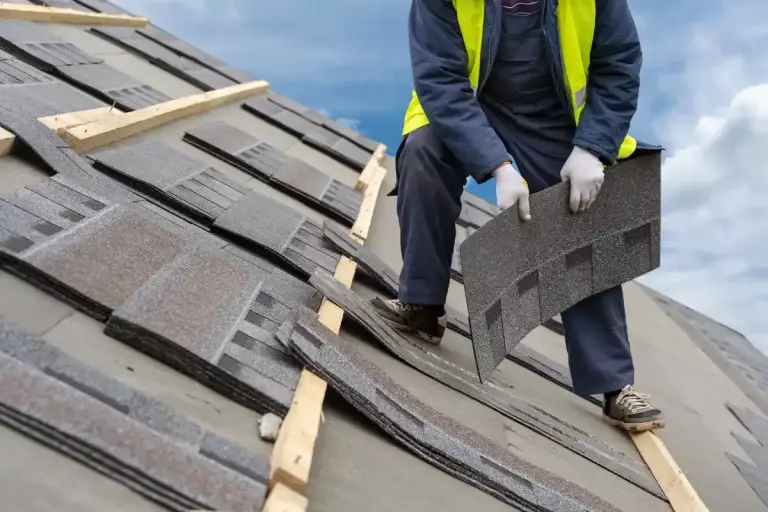
THE STEPS TO CLEAN YOUR ROOF SHINGLES

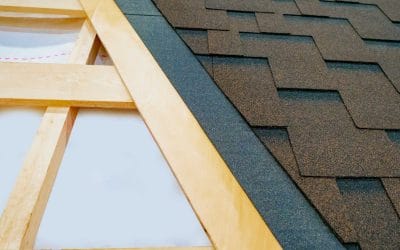
To keep things simple, we’ll run through the steps using bleach as the DIY cleaning solution on asphalt shingles.
Here’s how it’s done:
- To create your cleaning solution, use a 1:1 ratio of bleach and water. To help the chemical solution stick to asphalt shingles better, you can add a little bit of laundry detergent or dish liquid (about ¼ cup).
- Before you begin, be sure to sufficiently water the surrounding vegetation and grass. When plant life is thoroughly watered, it won’t retain any excess water that comes down — which means you won’t accidentally kill your lawn or garden while cleaning your roof. It’s also a good idea to cover bushes and extensive gardens with plastic after watering.
- Be sure to also turn your gutters away from any precious vegetation, just as a precaution.
- Using your low-pressure pump, start high on the roof and work your way from top to bottom, spraying an even coat of the cleaning solution.
- Allow the solution to sit for up to 20 minutes, and then rinse away with clean water.
*If you choose to use a store-bought roof cleaning solution, just follow the directions on the label. If you decide to use Sodium Hypochlorite (pool shock), start with a solution that’s 95% water and 5% Sodium Hypochlorite.
WHAT NOT TO DO WHEN CLEANING YOUR ROOF
Cleaning your roof isn’t as easy as it may sound. There are plenty of mistakes to be made, which is why you must avoid doing the following:
- Using a pressure washer. Pressure washing any type of roof will undoubtedly cause damage.
- Overdo it. While you may want to repeat the process a second time if there’s a lot of moss or algae growth, it’s best to give it time to die off. If it doesn’t after a few rain showers, repeat the process.
- Cleaning on a sunny day. The sun will cause your cleaning solution to evaporate too quickly — it’s best to choose an overcast or cloudy day.
- Waiting until your roof is completely covered in growth to clean. If this is the case, it’s too late. You’ll need to bring in the professionals.
DON’T FORGET REGULAR ROOF INSPECTIONS!
Sometimes, it’s just better to call the pros to have your roof cleaned. It’s also necessary to schedule regular roof inspections to ensure there’s no damage beyond the simple algae stains you cleaned a month ago.
That’s where we come in. Get in touch with us today to learn more about our residential roofing services and our FREE roof inspections!
Feb 17, 2023 | Blog, Costs, Maryland, Roof Replacement
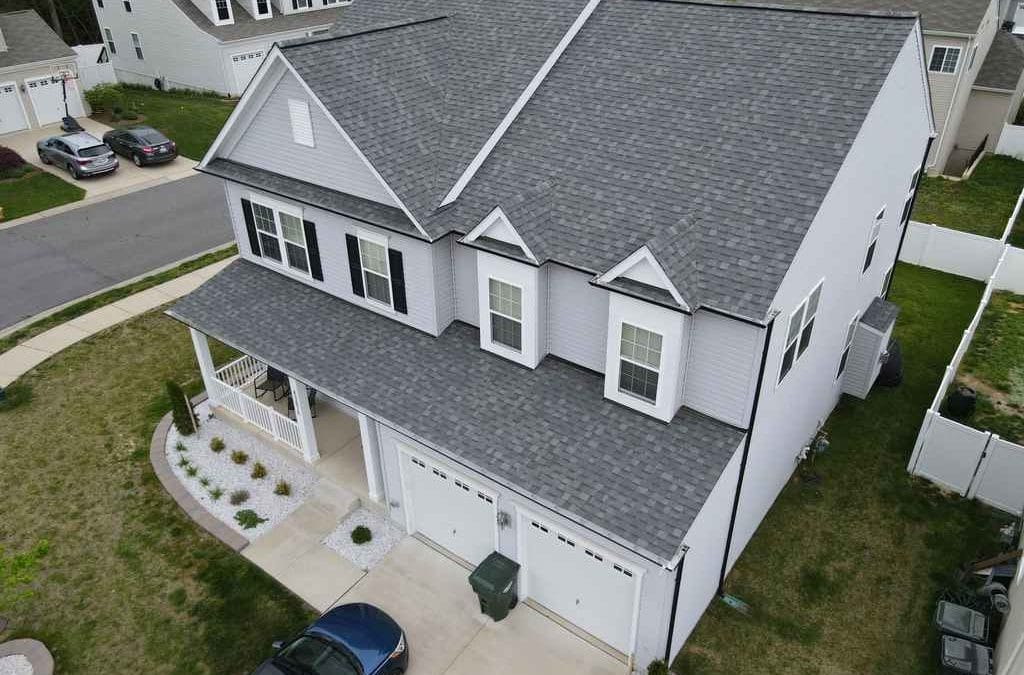
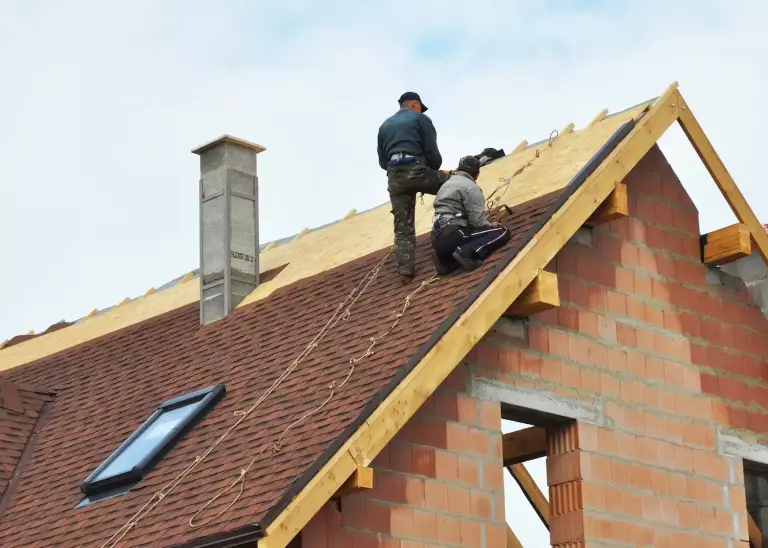
Have you determined it is time to replace your roofing system this year? Perhaps you have noticed areas of damage, or the constant repairs are becoming too repetitive. Wind, hail, and tornadoes can cause complications with our roofs in the Maryland area. How much does it cost to have a roof replaced in Maryland?
The average cost of a roof replacement in Maryland is $650 to $1,100 per square foot. This cost depends on a variety of factors including the size of your home, the roofing materials used, and the installation costs of the roofing contractor in Maryland.
Here is a rough estimate of the breakdown:
- 10 square roof: $6,500 to $11,000
- 15 square roof: $9,750 to $16,500
- 20 square roof: $13,000 to $22,000
- 25 square roof: $16,250 to $27,500
- 30 square roof: $19,500 to $33,000
Roofs are measured in “squares”. A 100-square-foot area is considered 1 square in roofing terms. To simplify, the amount of material needed to cover 100 square feet of roof area is equal to 1 square of roofing material. So, as an example, if a roof surface area is 2000 square feet, the contractor would figure 20 squares. You can approximate how many squares your home is by dividing the square feet of your roof area by 100. For a free inspection of your particular home, contact MARS Restoration at (240)540-4580
What are some indications it is time to replace your current roofing system? Here are some things to look for:
- Missing, damaged, or curled shingles
- The roof has outlived its lifespan
- Sagging roofline
- Granules are found in the gutter system
- Mold and moss are evident on the shingle surface
- Increase in heating and cooling energy bills
Once you have determined the time has come for a roof replacement, where do you turn? MARS Restoration is the Maryland roofing company you can trust for all of your roofing needs! We have been involved in the roofing industry for over 20 years and we strive to make the process of getting a new roof as stress-free as possible. We offer a free inspection within 24 hours of the request and desire to make the process simple and straightforward.
What are some benefits of a roof replacement?
- Increase in property value
- Decrease in monthly energy bills
- Improvement in curb appeal
- Return on Investment, if selling the home
- Repair of damaged areas
- May not need another roof for duration of home ownership
Our process is easy when you make the call. Here is our plan for every home we service:
*Inspection – When you call, we set a time to inspect your roof.
*Review Your Home – meet with you, thoroughly inspect the current roofing system, and discuss our detailed findings.
*Create a Plan of Action – We offer suggestions based on your needs and provide you with an appropriate timeline.
*Execute the Plan – We are thorough in our work, and will leave your home and property as good, if not better, than when we arrived.
Your home is your most important possession and your biggest investment. We respect that and strive to provide industry-leading warranties, quality workmanship, and a drive to get the project done right the first time. We guarantee excellence.
Feb 13, 2023 | Blog
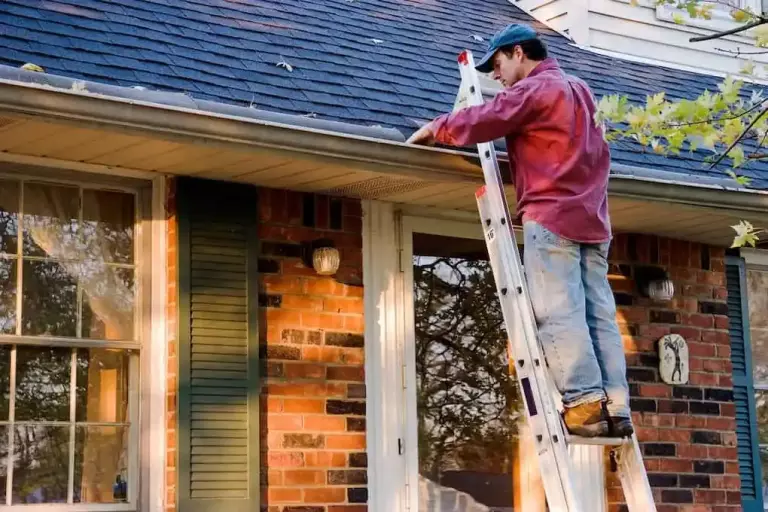
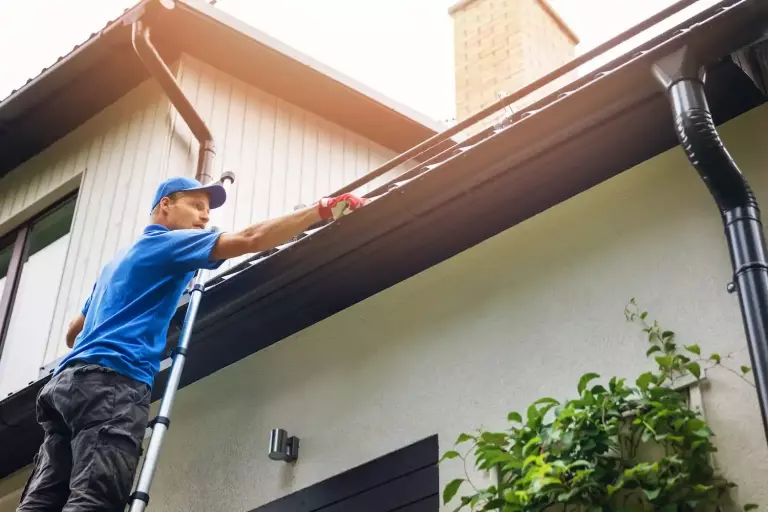
Whether you realize it or not, there may come a day when you need to grab a ladder and carefully ascend to your roof for inspection. Usually, this type of task is best left to the professionals, but there are ways for you to walk safely on a roof. It’s not something to take lightly, considering falls from roofs could be deadly.
Safety should be your top priority when deciding to walk on a roof. But where should you begin? Read on to learn more about how to walk on a roof safely.
HOW TO WALK ON A ROOF
Walking on your roof can be hazardous, especially if you don’t take the time for safety precautions. It’s best to take note of all the conditions surrounding the roof of your home or property. Before you begin, ask yourself these key questions:
- Do you have a steep roof pitch?
- Does it have asphalt shingles or slippery metal panels?
- Is there a low-hanging power line near your roof?
- Are you trying to access it during inclement weather?
Taking the time to carefully assess your situation will help you better understand the safety equipment needed for the job. Now, before you venture on your roof, you’ll need to gather some essential safety supplies. Some of the general safety items you’ll need include:
- A ladder
- A roof bracket
- A safety harness
- Proper footwear
- Appropriate clothing
- Gloves
- A toolbelt
These essential items are the foundation of any roofing project. Let’s take a closer look at how you can use them efficiently for safer roofing projects. Alright, so you’ve got your supplies and are ready to get to your roof. Follow these steps to help reduce your chances of serious injury.
1) SECURE YOUR LADDER
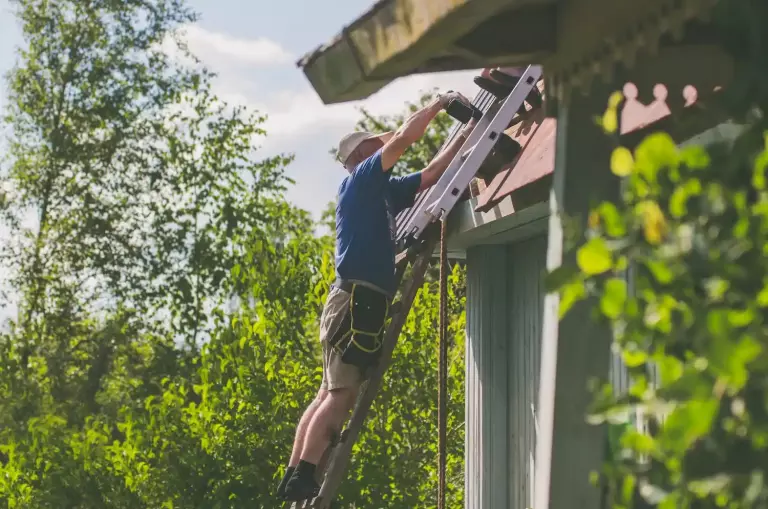
Deciding which type of ladder to use is your first step. Fiberglass, aluminum, or wooden ladder work well as long as they are safely secured. Consider using a cord to anchor it in place. That way, you don’t need to worry about losing it mid-project.
Remember to place your ladder on flat, level ground that follows the 4:1 ratio. Ex. For every four meters that it goes up, you extend the bottom one meter away from your house (1 meter=3.28 feet).
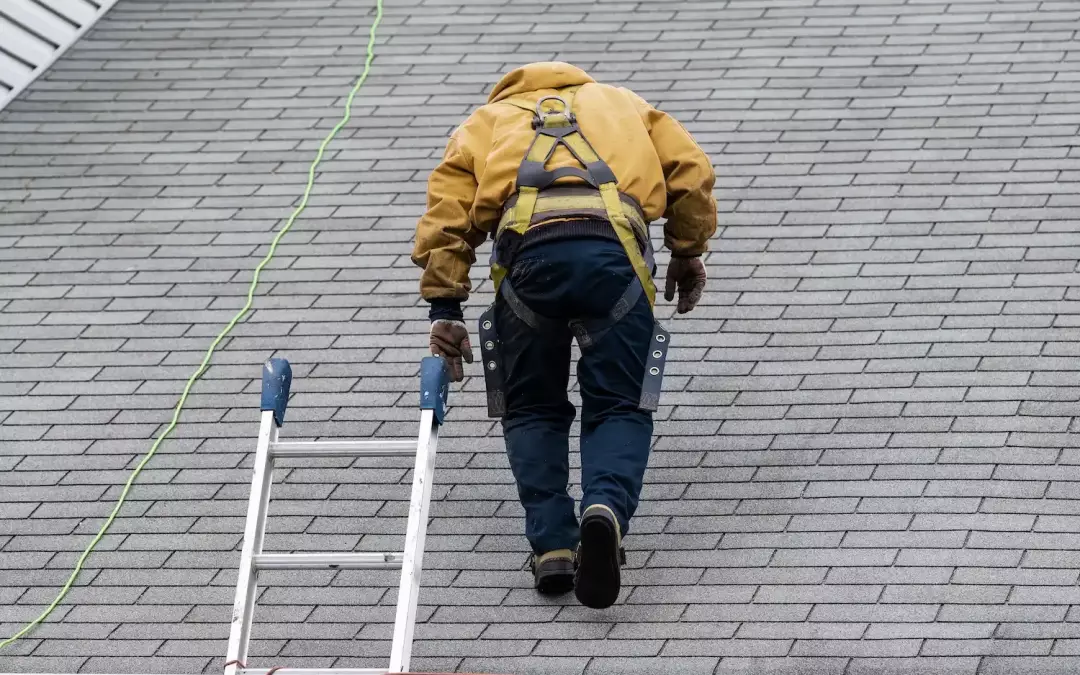
2) WEAR A SAFETY HARNESS
The best way to protect yourself while walking on a roof is by wearing a safety harness. Attach it to the roofing bracket for added support. Just make sure the roofing bracket is also anchored securely in a truss or rafter. This guarantees greater support since those areas are solid wood. If you’ve never used safety harnesses before, check out the video below to learn more.
3) USE PROPER FOOTWEAR AND CLOTHING
Choosing the right pair of shoes will help you traverse a tile roof. That’s why it’s recommended to use shoes with a soft rubber sole for extra grip. Some styles include:
- Hiking boots
- Approach shoes
- Non-slip tennis shoes
Also, ensure you’re wearing the right clothing for the job. Make sure to wear durable, slip-proof pants and gloves, and also consider if you need sunglasses or a sun hat. These will all enhance your roofing experience while keeping you safe.
4) CHECK WEATHER CONDITIONS BEFOREHAND

The last place you want to be during inclement weather is in the middle of a roofing project. A steep roof becomes deadly when wet, so make it a rule to avoid climbing on one during or after bad weather. Also, work on your tile roof when the weather looks clear.
5) MARK OUT YOUR WORKSPACE
Whether you’re updating your tile roof or clearing debris, you’ll want to set aside an area around two feet by your ladder for your workspace. This gives you a “fall zone” that’s safer than near other sharp items.
DON’T FORGET TO FOLLOW EXPERT ADVICE
It’s imperative you take the proper safety precautions when walking on your roof. Although major falls are common for roofing projects, you can reduce your chances of injury by following those steps.
If you’re looking for a more in-depth roof inspection, make sure to reach out to the experts at Mars Roofing. Our team is ready to help make your roofing project as stress-free as possible. Contact our team today to book your free inspection.

Feb 13, 2023 | Blog
If you have leaks and water stains in your attic, more shingle debris in your gutters than usual, or even moss or other plant growth on your roof, it’s time to consider getting a roof replacement.
With so many roofing material options to choose from these days, the process of planning for a new roof can be overwhelming, to say the least.
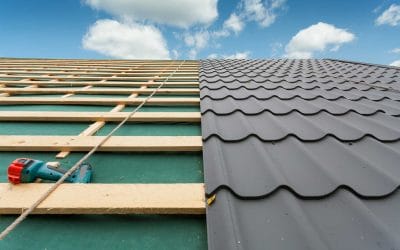
Metal panels and asphalt shingles are two of the most common roofing materials on the market today, and many homeowners want to know the upsides and downsides of each of these materials. Here, we break down the advantages and disadvantages of getting a metal roof vs shingles to replace your current roof.
COST OF EACH ROOFING MATERIAL
It isn’t for nothing that asphalt shingle roofs became so popular; affordability is a huge part of their appeal. Shingle roofing tends to cost around $1 to $6 per square foot, resulting in a total roof cost of around $10,000.
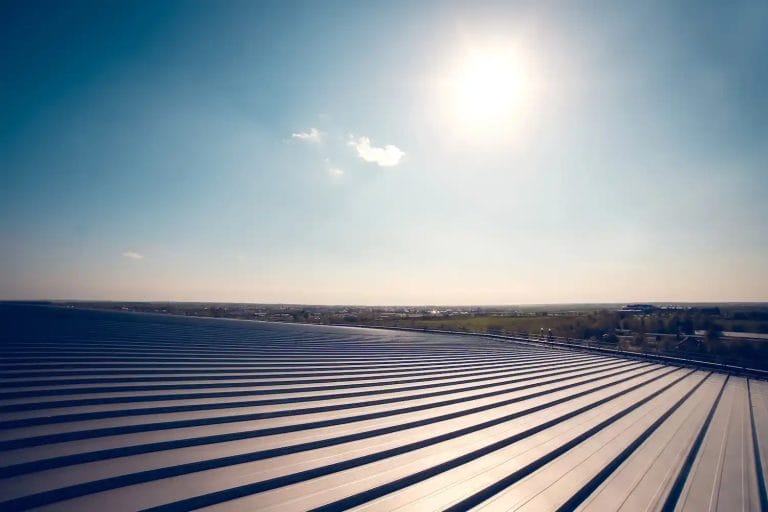
Metal roofing prices, on the other hand, are quite a bit higher than the upfront cost of asphalt shingles. While prices depend on your location and the current cost of materials, metal roofs can cost $10 or more per square foot or about $20,000 for a whole roof replacement.
While it seems like asphalt is the cheaper of the two materials, there’s more to it than initially meets the eye. You’ll likely only need to purchase a single metal roof in your lifetime, but because of the typical lifespan of asphalt shingles (explained in the next section), you might need to redo your asphalt roof multiple times. If you have the cash available and plan to stay in your current home for more than 5-10 years, the initially higher cost of metal roofing actually becomes a lower cost than asphalt shingles in the long run.
DURABILITY AND LIFESPAN
What metal lacks in short-term affordability, it more than makes up for in longevity. Barring severe weather events or other emergencies, you can expect your roof to last 50 years or more (depending on the type of metal you use, your roof might even last 100 years). Compared to the 25-year maximum lifespan for most asphalt shingles, it’s easy to see how a metal roof becomes the less expensive option in the long run.
Metal roofs also tend to be more durable than asphalt shingles. In extreme weather conditions like strong wind and hail, asphalt shingles are more susceptible to damage than metal roofs. Metal is also more resistant to snow and ice accumulation than asphalt.
This, in addition to asphalt being the more absorbent of the two materials, means that if you live in a climate that has multiple season changes, asphalt shingles may absorb water and expand and contract throughout the year. This erodes the quality of the material over time, and in rare cases, may even cause it to crack.
INSTALLATION TIME
While an asphalt roof may take a day or two to install, a metal roof may take nearer to a week to be completed. The more exacting nature of a metal roofing project also means that you may have to wait a bit to get an appointment with a contractor who has the skill necessary to work with metal roofing, whereas most contractors should be able to handle asphalt shingles. (Luckily, we’re more than happy to take on either kind of project for you here at Mars Restoration.)
AESTHETICS AND APPEARANCE
When considering purchasing metal roofing for their home, many homeowners are worried about ruining their home’s curb appeal; in the relatively short time they’ve been on the market, metal roofs have gained a reputation for looking cold, industrial, and unsightly.
However, metal roofing options have come a long way since they first became available for residential use. As you probably know, you can choose between many kinds of metal for your roof, including copper, aluminum, zinc, and steel. However, you might not have known that you can also choose between many different styles for your metal roofing:
- Corrugated metal
- Standing seam
- Stamped metal
- And more!
Each of these materials and styles of metal roofing comes in a variety of colors, and some are even built to emulate the look of shingles, tiles, and other kinds of roofing! No longer do you have to compromise between having an attractive roof and reaping the quality benefits that metal roofing has to offer.
Asphalt shingles also have similar aesthetic options. They come in various colors and styles. You can even choose multi-color shingles to add depth to the look of your roof, giving you near-infinite options to choose from for your roof’s appearance.
MAINTENANCE
We’ve come to one of the more dreaded parts of home ownership: roof maintenance. While you may not enjoy thinking about this chore, it’s an important part of maintaining the long-term health of your home.
For both kinds of roofs, you’ll need to perform routine maintenance tasks like clearing debris, cleaning out the gutters, and visually inspecting your roof for wear and tear. Beyond these basic tasks, though, metal requires little or no maintenance in most circumstances. Depending on the style of metal roof you have, exposed fasteners may need to be replaced as they rust and degrade over time, but the roof panels themselves shouldn’t require much upkeep from you.
Asphalt shingles, on the other hand, will need at least some maintenance over their lifespan. Some shingles may become damaged or fall off, requiring replacements to be put on in their place. Additionally, the flashing, sealants, and other auxiliary components of the roof will need repair and replacement before the shingles reach the end of their lifespan.
CLIMATE AND WEATHER
Metal roofs are reflective, which means they’re great at keeping heat out of your home. Asphalt shingles work very well to retain heat. So, in cool climates, installing a metal roof might increase your heating costs, while putting on an asphalt roof in warm climates will take more energy to keep your home cool. You can combat these issue with proper insulation, however.
Metal roofing offers the most fire resistance of any roof type. It’s also extremely durable against:
- Hailstorms
- Strong winds
- Moisture
An asphalt shingle roof will likely succumb to these environmental pressures, requiring at least a few repairs over its lifespan.
ENERGY EFFICIENCY
As mentioned earlier, metal roofing will keep your home cool throughout the year, while asphalt shingles will keep your home warm. Depending on which climate you live in, one roofing material may lead to more energy savings than the other.
ENVIRONMENTAL IMPACT
Did you know that asphalt can be recycled? For a while, it was thought that asphalt had to go to the landfill because it’s an oil-based product. However, as long as you live in an area with the appropriate recycling facilities, recycling asphalt shingles is completely doable. Once the asphalt is separated from the other materials in the shingles, it can be reused for paving projects. Metal roofing panels are, of course, even easier to recycle than asphalt and can then be used for a variety of purposes, depending on the kind of metal the panels were made from.
Unfortunately, this doesn’t necessarily make asphalt an environmentally-friendly product, as asphalt is a byproduct of the refinement of oil. Since nonrenewable resources have to be used to create asphalt in the first place, metal roofing is the way to go if you want to reduce your home’s overall environmental impact.
INSURANCE RATES
Because of the durability and long lifespan of most metal roofs, some insurance companies offer discounts on home insurance premiums to homeowners who choose to install a metal roof. However, because of the higher upfront costs of metal roofs, some companies will increase your premium to cover the high anticipated cost of materials should you need another roof replacement.
You’ll need to check with your insurance company to determine how your rates will change with a metal roof, if at all. Asphalt shingles likely won’t affect your insurance costs in either direction.
IN REVIEW: PROS AND CONS OF ASPHALT SHINGLES VS. METAL
As you can see, both asphalt shingles and metal roofs have both advantages and disadvantages.
✅ Pros of Asphalt Shingles
- Low installation cost
- Quick to install
- Many aesthetically-pleasing appearance options
- Great at keeping warmth inside the home
🚫 Cons of Asphalt Shingles
- Only last 15-25 years
- Require regular maintenance
- Not environmentally-friendly
✅ Pros of Metal Panels
- Last 50+ years
- Many aesthetically-pleasing appearance options
- Require little to no maintenance
- Very durable against extreme weather
🚫 Cons of Metal Panels
- High initial materials cost
- Require specialized knowledge to install
- Might affect insurance rates
And these are just two of the available roofing materials on the market; other materials like clay, concrete, slate, and wood have their own pros and cons.
METAL ROOF VS. SHINGLES: WHICH SHOULD YOU CHOOSE?
The right choice of roofing materials depends on your finances, your climate, and your long-term home ownership goals. Asphalt shingles and metal each serve their own purpose, and determining the right choice is entirely up to you.
Ready to get started on your new roof replacement? Reach out to Mars today to learn how our roofing professionals can help you with your metal or asphalt shingle installation!

Feb 6, 2023 | Blog
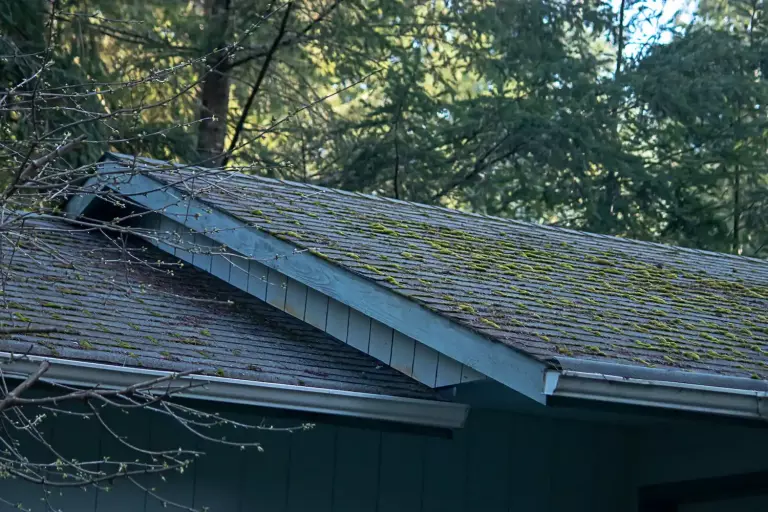
Moss on a roof is a real eyesore for homeowners, and it can also damage roofs. If left unchecked, moss growth can lead to a huge headache down the line. The good news is that there are several methods that you can use to remove troublesome moss from a roof quickly and effectively.,Read on for helpful tips on how to get rid of moss on roof surfaces.
WHAT IS MOSS? 🌱
Before delving into how to get rid of moss, let’s discuss what moss growth is and why you should remove it from your rooftop. Moss is a type of plant that can quickly spread over your roof and cause damage. Moss absorbs moisture and grows in areas with lots of humidity.
As a result, it creates an ideal habitat for mold, mildew, and other organisms to grow. In order to maintain the condition and integrity of your roof, it’s essential to remove moss that has grown on it. By removing the moss, you’ll not only improve the appearance of your roof, but also save money on energy costs. Professional roofing treatment is recommended to ensure the job is done properly and efficiently.
However, if you want to remove the moss yourself, here’s how to get rid of moss on roof surfaces:
1. MOSS TREATMENTS
Moss removal treatments involve the application of a chemical solution to the affected area. The chemicals penetrate deep into the surface, killing existing moss and preventing new growth. This treatment is recommended for optimal results.
To do this method, go onto your roof and spray the chemical solution onto the moss-affected areas. Before using the moss remover, be sure to read the instructions carefully. In most cases, the chemicals will kill the existing moss and prevent new growth.
Although chemicals do a great job of removing dead moss from roof shingles, this isn’t a treatment you should do yourself. It’s best to hire a professional, like Mars Restoration, to perform the job in order to avoid any harm or damage. The last thing you want is to risk the health and safety of yourself or your family members.
2. PRESSURE WASHING
Pressure washing is a simple way to get rid of a moss problem on your roof. It involves the use of a pressure washer to blast off the existing moss and dirt accumulation on the surface. Since moss is easily spread through spores, it’s vital to use a pressure washer that has high-pressure settings.
To pressure wash your roof, you’ll need access to a pressure washer with adjustable settings. Start by setting the pressure as low as possible and work your way up until you’re able to remove the moss. Always wear protective eyewear and clothing when pressure washing, as debris can fly off at high speeds.
Of course, this is a task that you can do yourself, but if you don’t know what you’re doing, it’s best to hire a professional roofing company. They’ll use special equipment and supplies to ensure the job is done correctly and safely.
3. MANUAL REMOVAL
If you’re looking for a straightforward solution to removing moss from your roof, manual removal may be the best option. This involves using a brush, trowel, or other tools to physically remove the moss from the surface.
When removing moss by hand, you’ll want to start by using a wire brush. This is the most effective way to get rid of moss, as it easily dislodges the growth from the surface. Simply brush over the moss until it comes off.
Be sure to take caution when removing the moss, as it’s a tedious and dangerous job. If you take the manual route, just know that it’s a labor-intensive job and will require you to invest a lot of time and energy. Therefore, getting rid of moss by hand is best for small patches of moss growth, not an entire roof.
4. CALLING THE PROS
Ultimately, you’d be better off calling Mars Restoration to take care of your moss problem. By allowing professional roofers to do the job, you can rest assured that it’s done correctly and efficiently. Plus, you won’t have to risk hurting yourself!
THE DANGERS OF LEAVING MOSS GROWTH UNCHECKED
Believe it or not, having a moss-covered roof can lead to some serious issues. Here are a few things that can happen if you don’t get rid of roof moss:
INCREASED RISK OF WATER DAMAGE 💧
When you don’t take care of moss growth, it can lead to water damage. Since moss holds water, it can cause the shingles and other materials on your roof to rot or become damaged over time. This is a huge problem because water damage is expensive to repair and can even make the roof less structurally sound. Not to mention, water damage creates a breeding ground for mold.
DECREASED ROOF LIFESPAN 📉
Moss can also shorten the lifespan of your roof. If moss isn’t removed, it can cause the roof to deteriorate and eventually need replacement. Your roof should last for many years, so it’s imperative to be proactive about taking care of any moss-related problems.
HIGHER ENERGY BILLS ⚡
Moss can actually cause your energy bills to increase. Since moss holds onto moisture, it makes the roof absorb more heat and eventually increases your cooling costs. Your pockets will take a hit if you let moss accumulate on your roof. Therefore, it’s important to stay on top of any moss issues.
WEAKENED SHINGLES 😩
Moss weakens shingles over time. If a shingle is attached to a layer of moss, it won’t be able to adhere properly to your roof. This increases the risk of numerous issues, so it’s vital to get rid of moss as soon as possible. Your roof is designed to protect you. But if it’s weak, it could potentially cave in and cause serious damage to your home.
CONTACT A PROFESSIONAL ROOFER TODAY!
Why would you remove moss from your roof when you don’t have to? Instead, let Mars Restoration handle the job. Our skilled roofers provide professional services for commercial buildings and residential properties. Not to mention, the majority of our roofing projects can be done within one day!
If you would like to schedule a free inspection, contact us online, and don’t hesitate to call us at 240-319-7311 if you have any questions. We look forward to speaking with you soon!

Feb 3, 2023 | Blog
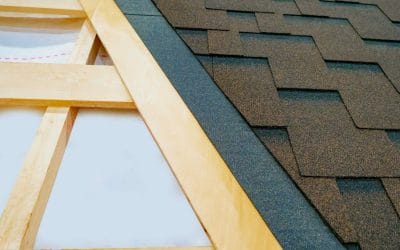
Removing shingles from roof structures is a daunting project for any homeowner. It requires careful performance to ensure that existing structures are not harmed. It must also be done with safety in mind. Fortunately, there is a simple way to approach this task without having to resort to complicated methods.
With the right knowledge and tools at your disposal, the shingle removal process becomes less complicated. In this blog post, we’ll provide helpful tips that’ll make the project easy. Read on for more insight!
1. SAFETY FIRST 👷
Before getting started, wear gear such as safety glasses and gloves, and use a sturdy ladder for climbing onto the roof. By doing so, you’ll minimize the risk of injury. It’s a good idea to wear long pants to protect your legs when kneeling down on the roof.
Also, it’s important to check the weather conditions before beginning work. That way, you can ensure there are no high winds or other dangerous conditions.
2. USE THE RIGHT TOOLS 🔨
To remove the old shingles, there are a few essential tools that you’ll need, including:
- An adjustable roofing jack
- Hammer jack
- Nail puller
- Flat pry bar
- Razor knife
- Magnetic sweeper
- Push broom
- Chalk line kit
- Roofing Shovel
- Roofing hammer
If you don’t have all of these tools, that’s okay. At the very least, you’ll need a pry bar or roofing shovel and a nail puller.
3. PREP TO REMOVE THE SHINGLES
Before removing roofing shingles, prep the area by removing any loose nails, sweep away dirt and roofing debris, and release any adhesive that is present.
Next, draw a line across the roof with chalk. That way, you’ll know where to stop when removing the shingles. This will help ensure that you don’t damage the underlayment or the roof deck.
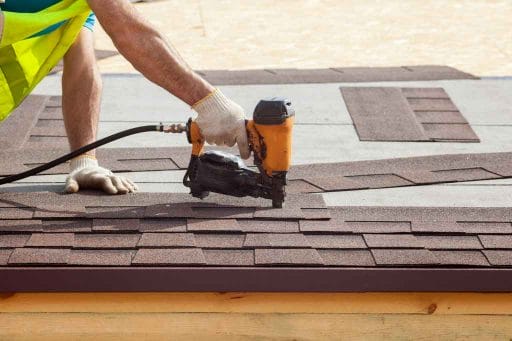
4. REMOVE THE OLD SHINGLES
Once you’re ready, here’s what you should do. Start by securing the roofing jack on one side of the roof, and use it to lift a few shingles. Use the hammer jack to pull out nails from the lifted-up shingles, and the nail puller to remove any protruding nails.
Once all of the nails have been stripped away, use the flat pry bar to lift up the shingles. Remove all of the pieces and throw them away, then move on to the next row. Repeat until the entire roof has been cleared.
5. CLEAN UP 🧹
Once all the shingles have been removed, you’ll need to sweep away any remaining dirt and roofing debris. You may also want to use a magnetic sweeper to make sure you pick up any nails that were missed during the removal process. Finally, check the roof deck and make sure there are loose nails or other roofing elements stuck to it. If there are, use a razor knife to remove them.
Speaking of cleaning up, it’s a good idea to have a dumpster for the removed shingles. This will help keep the job site clean and safe, and make it easier for you when the time comes to dispose of the shingles.
SIGNS THAT YOU SHOULD REMOVE OLD ROOF SHINGLES 🏚️
Now that you know how to remove roofing shingles, you may be wondering when it’s time to do so. Generally speaking, shingles should be replaced when they start to curl and buckle. However, here are some telltale signs that’ll let you know when it’s time for a roofing shingle replacement or a new roof:
THE ROOF SHINGLES ARE CRACKED
If you regularly inspect your roof, you may notice small cracks in the shingles or broken shingles. This can be caused by extreme temperatures, UV rays, or even a naturally occurring defect. In any case, these small cracks can quickly turn into large ones, leading to water damage and the need for a roof replacement. This is especially true for asphalt shingles.
THE ROOF SHINGLES ARE BLISTERING
Another sign that it’s time to replace your shingles is when they start to blister. This can happen when there is a buildup of moisture underneath the shingles, and it’s a sign that there is water damage. If left untreated, this can lead to costly repairs down the line.
MISSING SHINGLES
If you notice that there are stray shingles in your driveway, or that there are missing roofing shingles on your roof, this is a sure sign that all of them need to be replaced. Missing shingles allow moisture to penetrate the roof’s surface, which can lead to leaks and even structural damage.
If any of these signs apply to you, then you may need a new roof. It’s best to have a professional come and inspect your roof, as they’ll be able to provide the most accurate assessment of the situation. Plus, they can do a thorough inspection of your entire roof, not just the shingles. This will ensure that there are no other underlying issues.
CALL US FOR YOUR ROOFING NEEDS
If you’re looking for a professional roofer to remove your old shingles, give Mars Restoration a call. We provide residential and commercial roofing services, as well as repairs for doors, windows, and more.
To schedule a free inspection, reach out to us online, or if you have any questions, call us at 240-319-7311. We look forward to assisting you!