Nov 30, 2022 | Blog
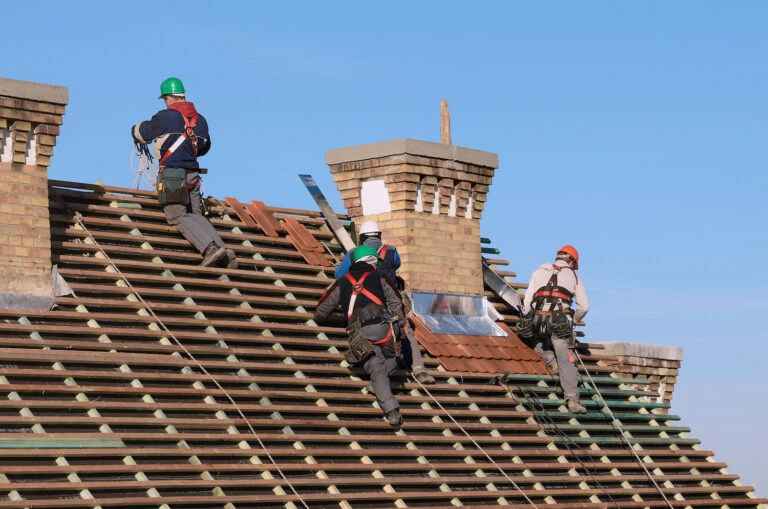
There are certain tips to abide by if you are in charge of a crew performing repairs or replacements on a person’s home or commercial building. Knowing the basics of roofing safety is key for any person in charge of a group of people who are working or operating around a construction site.
Leaders can help their workers stay safe doing this dangerous job by using the correct safety equipment (i.e., safety harnesses, safety glasses, etc.), reading common roofing safety tips, safeguarding the work area against accidents/falling, and de-briefing their team before the project regarding proper use of equipment and protection.
ROOF HAZARDS
Before you can understand the most common safety rules to abide by when it comes to roof safety, you need to know the most common roof hazards that can occur. To protect one another from harm, such as the local contractors and roofers, you need to be aware of the following hazard that must be identified, analyzed, and controlled.
FALL HAZARDS
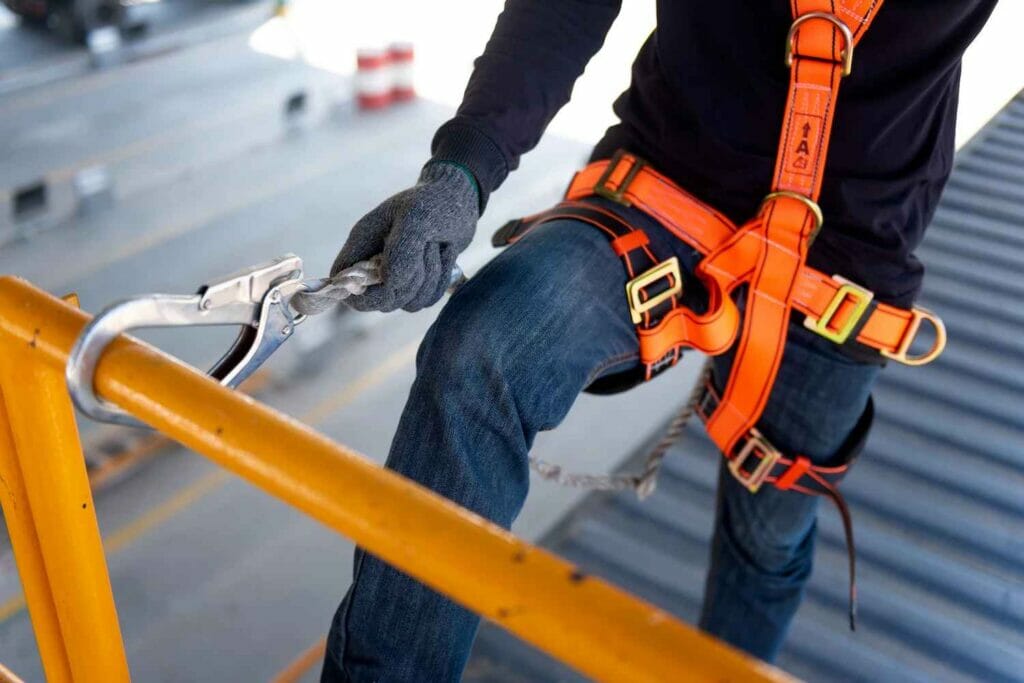
The first issue to keep an eye out for are fall hazards, including guardrails, structural support, holes and cracks, and other potential concerns that have to do with height on a house. Workers should always have a safety harness and ladder to prevent falls near the roof edge. Team leaders can prevent an accident by using an extension ladder to safely work in high areas and minimize risk.
POWER TOOLS
The second roof hazard to consider in terms of occupational safety is the presence and use of electric machines. If these are not used properly or workers do not know how to operate them correctly, this can cause slips, injuries, and unsafe working conditions. Knowing the basics of protection against these items are key to working on a roof.
ELECTRICITY
The third issue to keep an eye out for is electricity, including power lines, electrical shocks, burns, and possible causes of electrocution while working on a roof. Double check that your job site is free of these common hazards, such as an unintentional rope grab, to avoid lost footing.
HAZARDOUS MATERIALS
Keep an eye out for hazardous or toxic materials, like paint fumes, chemicals, or poison that can lead to workplace injuries or accidents. Make sure you only have the proper equipment on site to avoid serious injury.
EXTREME TEMPERATURES
Lastly, those in charge of a workplace crew who are working on installing a new roof or roof replacement must consider extreme temperatures or weather conditions during operating hours. Slate and tile roofs can succumb to the heat, so make sure your workers are properly trained to wear suitable footwear and look out for the common signs of heat or cold related illnesses.
4 ROOF SAFETY TIPS
Now that you know the main roof hazards to keep an eye out for while in charge of a crew, there are a few key roof tips that must be followed during the entirety of the roof repair project.
PRE-START DEBRIEF ON SAFETY EQUIPMENT
One of the most important aspects of any job, whether it is a small repair or large scale replacement, is a pre-start debrief and team talk before you get started. This process gets everyone on the same page and avoids miscommunication or lack of information.
The person in charge should talk to every crew member for at least 10 minutes to tell them the important information about the worksite, the project itself, and the hazards to keep an eye out for (ex: electricity areas, extremely hot weather, extremely cold weather, snow, height concerns, etc.).
Furthermore, the crew leader should assess the work area and tell the crew about any potential dangerous spots that could be unstable during use. The final step of the debrief process should include a checklist and notes to write down the conversations regarding workplace safety and the to-do list.
PLACE THE ROPES AND CORDS IN THE PROPER PLACE
The next roof safety tip to keep in mind is to put the ropes, extension cords, and other tripping hazards out of the way to prevent any falls or tangles. Make sure that any electrical items or power tools are out of the way of walk paths and not at risk of falling off of the roof.
The crew should make sure that ropes and cords are not underfoot at any point, including harnesses, that could get tangled up while a person is walking or moving across the roof.
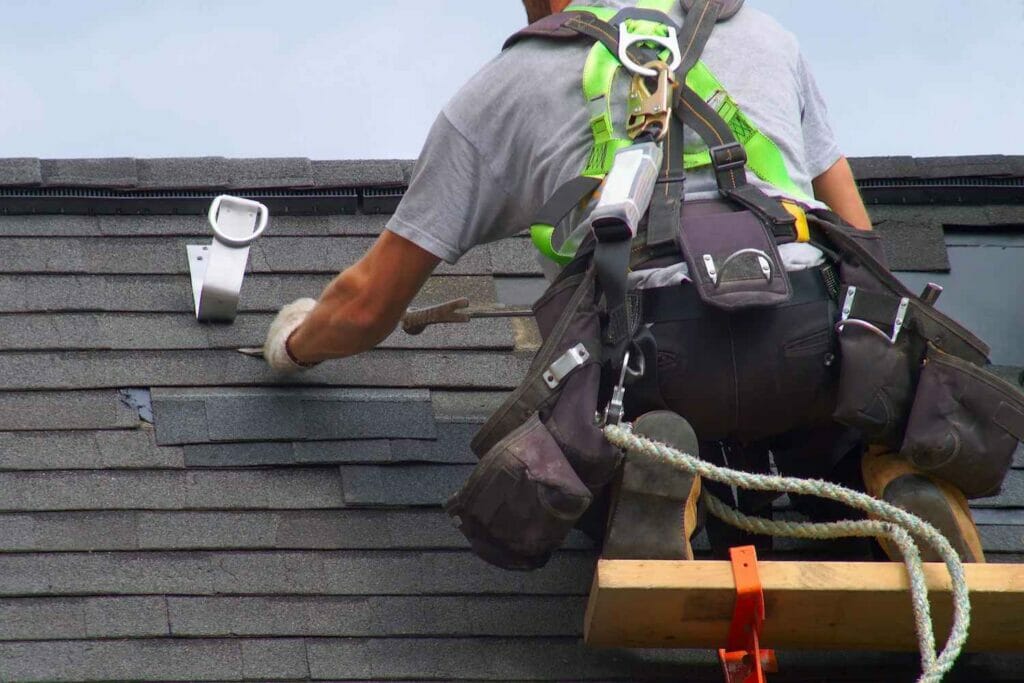
USE GUARDRAILS (AND A SAFETY HARNESS)
Although they may cost extra money and take time to install, using guardrails is essential to preventing falls and keeping workplace injuries as low as possible. Especially if you are working on a roof that is very high above the ground, using guardrails can help prevent injuries, deaths, and lawsuits. Workers should also wear a harness with a roof anchor to prevent falls. Lastly, knowing how to use a ladder with a guardrail is essential to avoid any items falling to the ground.
USE SIGNAGE
Lastly, using clear and easy to read signage is key to avoiding miscommunication between workers and also keeping pedestrians out of the way of the construction site. People around the area where you are working should always be aware of what is going on. Using bright signage and clear indications to keep out of the way can help prevent any injuries regarding third parties.
- Danger Sign — One of the most common signs to use for roofs is the ‘Danger’ Sign. This sign also typically states ‘Keep Off Roof’ to warn passersby to avoid danger or unstable surfaces.
- Warning Sign — The next type of sign that you can use for your worsite is a warning sign that typically states ‘Access by Permit Only’. This lets third parties know that only authorized workers or employed personnel can be in the area at any time.
- Caution Sign — The final type of sign you can use for your worksite is the ‘Caution’ sign that typically states the dangers, such as ‘Roof Slippery When Wet’.
ROOFING SAFTEY BASICS
There are a few key basics to keep in mind regarding roof inspections.
Team leaders must lean how to carefully position ropes, set up fiberglass ladders properly, place squares on roofs, and install shingles while using a ladder.
Knowing the basics for how to safely perform repairs can help lessen employee risk, such as a slip and fall accident, a broken ladder, or roofing concerns.
SAFETY ADVICE FOR ADDED PROTECTION – ROOF SAFETY IS KEY!
Even if you are doing a DIY project without any employees, you still need to know the safety rules of working on a roof.
Understanding roofing safety, using ladders, and roofing materials can help reduce any chance of injury, fall, or death.
Nov 29, 2022 | Blog
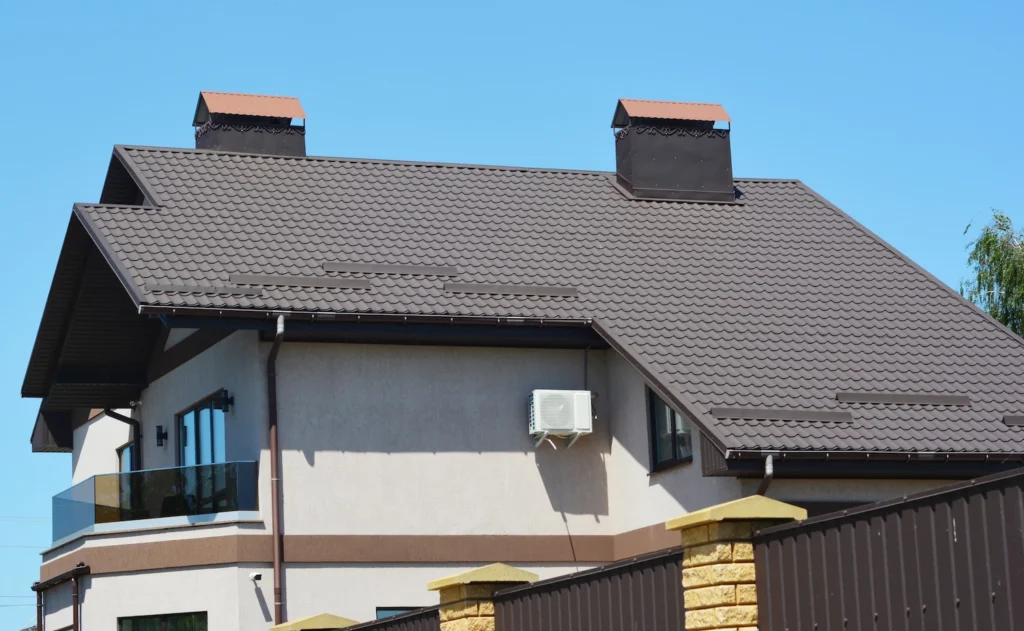
Saltbox roofs are a unique and interesting architectural feature. Initially built during the 17th and 18th centuries, their resemblance to wooden salt containers of the time gives them their unique name. Their signature one-sided slope makes them easy to identify. While not as common as they once were, saltbox roofs are still used today in more unique modern architecture.
This guide on saltbox roofs will go in-depth about their common uses, pros and cons, and their cost. That way, you can decide if a saltbox roof is right for you!
WHAT IS A SALTBOX ROOF + ITS DISTINGUISHING FEATURES?
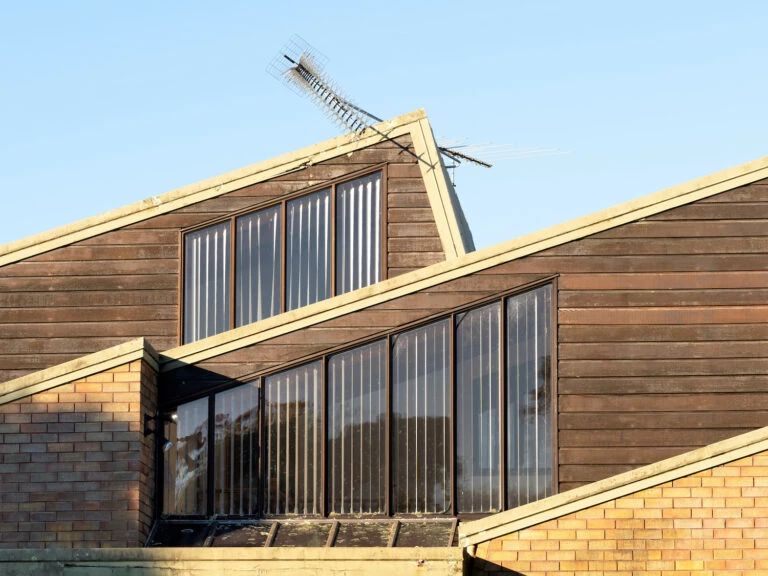
Because none of us have probably ever used a colonial-era saltbox, it can be hard to imagine how this type of roof looks. The best way to describe it is that it looks like a gable roof, with one pitch and two sides, but this asymmetrical roof has one long side, then a shorter side with a steep slope.
The main purpose of this design was to create extra storage space in the attic or loft area. The steeper slope on the shorter side allowed for this by creating more headroom on that particular side. However, this also means that only half of the house can allow for an upper level— like a lofted area. The longer slope, however, allows for more open space and higher ceilings. In short, the most distinguishing features of a saltbox roof are:
- Its asymmetrical slopes.
- It has one short, steep slope and one long, shallower slope.
WHAT ARE THE BENEFITS OF HAVING A SALTBOX ROOF ON YOUR HOME?
If you have a saltbox roof on your home, you might be aware of its amazing benefits. If you’re considering one, here’s what you can expect:
GREAT FOR SNOWY CLIMATES ❄️
Saltbox roofs have great snow and ice-shedding capabilities, making them excellent in snowy climates. The steeper slope allows snow to slide off easily, which prevents it from building up and causing damage or a collapse.
ADDS CURB APPEAL 😍
Another great thing about saltbox roofs is that they add curb appeal. This unique roof style is eye-catching and can make your home stand out from the rest.
HIGH WIND RESISTANCE 🍃
Saltbox roofs stand up to high winds better than a standard gable roof. This is because the steeper slope allows wind to flow over the roof rather than hitting it head-on.
ADDS MORE LIVING SPACE 🛋️
Although saltbox roofs only allow more living space on one half of it, the space created is perfect for additional living space, like a lofted bedroom or office. The steeper slope provides more headroom on that side of the attic.
ARE THERE ANY DRAWBACKS TO USING A SALTBOX ROOF
With this unique roof style, there, of course, are a few cons— cause nothing’s perfect.
COMPLICATED TO INSTALL 🏗️
While the roof looks like a standard two-sloped roof, it can be a little more complex to install. There aren’t any supporting beams, which can speed up the process, but the steepest side of the roof requires more safety measures and takes a little extra time to install properly.
TAKES AWAY FROM VITAL ATTIC SPACE ⛔
Yes, a saltbox roof can add living space, but it does not have a standard attic space like gable roofs. In turn, this can mean there’s less storage and less insulation if not done right.

HOW MUCH DOES IT COST TO INSTALL OR REPLACE A SALTBOX ROOF ON YOUR HOME
More often than not, a saltbox roof will likely be built in the initial home build. In this case, you can expect a saltbox home to cost between $200,000 and $500,000, with the average being $285,000, according to HomeAdvisor.
The roofing component, however, makes up between $5,000 and $20,000 of that overall cost. So if you did want to renovate your single-story home to have a saltbox roof and lofted living space, you could. That cost would really depend on the size of your home, the amount of lumber needed to build up the frame, and then insulation and roofing materials like asphalt shingles.
INTERESTED IN INSTALLING OR REPLACING A SALTBOX ROOF? CALL MARS RESTORATION
If you’re interested in updating your saltbox roof or any roof on your home, call MARS Roofing. We can help you with any and all of your roofing needs. Contact us for a FREE inspection.
![What Is A Gable Roof? [Picture Guide]](https://mars-roofing.com/wp-content/uploads/2022/11/gable-roof-brick-768x512.jpegw3_.webp)
Nov 29, 2022 | Blog
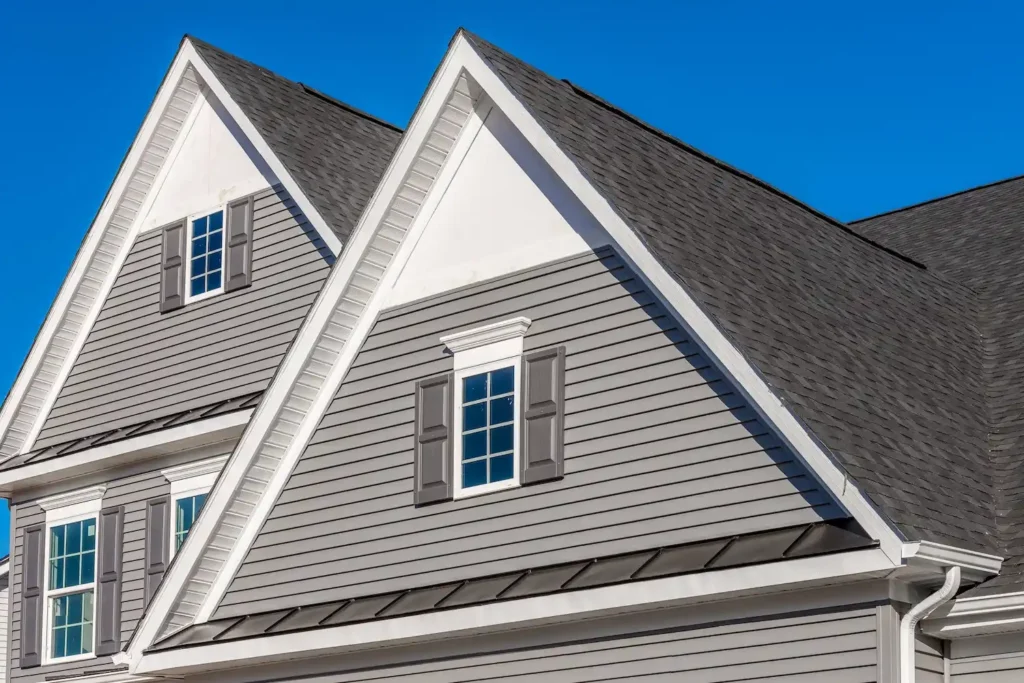
While the use of gable roofs in architecture dates as far back as ancient Greece, this roof style was most popular in the United States in the 19th and early 20th centuries. Just because it’s not as ubiquitous as it once was, however, it doesn’t mean that this roof style doesn’t still have its merits.
Let’s break down the qualities of a gabled roof, examples of gabled roof styles, and why a gable roof might be the right choice for your home.
GABLE ROOF CHARACTERISTICS
All gabled roofs have a few characteristics in common:
- Two or more (often steeply-pitched) roof sides
- One or more ridges, which are formed where the tops of two roof sides meet
- Two or more gables, or the sections of wall or siding that run perpendicular to the roof sides
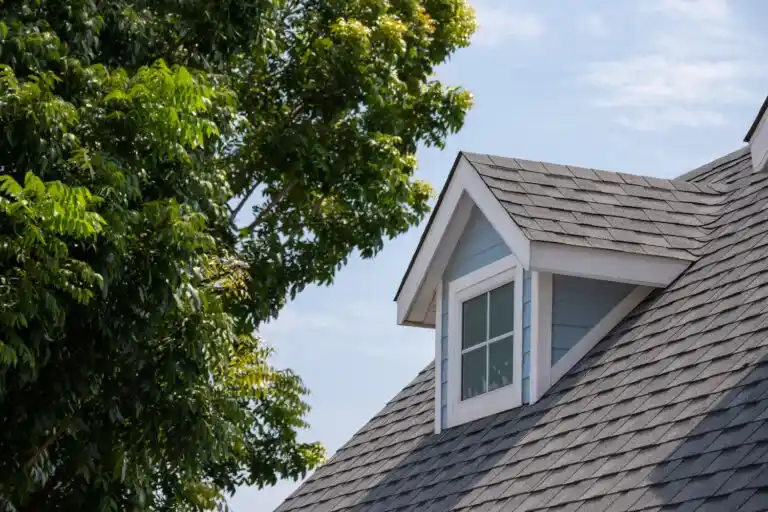
Nearly any roofing material can be used to build a gable roof, including concrete tile, asphalt shingles, and cedar shakes. The gables are usually made of the same material as the siding on the rest of the house. A gable roof may or may not have dormer windows as well.
TYPES OF GABLE ROOFS
Different kinds of gable roofs are distinguishable by the location of their gables, the number of ridges they have, and the pitch of the roof.
FRONT, SIDE, AND CROSS GABLE
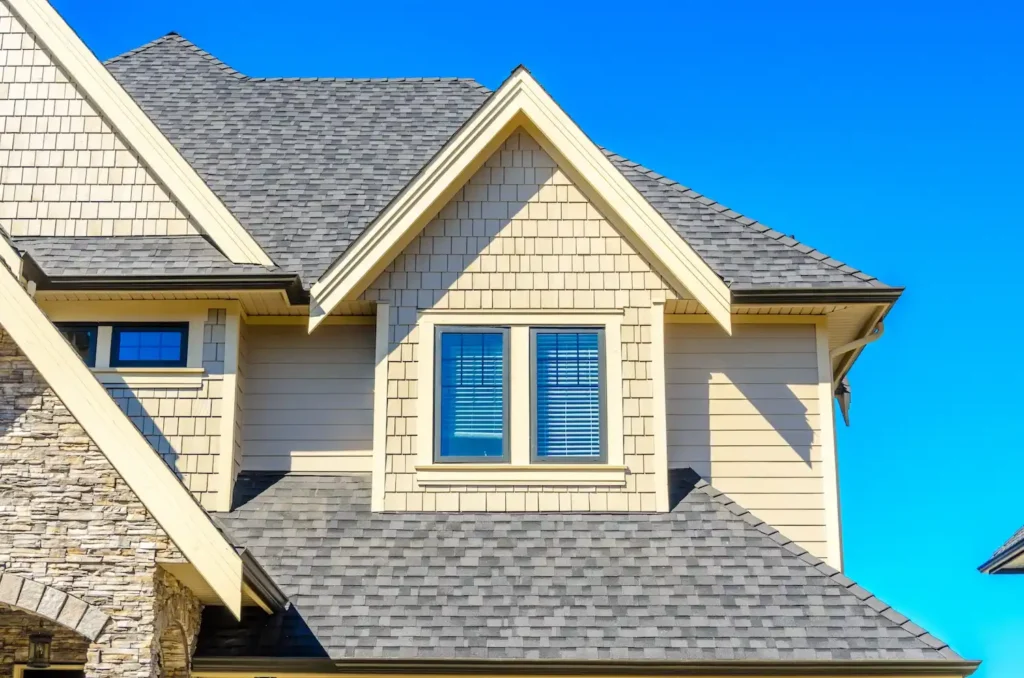
Sometimes called open gable roofs, both front and side gable roofs have the typical sloping sides and open gables that you expect from a gable roof. For a front gable roof, the gables are located on the front and back sides of the house. A side gable roof, as the name suggests, has gables on the sides of the home.
A cross-gable roof is a blend between both front and side gable roofs. This roof design is somewhat complex and results in a roof with multiple ridges, several pitched sides, and four gables in total.
BOX GABLE
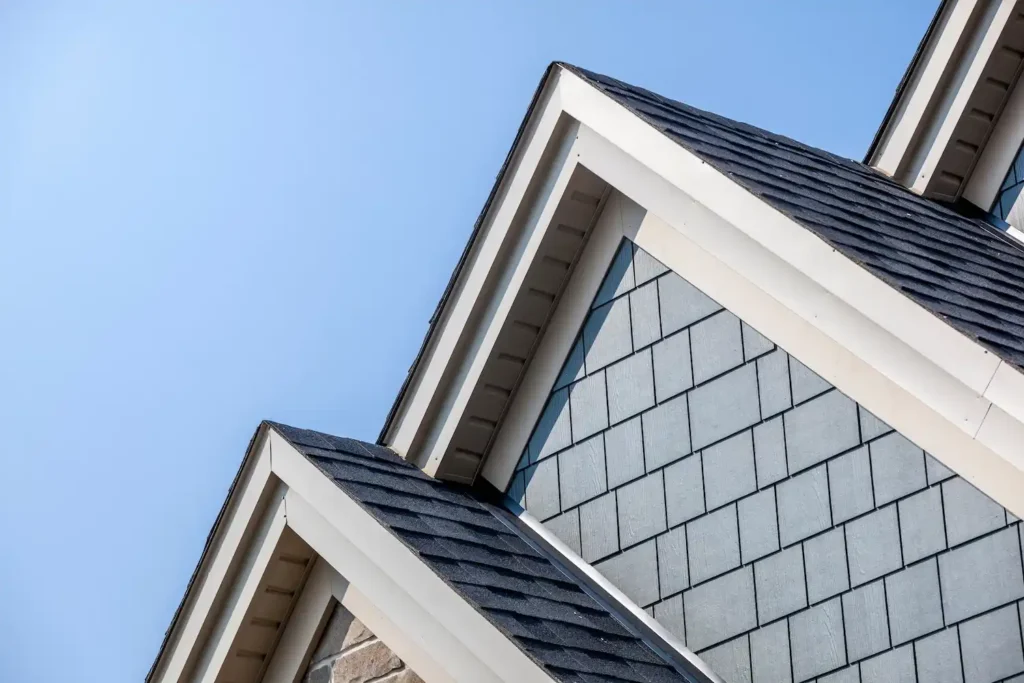
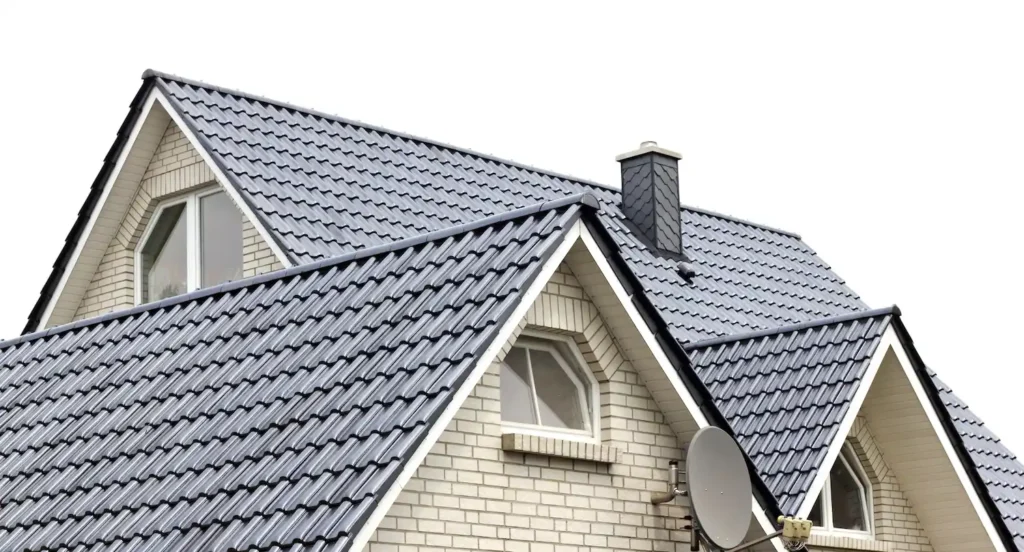
A box gable roof looks like most standard gable roofs, except that the triangular sections of the gables are boxed in. This makes them a more prominent part of the architectural design than on a standard gable roof.
GAMBREL
A gambrel roof is a type of gable roof design made of two parts: the lower halves of the roof sides have steep pitches, and the upper halves of the roof have more shallow pitches. If you picture the shape of a typical barn roof, you’ll have a sense of the shape of a gambrel roof. This roof style is great for adding additional storage space inside the building or for creating enough ceiling space for a loft.
✅ GABLE ROOF ADVANTAGES
- Because of their simple design, gable roofs tend to be one of the most cost-effective roof styles out there.
- The steep pitch of these roofs also allows snow and ice to slide off the sides easily. This makes them ideal for cold-weather climates and climates that experience high levels of rainfall.
- Because two sides of the roof are not pitched, you also get a lot more attic space with a gable roof than you do with a hip roof. You can even supplement your existing attic ventilation by adding gable vents to get rid of extra moisture in your home and increase the air quality inside.
❌ GABLE ROOF DISADVANTAGES
- Gable roofs do not hold up well to high winds, so if you live in a windy climate or in an area that has a good chance of experiencing high-speed windstorms, this may not be the best roof choice for you.
- Although the base cost of a gable roof is relatively inexpensive, if you’re planning on building a complex gable roof design (think cross gable or gambrel), you may run into increased costs. This is especially true if the interior walls need to have support added to them or if your walls need to be built to different heights to accommodate the complex design.
START YOUR NEW ROOF PROJECT TODAY
With our cold and snowy winters, a gable roof is an ideal choice for any home in Maryland. The attractive and practical design is sure to make your home the talk of the neighborhood.
Interested in getting your gable roof repaired or installed? Look no further! Get in touch with one of our experts today.
Nov 28, 2022 | Blog
Knowing the basics of how to patch a roof leak as soon as you notice it is key to mitigating damage and preventing unwanted risk in the structure of your home. Let’s see the leading causes of roof leaks and the most practical DIY fixes to prevent a leak from getting bigger!
CAUSES OF ROOF LEAKS
What causes a roof leak? Can a garden hose and pry bar really fix my issues? Finding out the causes of why you may have a leak can help homeowners find immediate solutions that will not break the bank.
OLD AGE
One of the most common reasons for a leaky roof is old age. Roofing material can break down over time, leading to leaks, holes, cracks, and curling shingles. You can help prevent roof leaks from old age through maintenance, roof repair, removing debris, and getting roof inspections every few years.
DAMAGED FLASHING
If your flashing was improperly installed or damaged in an event, such as humid/warm weather or a storm, it could cause damaged flashing that leads to weak points and instability in the roof. Flashing can be damaged by exposure, deterioration, and impact on the structure.
BROKEN TILES
The third reason your roof may leak is due to damaged roof tiles. The roof tiles help protect against impact and weather in your home — if roofing tiles are damaged, they can crack or fall off completely, leading to dampness, moisture build-up, condensation, and rotting.
DAMAGED ROOFING UNDERLAYMENT
If your roof has been damaged under the initial protective layer, this can cause moisture in the home, gutter cracks, and pooling water, leading to leaks inside your home.
WRONG ROOFING MATERIALS
Another common reason for leaking in your home is due to improper installation of roofing materials, cheap material, or the wrong material for your climate and home. For example, if your house does not have a double-layer of waterproof protection and you live in a wet climate, this can cause leaks.
HOW TO PATCH A ROOF
If you notice your roof is leaking, you need to find out the best ways to quickly patch the roof to prevent any more damage, emergency situations, and large-scale instability in your home.
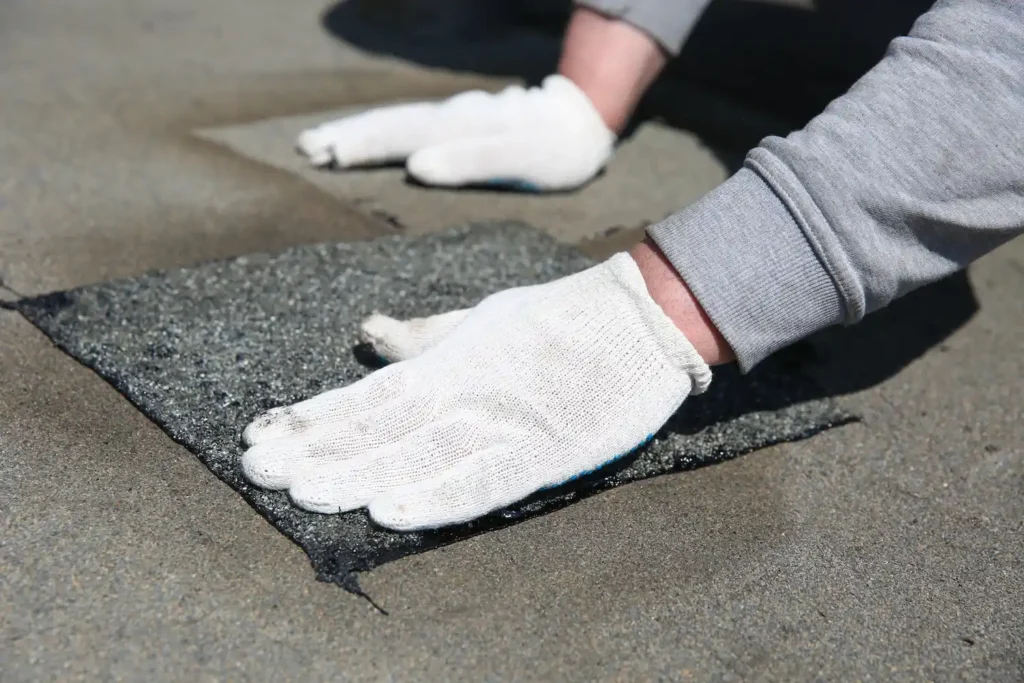
USE A TARP
The first way to quickly patch a roof is to use a tarp to cover the spot that is leaking. Although this is not a long-term solution, the tarp will catch the water and prevent the moisture from getting into your house. Use a hammer and roofing nails to secure the edges of the tarp and prevent it from moving.

USE ROOFING CEMENT
The second way to patch a roof is to use roofing cement to block any cracks, holes, or leaks in your roof. Get rid of any debris or large particles from your roof, and then use the roof cement to secure the leak.
USE A CAULK GUN
The third method to patch a roof is to use silicone gel or a caulk gun to plug a small gap or hole in your roof. Even though this is not a long-term fix, it can help stop leaks as soon as you notice them.
USE RUBBER ROOF SEALANT
The fourth method to help eliminate leaks in your house is using a rubber sealant to block leaks and holes. If you have a large-scale leak, try to use both a rubber boot and a tarp to stop the leaks and prevent water damage. For small leaks, use the rubber sealant and spray it on the damaged area.
USE ROOF FLASHING
The next way to prevent any leaks from growing in your home is to use aluminum flashing to cover leaking spots in your home and prevent further damage. One of the most common spots where you can use new flashing in your house is the chimney, edge, siding, or attic.
USE ROOF REPLACEMENT SHINGLES
For a more long-term fix, you can try to use roof replacement shingles on the leaking area. Although you may need a professional to do the official installation process, you can use new shingles to replace any missing shingles showing signs of age or deterioration.
Some shingles may be warped, broken, cracked, or curling, meaning that you need to replace these as soon as possible to identify the leak’s location and replace the old shingle. Identifying curled back shingles and old shingles is key to preventing a breakdown of most roofs.
USE TAR PAPER
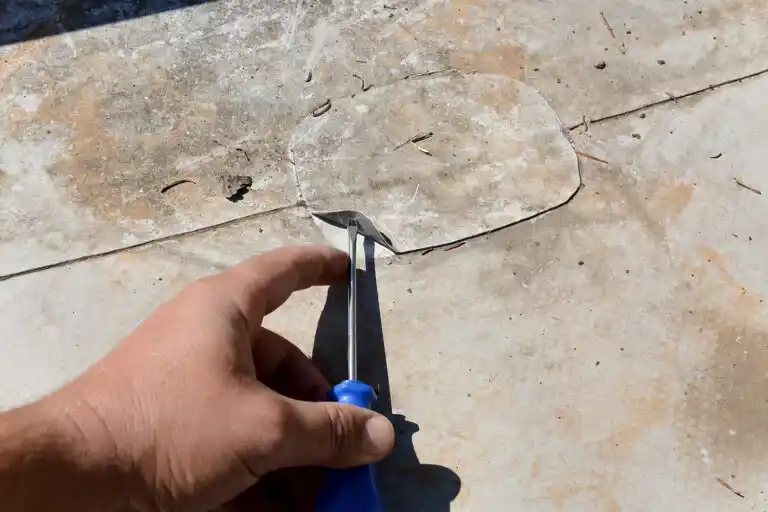
You can also use tar to replace a shingle or high-density fiberboard. This is one of the easiest ways to repair the edge of your roof. Use a nail to secure the paper while repairing the leak in your house. You may need to use a pry bar to remove a generous amount of the roofing structure.
USE SHEET METAL
The following way that homeowners can fix a leak in their house is to use a DIY shingle from metal or plastic that can cover the gap in the house. Measure the right size of the surrounding shingles to see how big of a piece of metal to use to replace the asphalt shingles. You can cut the right size of metal using a utility knife or putty knife to measure the new shingle.
USE PIPE FLASHING
The last way to stop a leak in your house ASAP is to use pipe flashing to replace old flashing or step flashing. If your leak is coming from the area around your water system or pipes, getting a new pipe flashing boot is the best way to prevent any moisture from soaking into your ceiling. If you need to remove the flashing, use a pry bar or flat bar to replace damaged flashing or roof sheathing.
FIXING A LEAKY ROOF: CONCLUSION
Do you have a leaky roof? Are your asphalt shingles breaking and cracked? What are the steps for repairing a leaky attic?
Although you may think you need a professional roofer or roofing contractor to repair a leak, you can usually do the repair effectively on your own. Sometimes, replacing curled shingles, fixing nail heads, and peeling back corners of neighboring shingles can be done on your own!
Whether you have asphalt shingles or curled shingles, learning the basic DIY steps of how to patch a roof is key. Although there are different roof types, the typical repair steps are the same when repairing a leak in your home.

Nov 25, 2022 | Blog
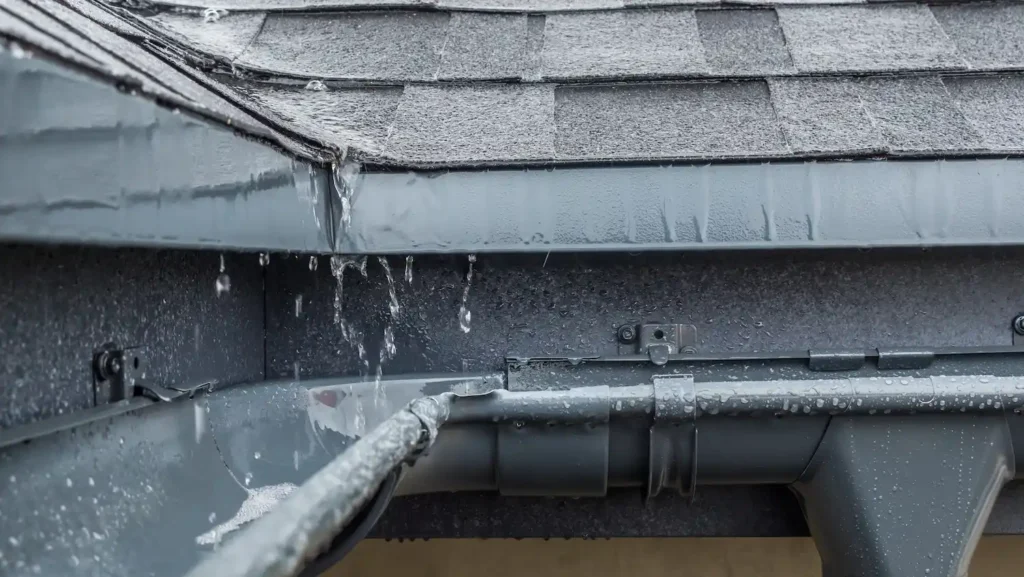
Sometimes time or finances can cause you to put off general maintenance around the house. If you noticed that you have a leaking roof and have not gotten around to fixing it, you know that the problem will only worsen with time. If a heavy rainstorm comes along and you notice roof leaks have suddenly gotten significantly worse, you may begin to panic.
The only true solution to a leaky roof is to call a professional to fix it or replace the roof altogether. But if it is leaking badly you have to do something or risk a lot of damage to your home. If there is a thunderstorm you cannot climb on the roof. You may be wondering how to fix a leaking roof from the inside of the house.
PATCHING THE ROOF
Putting a patch on the inside of your leaking roof is a temporary fix. It is a way to keep the water from coming in until you can get someone to do a proper repair on the outside. Never patch the inside and leave it as a permanent repair of roof leaks.
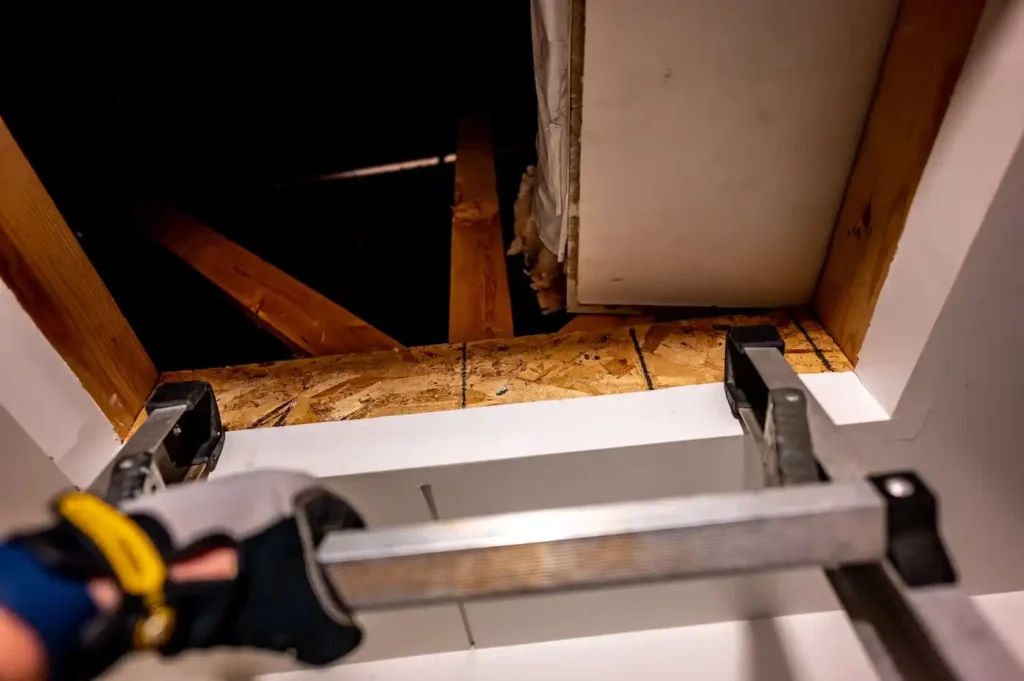
GO INTO THE ATTIC
To fix a leaking roof you will have to gain access to your attic with a ladder and search for where the water is originating from. Remember that the place you see water may not be the origin point. Water from a leaky roof can travel along surfaces before it starts to drip onto the ground.
Once you find the leak, open the drywall and remove as much insulation as you can to get to the leak. Be careful that you are not working around any of your home’s wiring. The drywall should be easy to get through if it has been leaking for a while. Use sponges or towels to soak up as much standing water from the roof leak as possible to prevent further damage.
MAKE A PATCH
If you have some extra roofing shingles and tar, they will be the best tools to use to patch the leaking roof. If not, you will need to make a quick trip to one of the hardware stores and pick up a piece of plywood and roofing tar. Use a utility knife to spread the tar evenly across the small holes. Put it on thick to prevent the roof leak from opening up again before you can fix it properly.
After applying the tar to the leak, stick the shingle over it. Put more tar around the edges to seal it as well and careful as possible. You have to cover every opening or the water will find another way to get in.
MAKE A MAP
Use a tape measure to determine how far the roof leak is from the edge of the ceiling. Once the rain has stopped and everything has dried out, you will want to use this measurement to find the leak from the outside. You do not have to be precise, but try to give yourself an idea of where to look.
PATCH THE ROOF WITHOUT PLYWOOD OR SHINGLES
You know how to fix a leaking roof from the inside, but there is a good chance you do not have any roofing shingles laying around. And if you cannot get any wood you can still put a patch on the ceiling. You will still need some roof patch or leak cement. It will cost you about $25 at your local hardware store.
Once you have found the leak, dry the standing water as best as you can. The roof patch substance works best in a dry site. Then apply a generous amount directly to the leak and spread it evenly with a putty knife. Once the roof patch dries you can either apply more of the roof patch or you can go around the edges with caulk to be sure you have closed up all the holes.
OTHER OPTIONS
If it is late, the hardware store is closed, or you cannot afford to buy shingles or roof patch, you still have options. The water will do damage to your home if you do nothing, or the roofing tar may not work in wet conditions. If you cannot patch the roof from the inside, the next best thing is to divert the water or cover the leaking hole in the attic ceiling.
DIVERT THE WATER
Once you have found the leak, stick a large nail in it. The nail will give the water something to run onto and it will all drip away from the leaking area in one direction. That will keep it from continuing to spread into your insulation and drywall. Remove standing water and then place a large plastic bucket or container beneath it to collect the water.
If it is raining heavily, the bucket may fill up quickly. You may have to sit and babysit it until the rain stops or the leaks slow down. You may also need a second bucket to swap out so you can go empty it when it gets full.
COVER THE HOLE
If you cannot patch your roof from the inside but you have access to a tarp or plastic sheeting, you can use it to temporarily deal with a small leak. This will only work if the rain outside is not heavy and it is even more of a temporary solution than patching it. You can cover the area of your roof with the tarp and attach it to the ceiling joists in your attic with a staple gun, but realize that the roof is still leaking and that water is now collecting inside the tarp. If it goes on for too long you might have a bigger mess on your hands.
CONCLUSION
If it is raining and you have discovered a large leak in your roof, you will not be able to do a proper fix until it dries. However, in a pinch, you can use some of these methods to temporarily fix the problem. The only true repair for leaky roofs is calling a roofing professional or replacing the whole thing. Be sure to make that call as soon as possible to prevent an even bigger problem later on.
Nov 23, 2022 | Blog
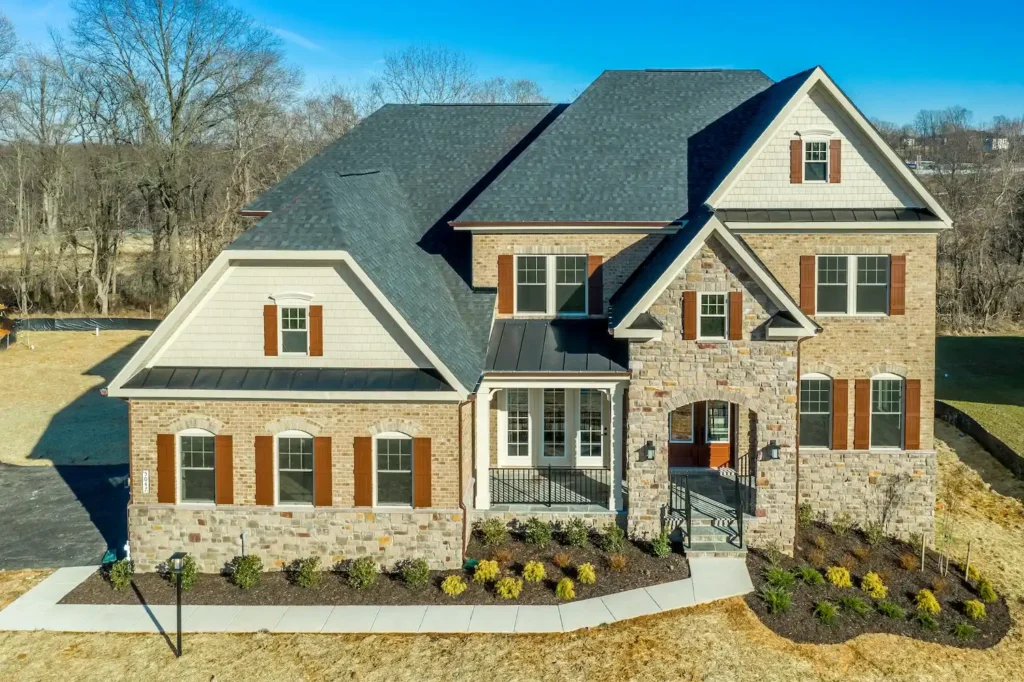
Are you looking to sell your home soon for a good price? If so, how great does your roof look? If your old roof needs roof repair, then consider replacing shingles. If you want to have a large house sale price, you may wonder – does a new roof increase home value?
You’ll find that an entire roof replacement will lead to a large increase in the full asking price when you sell your home. If you need a new roof installed, you’ve come to the right place. Here, we will detail:
- The reasons why your home sale price will grow
- How much added value to expect
- The costs of a new roof
- The roofing materials and shingles you’ll need
- And more!
If you have an old or sagging roof, you should consider replacing the entire thing before selling your home. That way, you can get more money from the home sale. Are you ready to learn more? Then, let’s get started!
WHY DOES A NEW ROOF INCREASE HOME VALUE?
You don’t want your real estate agent putting buckets in your house to catch the raindrops when showing off your place to potential buyers. Many buyers will not put down a bid on a home with an older roof in poor condition.
Research shows that you will get back 66 to 69 percent of the cost spent on a new roof from the home sale. Your return on investment (ROI) isn’t dollar for dollar, but it will boost home value.
HOW MUCH VALUE DOES A HOME GAIN AFTER A ROOF REPLACEMENT?
A new asphalt shingle roof replacement will increase your home value by as much as $15,247 based on national data from 2019. However, the average national cost of an asphalt shingle roof replacement is $22,636.
However, if you’re looking for an incredibly durable roof with minimal maintenance, you may need to install a metal roof. The average resale value of your home will increase by around $23,526 if you choose metal roofing.
DOES A METAL ROOF FURTHER BOOST HOME PRICES?
A metal roof does increase your full asking price and improve your home’s exterior. It adds as much as $8,279 on average to your home sale value as compared to replacing a roof with asphalt shingles.
However, you should also consider the initial costs of installing metal roofs. The average national cost of metal roofing replacements is $38,600. That price is much higher than the average price of asphalt shingle replacement, which is only $22,636.
HOW MUCH DOES A NEW ROOF COST?
Roof prices vary greatly depending on the roofing materials used, the size and shape of your home, and the location of your property. Wood shingles, metallic materials, and clay tile tend to have a larger price due to their greater durability. Roofing material is key when it comes to price.
When using asphalt roof shingles, on the other hand, the average roof replacement costs between $4,200 to $6,000 for a 1,600-square-foot home. For more superior materials, however, the cost will range between $9,500 to $16,000.
WHAT TYPE OF SHINGLES ARE BEST FOR YOUR HOUSE?
Asphalt shingles are usually the best choice for the majority of houses nationwide, according to Consumer Reports. That’s because these shingles are easy to install, lightweight, and quite affordable. However, if you live in a tropical or hot climate, metal roofs are great at reflecting sunrays, keeping your house cool, and cutting cooling costs.
TOP REASONS FOR A NEW ROOF
There are numerous major reasons you may need a new roof for your house, such as:
- Your roof is leaking
- You have missing, broken, or torn shingles
- You’ve found mold and mildew growing on your roof
- The roof materials have gotten too soft and rotten
HOW TO MAXIMIZE THE ROI OF A FULL ROOF REPLACEMENT
If you have chosen to replace your roof such as a tear-off roof replacement, there are steps you can take to maximize your return on investment. You’ll need to make some upgrades to keep your new roof protected, such as:
- Installing seamless gutters
- Adding gutter guards
- Adopting heated gutter systems if you live in snowy, cold environments
FREQUENTLY ASKED QUESTIONS (FAQS) ABOUT A NEW ROOF
Below, we answer several typical questions about a roof replacement and its associated increase in home value.
HOW MUCH VALUE DOES A NEW ROOF ADD IN 2022?
While you may not have as much ability to get full ROI from a new roof once you sell your place, replacing your roof can add an average of $12,000 to your home’s value. Yet, if you have decided on using metallic material for your roof, you will gain as much as $23,526 on your home sale price.
DOES A NEW ROOF ADD HOME VALUE DURING AN APPRAISAL?
Fixing your old roof with new shingles can add home value to your property during an appraisal. On average, your new shingle roof can raise your home’s resale value by $15,427, according to Remodeling magazine’s Cost vs. Value Report 2019.
When an appraiser considers the overall value of your home, the appraisal will include all home improvement projects, such as a new long-term roof.
WHAT HOME IMPROVEMENTS ADD THE MOST VALUE TO A HOUSE SALE PRICE?
Besides a new roof, several of the biggest home improvement projects that add the greatest value to your home sale price include:
- Finishing a basement
- Adding an extra bedroom
- Installing a new bathroom
- Renovating your kitchen completely
- Partaking in a complete bathroom remodel
FINAL WORD
So, does a new roof increase home value? The clear answer is yes! A new roof will increase your home’s value, as it will keep your home dry and free of mold. Home buyers prefer properties with new roofs and renovations.
To increase your home resale value, consider repairing the shingles with new ones or replacing the entirety of your home’s roof with metallic materials. Soon, you’ll sell your place for a reasonable price.

