When you think of the word “valley,” you’re probably envisioning green hills flanked on either side by mountains. We’re willing to be that you aren’t necessarily thinking about your roof.
So, we know what you’re thinking. What on earth is a roof valley?
While roofers know that most roofs are made up of a combination of unique features that require special care and attention, most homeowners are unaware. This can lead to improper maintenance and damage down the road.
Today we’ll be breaking down everything you need to know about your roof valleys, from what they are and how to maintain them.
WHAT IS A ROOF VALLEY?
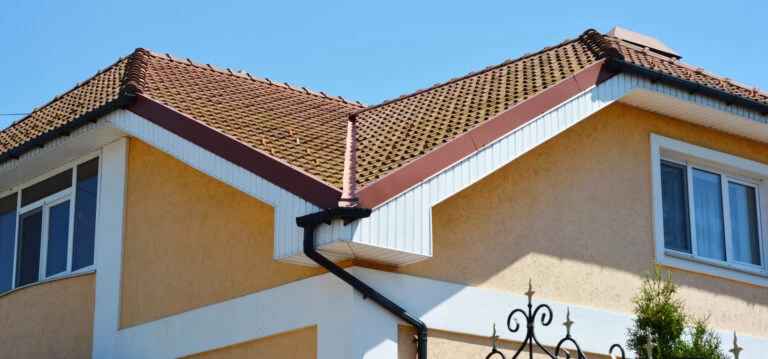
A roof valley is a common architectural feature in many homes. Roof valleys are created when two sloped roofs meet at an angle. This allows water to easily run off the roof instead of getting stuck and pooling, leading to eventual water damage.
Roof valleys also guard against snow and debris like leaves collecting on your roof. These things can block water flow and create problems further down the line.
Valleys are not only functional but also beautiful. They create more character for a home than a standard roof does.
3 TYPES OF ROOF VALLEYS
When it comes to roof valleys, there are three main types the roofers build.
1.) CLOSED ROOF VALLEY
A closed roof valley is a popular choice that many homeowners prefer. Not only do closed valleys help you achieve that aesthetic look that many want, but it also is a fairly affordable option.
Closed roof valleys are protected by an ice and water shield used for the underlayment. This acts as a water shield for your roof deck. After the underlayment is installed, shingles are installed to create a closed valley.
2.) OPEN ROOF VALLEY
If you are serious about protecting your home, an open roof valley might be the right choice for you. Open valleys are particularly durable, as they have metal flashing installed on top of the underlayment in order to provide an extra layer of protection.
3.) WOVEN ROOF VALLEY
Woven valleys are similar to closed valleys in the sense that they have the underlayment installed underneath. Where they differ is the shingle installation. In a woven valley, the shingles are installed in such a way that they change the direction of the roof slopes. This allows homeowners to direct the water off the roof in the way they want.
Woven roof valleys are popular with homeowners because they are a very budget-friendly solution.
WAYS TO TAKE CARE OF YOUR ROOF VALLEY
Now that you know the importance of your roof valley, you’ll also understand the importance of caring for it properly! Here are 4 tips to make sure that your roofing system is working efficiently and safely.
1) GET A ROOF INSPECTION
The number one thing homeowners can do to ensure that their roof is up to snuff is to get a professional roof inspection. Roofing contractors will be able to assess your roof for any problem areas and give you advice on how to maintain it and what to watch out for. A proper roof inspection will help you have peace of mind.
2.) MAKE SURE YOU HAVE THE RIGHT MATERIALS
Different climates create different tolls on your roof. While one form of roof valley may be an effective way to protect against rain and snow in one climate, it might not cut it in another. Consulting with a roofing contractor will help ensure that your roof is ready to handle whatever weather is thrown at it. When you have the right roofing materials, you can rest easy, knowing your home is covered.
3.) REMOVE DEBRIS
While valleys are designed to avoid causing debris build-up, they aren’t perfect. Cleaning debris from leaves, twigs, and other items will help you keep your roofing system functioning properly.
4.) DO A SELF-CHECK
Regular checks on your roof can help you catch any problems before they arise. Be sure to check for loose or blown-off tiles, moss growth, or soft, spongy parts of the roof.
CONSULT WITH A PRO
Want to make sure your roof valleys are functioning optimally? Reach out to your local roofing pros at MARS Roofing. Whether you are looking for a roof installation or simply some minor repairs, we can help. Contact us today to set up your free roof inspection!
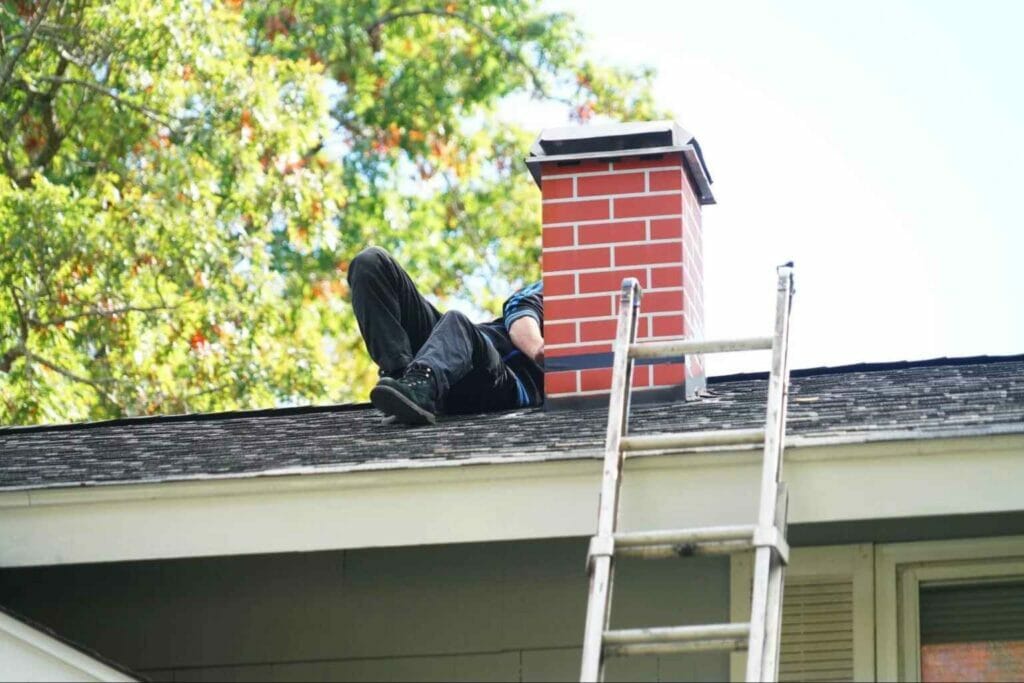
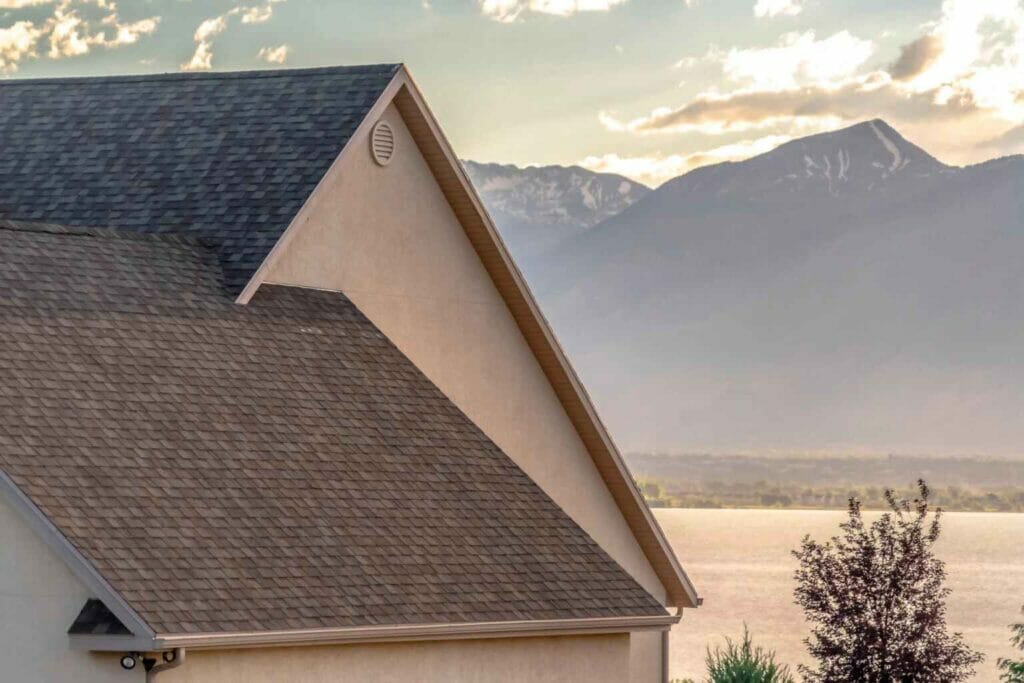
Most of us don’t think much about our chimneys, unless we’re lighting a cozy fire on a winter’s night. But the truth is that a chimney is one of the most vulnerable parts of your roof.
It might be time to check out your chimney if you’ve been dealing with persistent roof problems, including:
Roof leaks
Water stains on your ceilings and walls
A drafty attic
More specifically, it’s time to check on the roof saddle.
Have you never heard of a roof saddle before? You’re not alone. This vital element of your roof is virtually unknown to many homeowners. No need to worry, though, because we have you covered. Keep reading to find out all you need to know about roof saddles.
WHY DOES YOUR HOUSE HAVE A ROOF SADDLE?
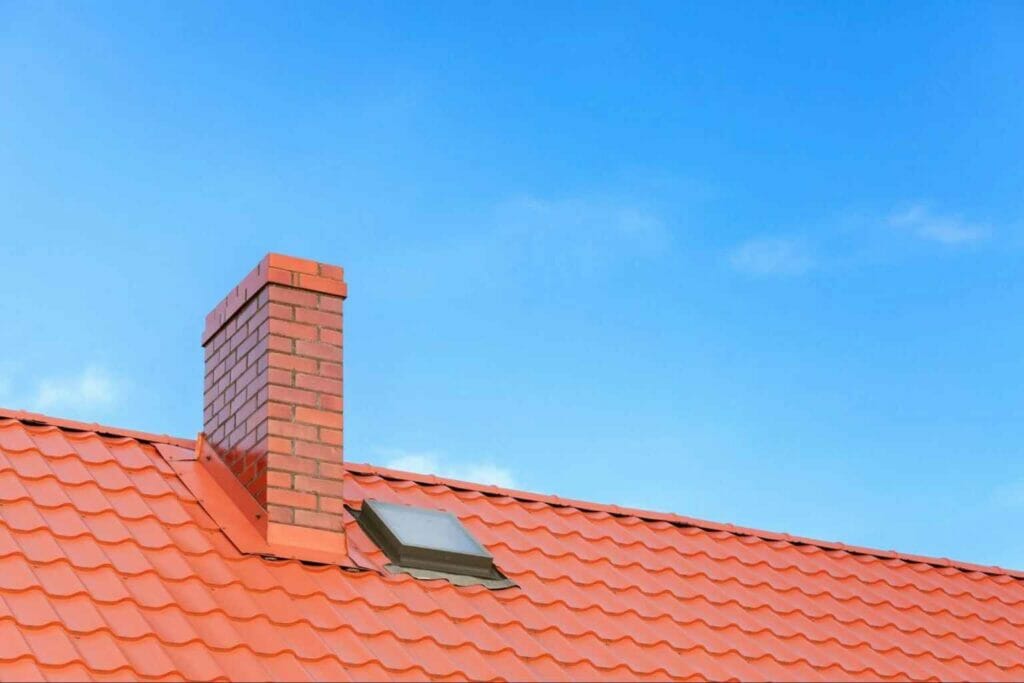
So, what exactly is a roof saddle? Also known as a roof cricket, a roof saddle is a type of customized chimney flashing that is designed to divert water away from your chimney. Like standard chimney flashing, it helps to keep water from entering your chimney by creating a waterproof seal. It differs, however, by also changing the path that the water is flowing.
It should not be confused with a saddle roof or a gable roof, which are specific roof designs, and very different than a roof saddle itself.
HOW MUCH DOES A ROOF SADDLE COST?
Installation of your roof cricket typically costs between $3000-$6000, depending on the size of your chimney and the roof materials. It’s always good to budget on the higher end in order to avoid being shocked by the final price.
Prices may also go up depending on the state of your existing roof. If a repair is needed before installing your roof cricket, you can expect to pay a bit more.
HOW IS A ROOF SADDLE BUILT?
Wondering how to add a roof cricket to your new roof? Follow this step-by-step process for a smooth installation.
1.) REMOVE SHINGLES
Before you install your roof cricket, you need to prep your space. This means clearing the roof area around the chimney. You will need to remove the various layers of the roof around the chimney. This means taking off the shingles and underlayment until only the decking is visible.
2.) BUILD FRAME
The next step is to build the frame for your roof saddle. If you are DIY-ing this project, it is important that you check what the building codes are, in regards to the height and slope of your roof cricket.
You can build the frame out of 2 by 4s, and attach it with framing nails.
3.) ADD SUPPORT
Don’t forget to add support beams to your frame! These should also be made of 2 by 4s that lay flat against the chimney facing. It’s important to make sure that they extend the full length of the chimney so that water is properly diverted.
4.) ADD DECKING
Once your frame is complete, it is time to add decking or sheathing to cover the exterior of your frame. Most people choose to use plywood as it is affordable and effective. It’s important to ensure that the boards are cut properly, and that there are no gaps that water can get through.
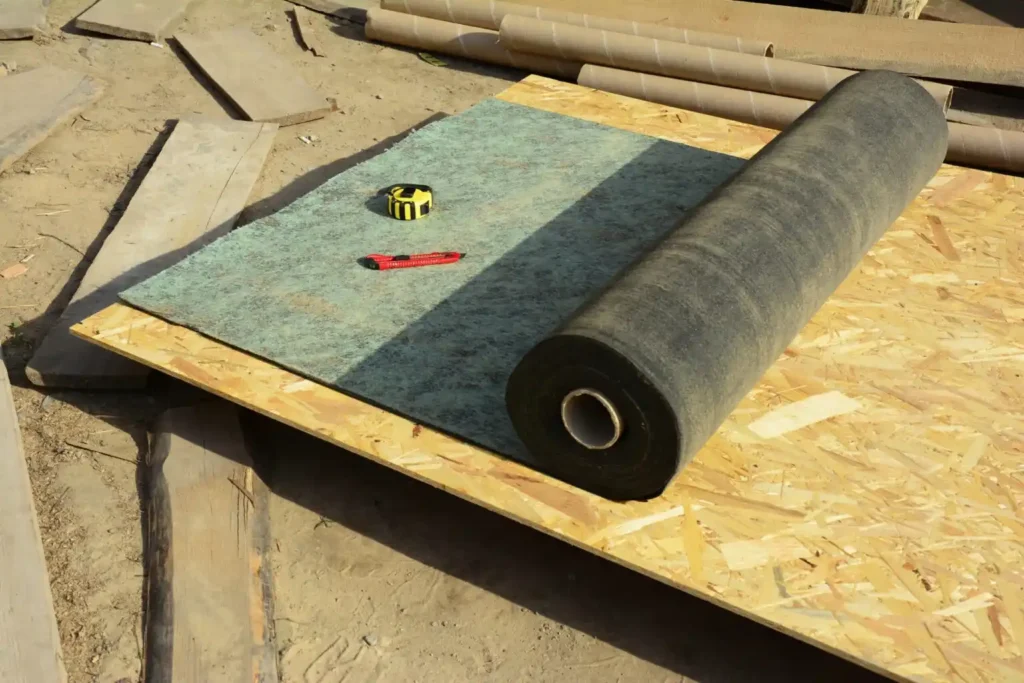
5.) ADD UNDERLAYMENT
Adding underlayment is an important step that will ensure that your roof cricket is protected from weather conditions like water and ice. Most homeowners choose to use felt for their underlayment, but you can also purchase a specific ice-and-water shield to protect your home.
6.) ADD SHINGLES
It’s now time to finish off your roof saddle! This is the step where you’ll either want to add metal flashing or shingles to your cricket. This will help the saddle blend in with the rest of your roof and also add an extra layer of protection against water and ice.
CONTACT A PROFESSIONAL
Not sure you’re up to the task of installing your own roof saddle? Let our team of trusted professionals handle it for you! At MARS Roofing, we are experts at all things roofing related, and would be happy to assist you with all of your roofing repair needs. Contact us today to set up your free roof inspection and get started!
As a homeowner, you might not spend a ton of time thinking about the structural components of your roof. That’s alright. Roofing contractors, like us, think about it for you!
The fact of the matter is that your roof is a complex system designed to keep you and your home protected from the elements. That system includes:
Roofing materials, like shingles and shakes
Ridge vents
Flashing
Insulation
And, of course, we can’t forget the roof decking.
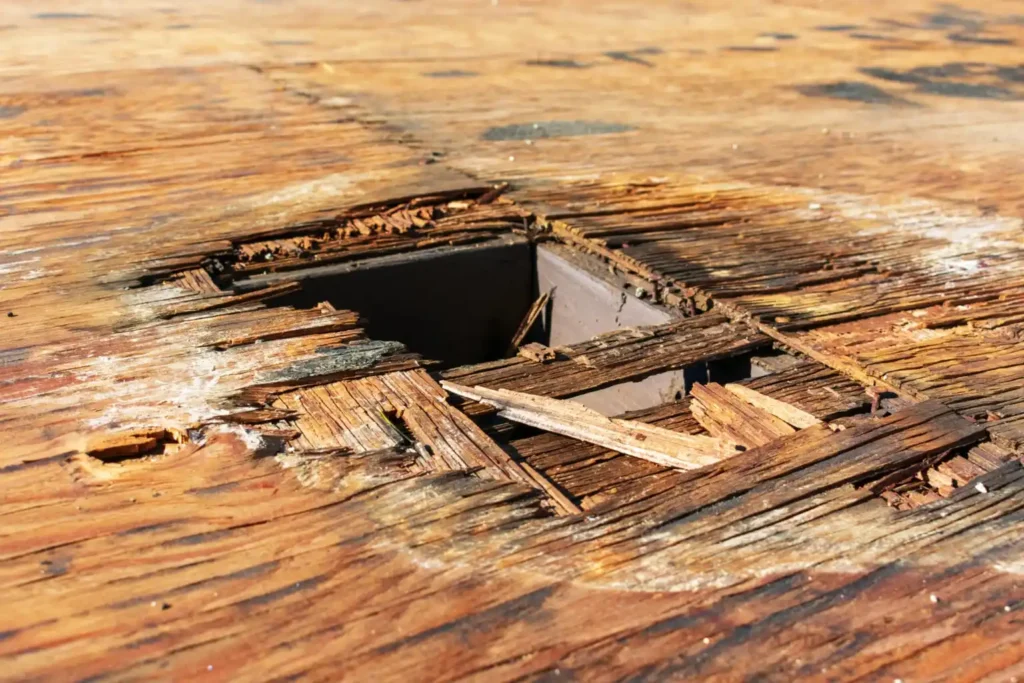
As the foundation of your roof, having a well-installed roof deck can be the key between a safe home and one that is prone to leaks and water damage. But what is roof decking? Read on to learn everything you need to know.
WHAT IS ROOF DECKING?
Roof decking functions a lot like the foundation of your home. It offers support to your roof and helps it maintain its structural integrity.
Roof decking comes in a variety of materials and is layered on top of your roof’s insulation before other roofing materials are attached. This provides an important protective layer for the interior of your home. Damaged roof decking can lead to water damage to the walls and ceiling of your attic space or mold and mildew growth in your insulation.
TYPES OF ROOF DECKING
Now that you understand what roof decking is, it is important to understand the options you have when it comes to roof decking materials.
PLANK DECKING
Got a historic home? It’s possible you are still dealing with plank sheathing decking material.
Plank decking material was the go-to choice for many years. These days, a roofing contractor knows better.
Made from rows of long wooden boards, this type of roof decking was once popular due to its stability and ability to hold lots of weight. However, any professional roofer will now tell you that this style of roof decking is known for needing roof repairs, as they are prone to cracking and breakage.
If you’re looking to update your roofing system, we recommend starting by choosing a different roof decking material.
SHEET DECKING
Sheet decking, also simply referred to as plywood decking, is the most common type of roof sheathing used these days. Plywood is relatively affordable with excellent durability. It is also fairly resistant to moisture, making it a great choice if you live in a damp climate.
METAL DECKING
Metal decking is not often used in residential buildings but is quite popular for commercial properties!
When it comes to durability, you simply cannot beat metal sheathing. It stands up well to all sorts of extreme weather conditions, such as rain, hail, and snow, making it suitable for almost all climates. Adding metal decking during your roof replacement can help you save on energy costs, as well, as it is a great insulator.
That being said, if you are replacing your entire roof system with metal sheeting, you will be looking at a significantly higher cost than you would find with either sheet of plank decking.
3 SIGNS YOU NEED TO REPLACE YOUR ROOF DECKING
Not sure whether it’s time to replace your roof deck or if you should wait for a while? Here are some signs that it is time to schedule your roof decking replacement.
1.) Leaking Roof
If you have been noticing roof leaks, it’s important that you contact a roofing professional ASAP. Leaks are a sure sign that your roof deck has been damaged and can lead to bigger, more expensive problems down the road if not dealt with promptly.
2.) Rotten Decking
Doing some routine roof repairs and notice that a part of your roof feels spongy? It’s time to invest in a new roof. A spongy roof is a telltale sign that your decking is in need of speedy replacement.
3.) Uneven Roof
If you are struggling with things such as ice dams or pooling water, it may be that your roof deck was improperly installed. Without an even roof, you will have trouble getting proper drainage and might be facing some serious water damage problems.
HOW MUCH DOES IT COST TO REPLACE ROOF DECKING?
So, you’re ready to start the roof replacement process. But how much should you budget for?
In general, homeowners who are replacing roof decking can expect to spend anywhere between $7000-$12,000 on a new roof deck. This number will change depending on the size of your home and the type of roofing materials that you choose to purchase.
CONTACT A ROOFING CONTRACTOR
Ready to get started? When it comes to installing new roof decking, you can count on the team at MARS Roofing to take care of your home. Contact us today to set up your free roof inspection and get started.
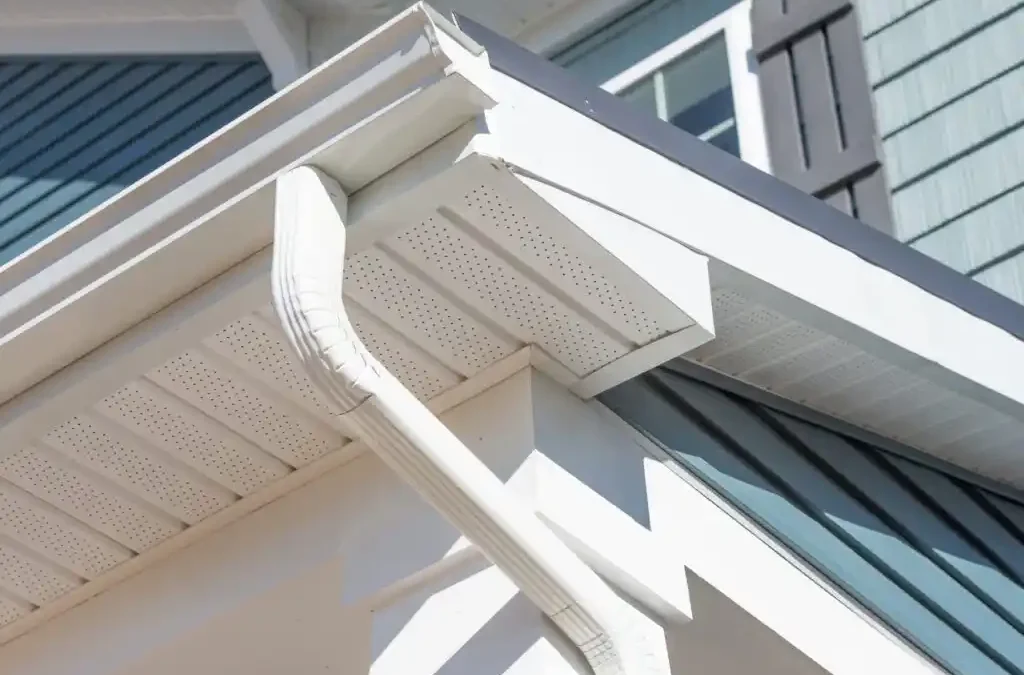
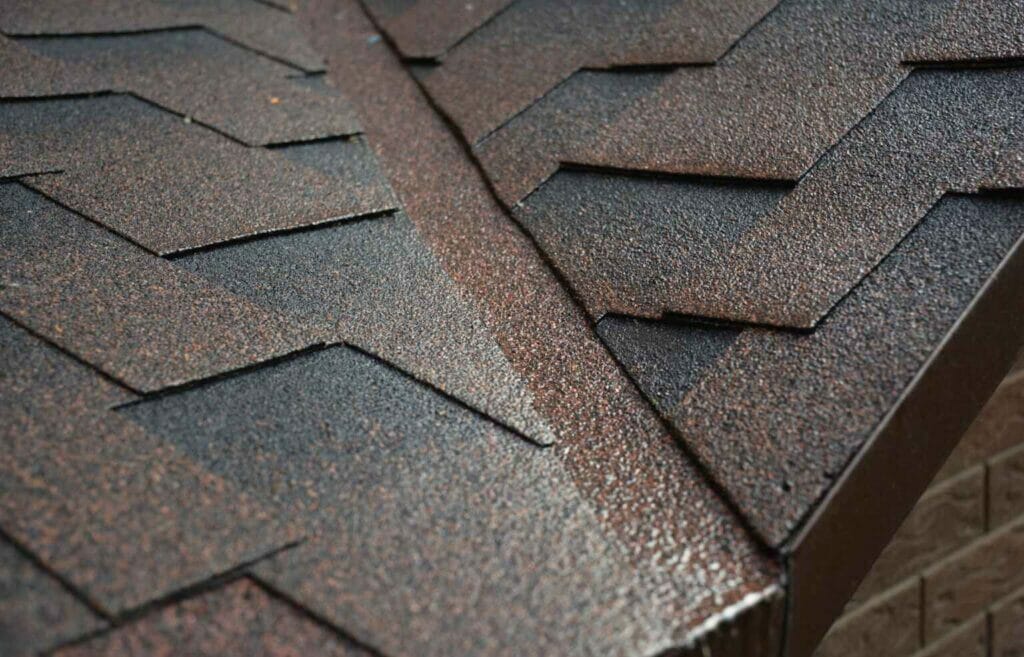
As a homeowner, you may not know all the ins and outs of your roofing system. You know there are shingles and that damaged shingles can cause leaks, but there is a myriad of components that make up a good roofing system. And the drip edge is one of the least visible but most important parts of the whole thing. The main purposes of a drip edge are:
Direct water away from your fascia.
Protect against wind-driven rain.
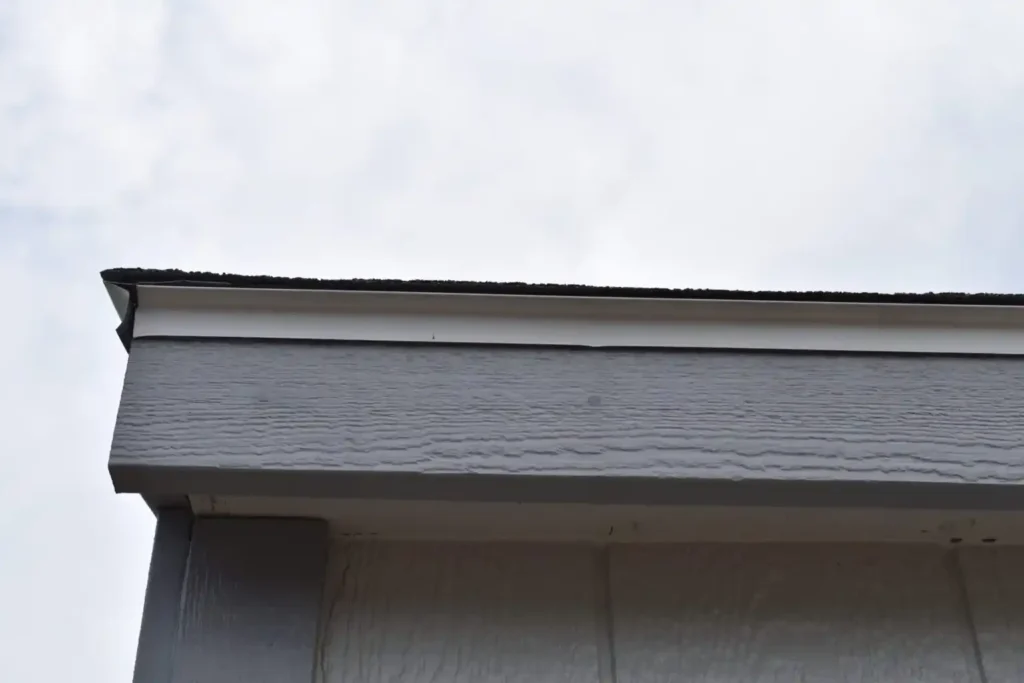
Simply put, the roof’s drip edge is a type of flashing that helps deter water from the roof’s edge. Our guide will go more in-depth as to what a drip edge is and why it’s so important.
WHAT IS DRIP EDGE FLASHING ON A ROOF?
Roof flashing is a thin piece of impervious material that is installed at any joint, corner, or seam on your roof that ensures a watertight seal. Types of roof flashing include:
Step flashing
Pipe boot flashing
Valley flashing
Counter flashing
Chimney flashing
Cap metal flashing
Drip edge
The drip edge is just one of many types of flashing on your roof, which all together work as weatherproofing for your entire roof. In fact, drip edges are one of the most effective moisture control methods for shingle roofs or any structure.
The roof drip edge is often the very first thing installed on a new roof before your roof’s shingles. This metal flashing directs water away from the fascia boards and roof underlayment and guides it right into the gutters.
WHY IS DRIP EDGE IMPORTANT?
A well-constructed drip edge will protect your home in multiple ways. Most notably, it helps to keep water off the roof deck and away from the fascia. Additionally, the drip edge helps:
Provide a finished look to the roof’s edge. This is especially true for homes with gable roofs, where you can see the drip edge from ground level.
A good drip edge helps keep critters out of your attic. Rodents and other small creatures can easily sneak under the eaves or fascia boards, but when a drip edge is installed properly, it creates a barrier that prevents them from getting in.
Protect the fascia and soffit boards from water damage. Water can collect in these areas, leading to rot and other issues. With a drip edge, the water is directed away from the area before it has a chance to cause damage.
Protects against ice dams that can cause damage to your roof’s deck and shingles.
Without this critical component, water runoff can seep beneath the shingles and cause damage to the wood decking, which could eventually lead to wood rot and structural damage. Drip edges are an affordable way to protect your home and extend the lifespan of your roof. Without it, you are leaving your home vulnerable to the costly water damage caused by water and critter infiltration.
HOW TO TELL IF YOUR DRIP EDGE IS DAMAGED
Once your drip edge is damaged, your roof is immediately susceptible to water damage or other issues. Some tell-tale signs that your drip edge is damaged or missing include:
Leaking or water pooling near the roof’s edge.
Water dripping behind the gutters, leaving stains on your home’s siding.
Staining or rotting on the fascia boards.
Water stains on the roof eaves or the ceiling near your outer walls.
Warped shingles on the roof’s edge.
The moment you notice any of these signs, get your roof assessed right away. The drip edge is vital to keeping your roof healthy and leak-free. This is true for all of your roof’s flashing.
The flashing is often the first thing that needs to be replaced before any other roofing component, so always keep a keen eye out for any signs of leaks coming from the roof— it could mean flashing failure. But it’s a simple fix as long as you catch it early enough.
ENSURING A PROPER DRIP EDGE INSTALLATION
Most building codes require a new drip edge to be installed with any new roof replacement. Always choose a roofing contractor who ensures you’re getting a high-quality drip edge along with sturdy roofing materials. At MARS Roofing, we use only the best roofing materials in the industry and will always install your drip edge and gutters properly, so you don’t have to worry about a thing.
Prevent rust, mold growth, and water leaks with a proper drip edge installation. Contact MARS Roofing for your next roofing project.
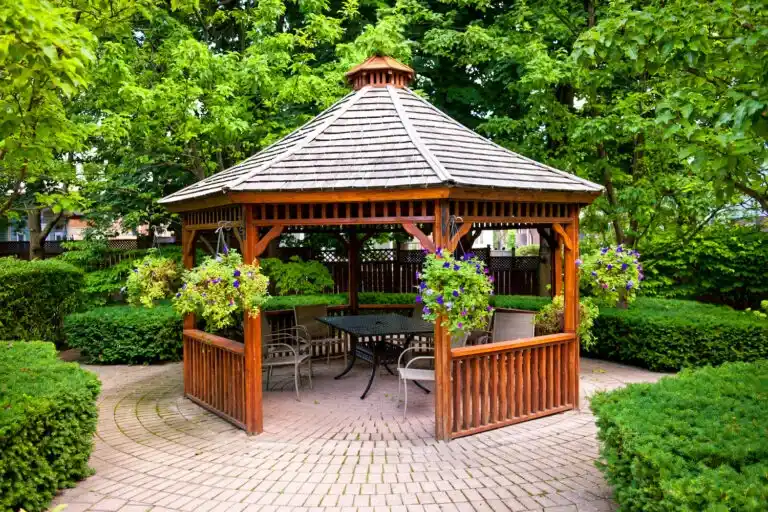
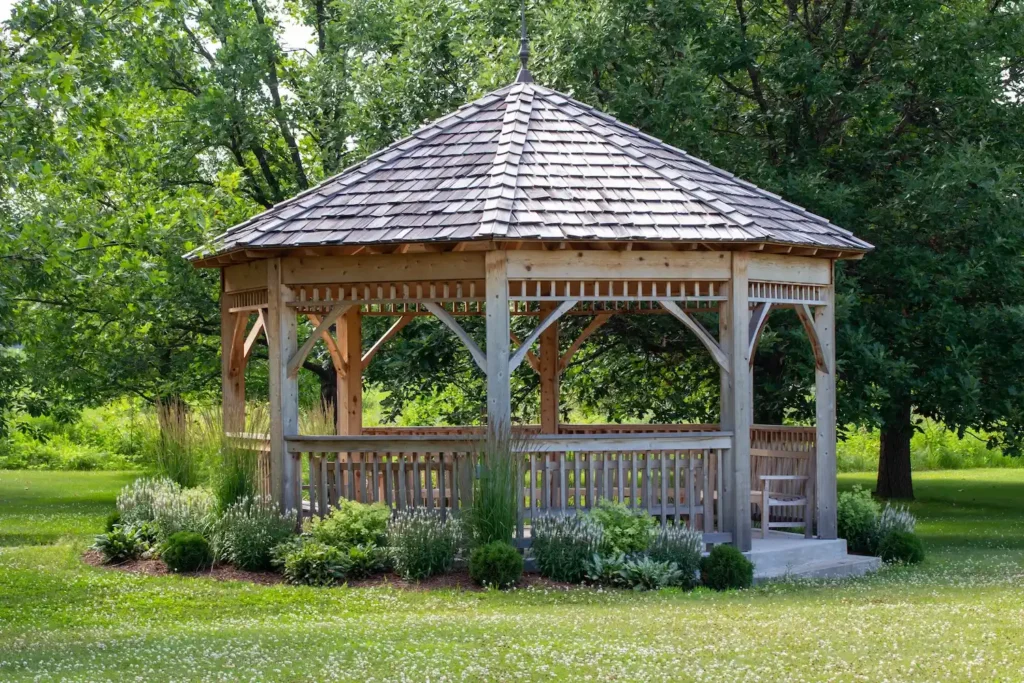
You’re probably thinking, “who on earth has a home with a hexagonal roof?”. Well, you’re not wrong. People don’t really utilize hexagonal roofs for their homes. However, you might see a hexagonal roof on:
Curious about how you can enhance your property with a stunning hexagonal roof? This guide will help!
WHAT IS A HEXAGONAL ROOF? 🛑
How well do you remember geometry class? If you recall, a hexagon has six sides, angles, and planes. Thus, a hexagonal roof is a six-sided roof with this unique shape. This type of roof is often seen on gazebos, sunrooms, and greenhouses. While it’s not a common roofing choice for homes, it can add a touch of elegance and style to any property. Here are some of the pros and cons of a hexagonal roof to consider.
✅ADVANTAGES OF A HEXAGONAL ROOF
Beautiful aesthetic
You can use any roofing material with it
Hexagon gazebos provide outdoor shade from sun and rain
Can be combined with other roof types on a home
🚫DISADVANTAGES OF A HEXAGONAL ROOF
Require complex carpentry and installation
Have a lot of seams that are susceptible to water leaks
Not ideal to be used for the main roof of a home
HOW TO BUILD A HEXAGONAL ROOF
Building a hexagonal roof can be quite complex and requires the right expertise to build the frame and rafters before even laying the roofing material. This simple step-by-step guide can help you get started!
🔨TOOLS REQUIRED:
6 74-inch pieces of lumber for the rafters
Plywood
Tar paper
Mitre saw
Roofing materials (asphalt shingles, cedar shake, metal, etc.)
Nail gun and nails
Galvanized screws
Hammer
Silicone caulk
Utility knife
STEP 1— BUILD THE RAFTERS
The rafters make up the structure of a hexagonal roof and are the first thing to put in place before installing the roof, obviously. The rafters are made up of six pieces of wood that will meet in the center at a point. Your initial frame will need to be set first, which you can see here.
You have two options for installing your rafters:
By assembling the roof frame on the ground, you avoid having to do all the work on top of a ladder. But you will need some help to lift and hold the roof frame while attaching it to the main railings.
If you’re DIYing, it will be easier to install each rafter on top of the existing posts. Just make sure your ladder is positioned on a flat, stable surface.
You will want to cut the ends of your rafters to be 45 degrees so they can fit flush against the posts. Then, you’ll secure them using galvanized screws.
STEP 2— BUILD THE ROOF
After you’ve put up the frame for your roof, it’s time to add the bottom layer. You can use either plywood boards or slats— both work just fine. However, if you’re looking to save some time, go with the plywood boards.
Measure one of the triangular sections of your roof, between two rafters. This will require some math: use these formulas to calculate the area of your triangle.
Once you determine the size, trace the corresponding triangle shape on your first sheet of plywood, using the mitre saw to carefully cut it out.
Repeat step 2 six times until you have all of your plywood pieces cut.
Using a hammer or nail gun and nails, tack these plywood pieces to the rafters to frame your roof.
STEP 3— WATERPROOF THE ROOF
Just like any roof, waterproofing the roof deck (plywood) is vital to ensuring your home or structure stays safe from water leaks and damage. To do this, follow these steps:
Cover the plywood boards with a sheet of tar paper and use staples to secure them.
Next, you should install a breathable membrane that will allow air to circulate, decreasing the chance of condensation.
Lastly, apply a thin layer of silicone caulk over the screw or nail heads to seal their holes which can be susceptible to minor leaks.
STEP 4— INSTALL THE SHINGLES
The final step is to install the roofing material of your choice! There are many different types of roofing materials you can use on a hexagonal roof, including asphalt shingles, cedar shake, and metal.
If you’re using asphalt shingles, start from the bottom and work your way up, overlapping each row as you go. Make sure to line up the shingles with the center of each rafter so that they’re evenly distributed. Following the manufacturer’s instructions will be key to instilling these properly. Just keep in mind that a hexagonal roof will have six peaks that require proper flashing and sealant to ensure a watertight seal.
And there you have it— your very own hexagonal roof!
WORK WITH TECTUM ROOFING FOR YOUR CUSTOM ROOFING NEEDS
If you’re looking for a custom roofing solution, look no further than MARS Roofing. We specialize in creating one-of-a-kind roofs for all types of homes and commercial buildings. No matter what your vision is, our team of experts can make it a reality. Contact us today to get started on your project!


![What Is The Saddle Of A Roof? [Pictures]](https://mars-roofing.com/wp-content/uploads/2023/03/roof-saddle-featured-scaled-768x576.jpegw3_.jpg)