Feb 3, 2023 | Blog
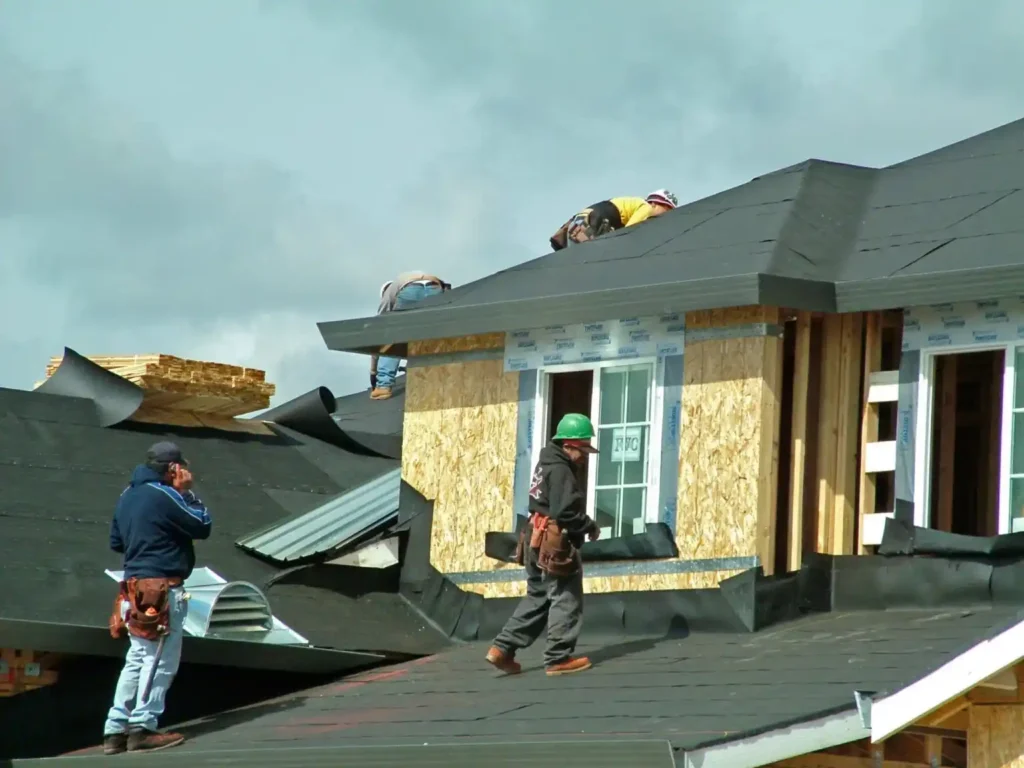
Removing shingles from roof structures is a daunting project for any homeowner. It requires careful performance to ensure that existing structures are not harmed. It must also be done with safety in mind. Fortunately, there is a simple way to approach this task without having to resort to complicated methods.
With the right knowledge and tools at your disposal, the shingle removal process becomes less complicated. In this blog post, we’ll provide helpful tips that’ll make the project easy. Read on for more insight!
1. SAFETY FIRST 👷
Before getting started, wear gear such as safety glasses and gloves, and use a sturdy ladder for climbing onto the roof. By doing so, you’ll minimize the risk of injury. It’s a good idea to wear long pants to protect your legs when kneeling down on the roof.
Also, it’s important to check the weather conditions before beginning work. That way, you can ensure there are no high winds or other dangerous conditions.
2. USE THE RIGHT TOOLS 🔨
To remove the old shingles, there are a few essential tools that you’ll need, including:
- An adjustable roofing jack
- Hammer jack
- Nail puller
- Flat pry bar
- Razor knife
- Magnetic sweeper
- Push broom
- Chalk line kit
- Roofing Shovel
- Roofing hammer
If you don’t have all of these tools, that’s okay. At the very least, you’ll need a pry bar or roofing shovel and a nail puller.
3. PREP TO REMOVE THE SHINGLES
Before removing roofing shingles, prep the area by removing any loose nails, sweep away dirt and roofing debris, and release any adhesive that is present.
Next, draw a line across the roof with chalk. That way, you’ll know where to stop when removing the shingles. This will help ensure that you don’t damage the underlayment or the roof deck.
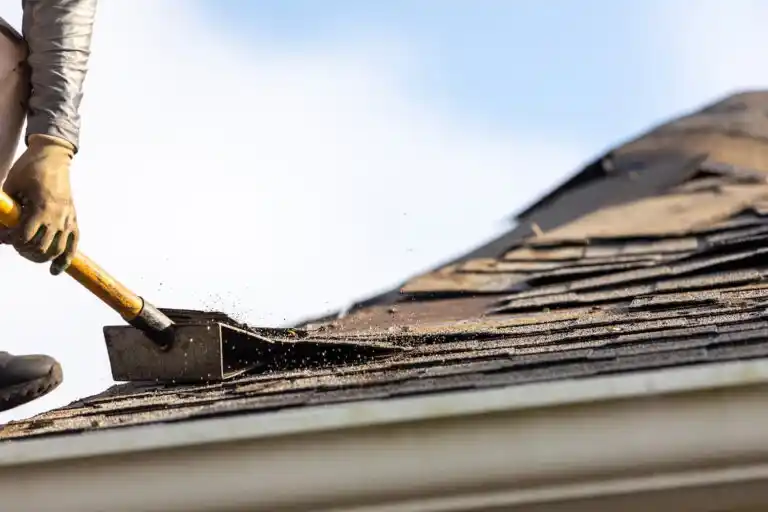
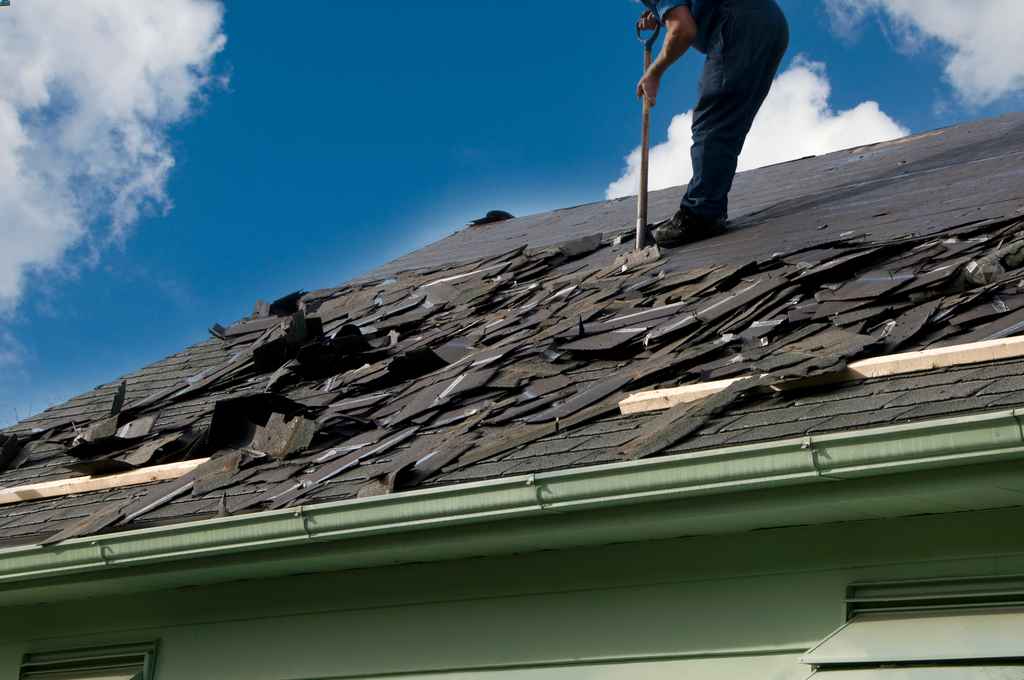
4. REMOVE THE OLD SHINGLES
Once you’re ready, here’s what you should do. Start by securing the roofing jack on one side of the roof, and use it to lift a few shingles. Use the hammer jack to pull out nails from the lifted-up shingles, and the nail puller to remove any protruding nails.
Once all of the nails have been stripped away, use the flat pry bar to lift up the shingles. Remove all of the pieces and throw them away, then move on to the next row. Repeat until the entire roof has been cleared.
5. CLEAN UP 🧹
Once all the shingles have been removed, you’ll need to sweep away any remaining dirt and roofing debris. You may also want to use a magnetic sweeper to make sure you pick up any nails that were missed during the removal process. Finally, check the roof deck and make sure there are loose nails or other roofing elements stuck to it. If there are, use a razor knife to remove them.
Speaking of cleaning up, it’s a good idea to have a dumpster for the removed shingles. This will help keep the job site clean and safe, and make it easier for you when the time comes to dispose of the shingles.
SIGNS THAT YOU SHOULD REMOVE OLD ROOF SHINGLES 🏚️
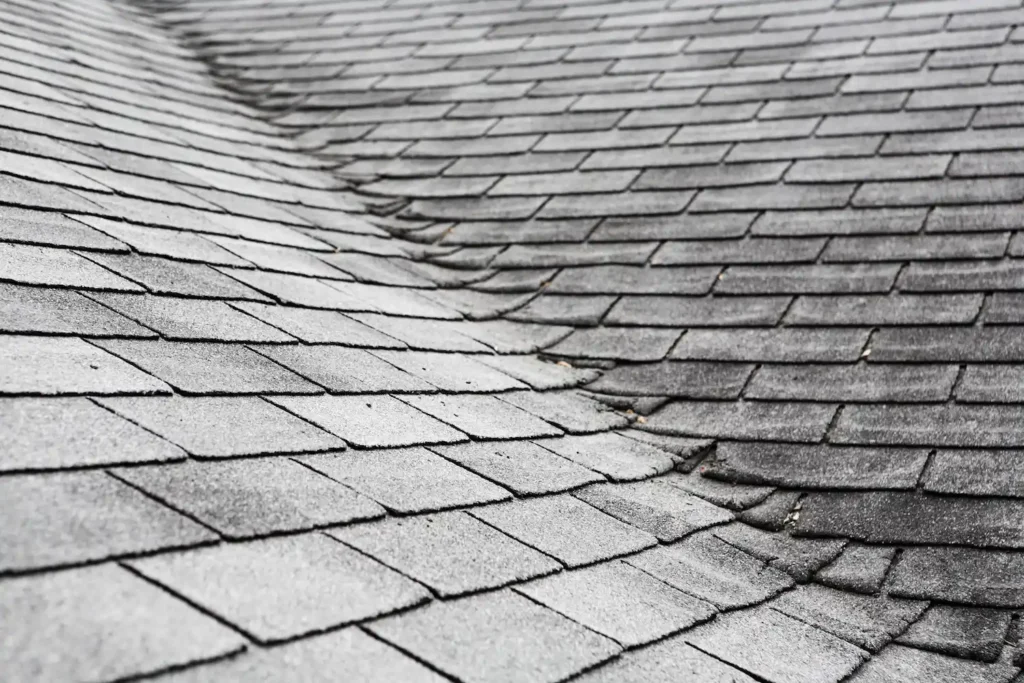
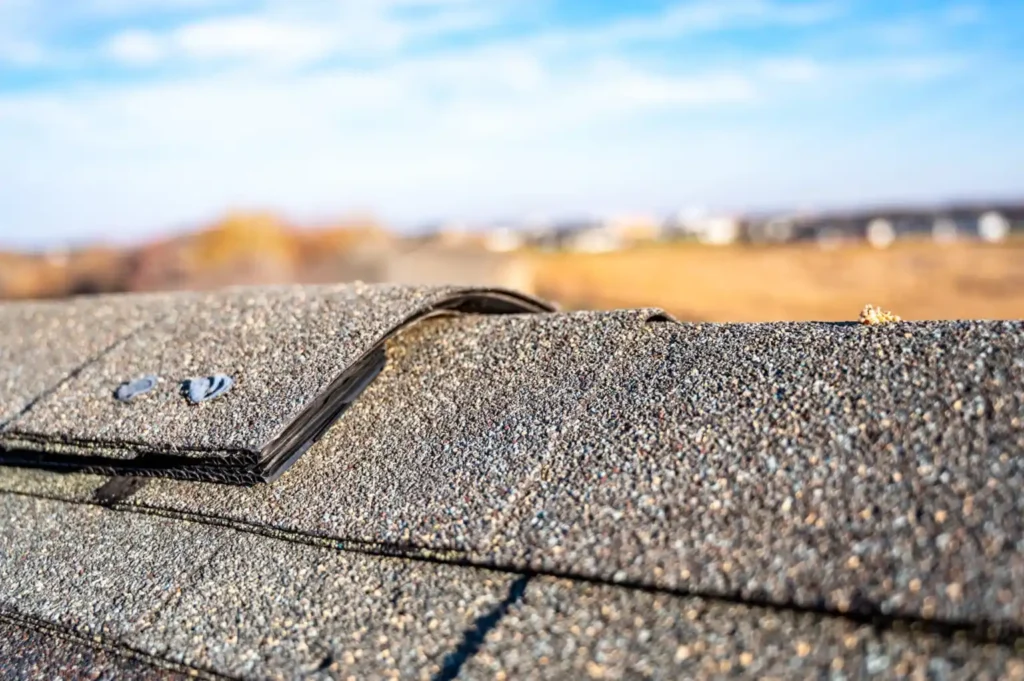
Now that you know how to remove roofing shingles, you may be wondering when it’s time to do so. Generally speaking, shingles should be replaced when they start to curl and buckle. However, here are some telltale signs that’ll let you know when it’s time for a roofing shingle replacement or a new roof:
THE ROOF SHINGLES ARE CRACKED
If you regularly inspect your roof, you may notice small cracks in the shingles or broken shingles. This can be caused by extreme temperatures, UV rays, or even a naturally occurring defect. In any case, these small cracks can quickly turn into large ones, leading to water damage and the need for a roof replacement. This is especially true for asphalt shingles.
THE ROOF SHINGLES ARE BLISTERING
Another sign that it’s time to replace your shingles is when they start to blister. This can happen when there is a buildup of moisture underneath the shingles, and it’s a sign that there is water damage. If left untreated, this can lead to costly repairs down the line.
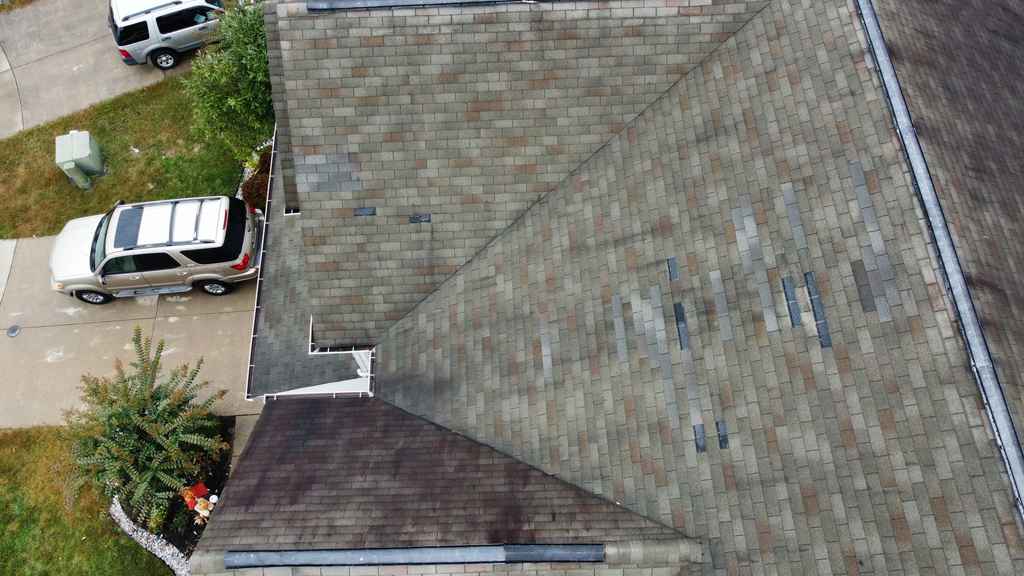
MISSING SHINGLES
If you notice that there are stray shingles in your driveway, or that there are missing roofing shingles on your roof, this is a sure sign that all of them need to be replaced. Missing shingles allow moisture to penetrate the roof’s surface, which can lead to leaks and even structural damage.
If any of these signs apply to you, then you may need a new roof. It’s best to have a professional come and inspect your roof, as they’ll be able to provide the most accurate assessment of the situation. Plus, they can do a thorough inspection of your entire roof, not just the shingles. This will ensure that there are no other underlying issues.
CALL US FOR YOUR ROOFING NEEDS
If you’re looking for a professional roofer to remove your old shingles, give Mars Restoration a call. We provide residential and commercial roofing services, as well as repairs for doors, windows, and more.
To schedule a free inspection, reach out to us online, or if you have any questions, call us at 240-319-7311. We look forward to assisting you!

Jan 27, 2023 | Blog
When you’re in the market for a roof replacement or a fresh roof installation on a new construction build, you’ll probably start to hear a lot of terms you may be unfamiliar with. One of them is “flashing.”
No, there aren’t any flashing lights required in your roof replacement, but there is metal flashing! Roof flashing is actually an incredibly vital part of a protective roofing system. So, what is roof flashing exactly? And where does it need to get installed? Let’s take a closer look.
WHAT IS ROOF FLASHING?
Roof flashing is a thin, flat piece of metal used to help waterproof certain areas on a roof. It is typically installed at the intersection of two roofing sections and around any roof protrusions to mitigate roof leaks. The installation placement is over the top of the underlayment (ice and water shield) but underneath the shingles. On metal roofs, flashing can be installed on top of the panels.
Flashing plays a vital role in protecting your home from water leaks. It works in tandem with the other aspects of a complete roofing system, such as:
- Decking
- Underlayment
- The outer layer of shingles
There are a few different types of metal that can be used for roof flashing.
- Steel: Steel, or galvanized steel, is commonly used for roof flashing. It typically has a zinc coating to protect against corrosion, which allows it to last even when exposed to moisture.
- Copper: If you want to make a statement with your roof, consider copper flashing. It’s the most durable and eye-catching (but also the most expensive) material. Keep in mind that it will form a green patina over time.
- Aluminum: Aluminum is an inexpensive flashing material that still has impressive durability. Since it’s malleable, it’s a good option for more complicated corners on your roof. It requires a protective coating to resist corrosion.
- Lead: As another incredibly durable metal, many homeowners prefer this option. Lead flashing can last for hundreds of years since it’s resistant to water damage!
5 TYPES OF ROOF FLASHING
When roof flashing gets installed by a professional roofing contractor, it should be installed in many different areas that are vulnerable to leaks. There are a few types of roof flashing based on where they get installed on your roof.
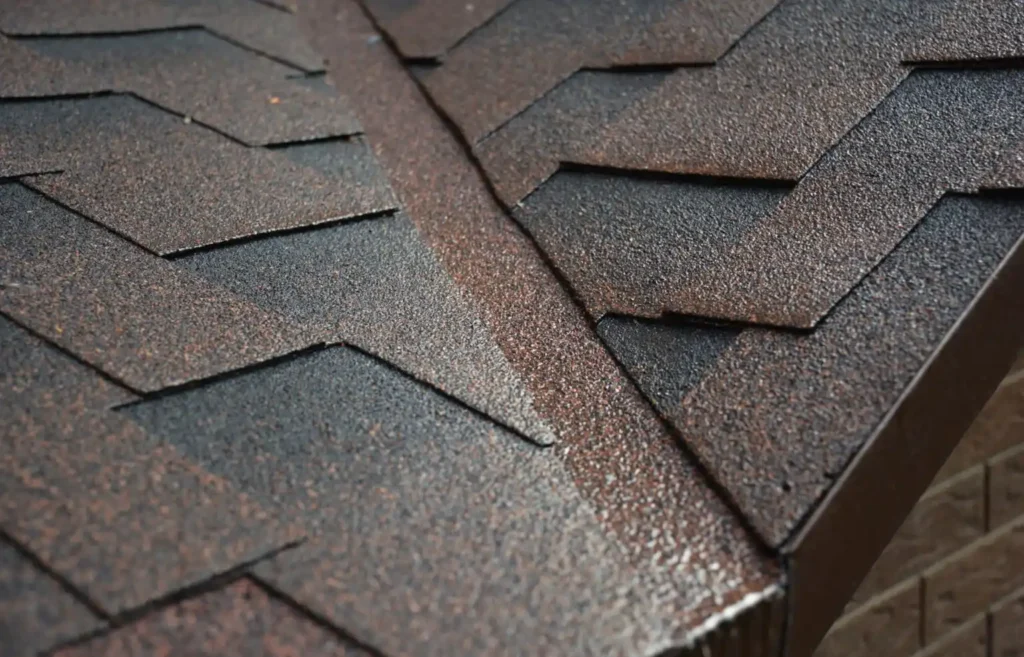
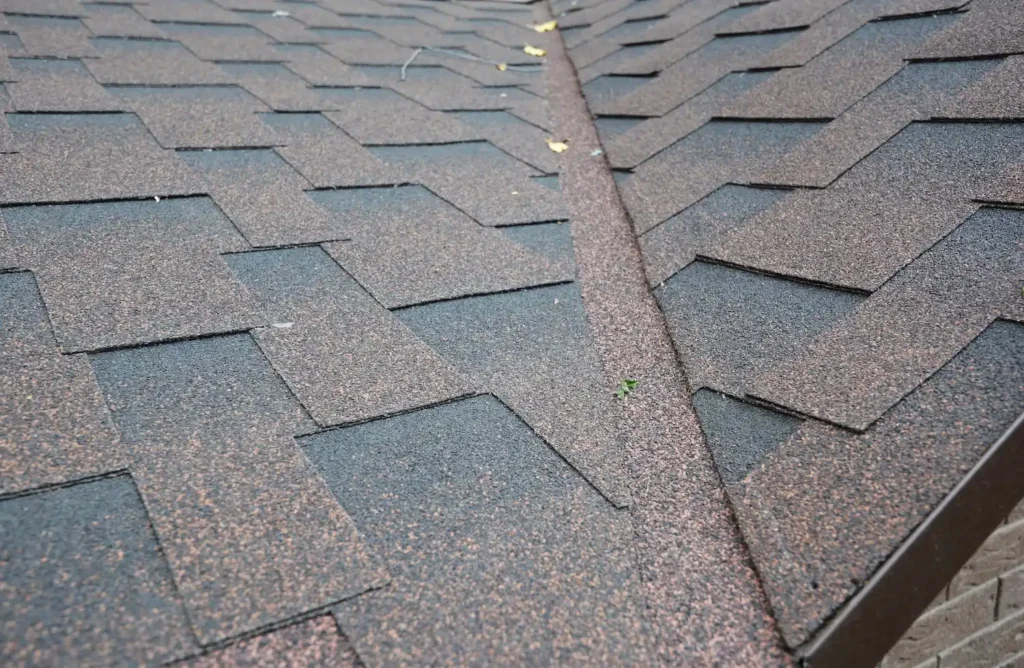
1) VALLEY FLASHING
Roof valleys are the areas where two roof decks slope towards each other and connect. This creates a low line that looks like a valley out in nature. Roof valleys are a popular place for water to hit and collect.
Metal valley flashing gets installed over the underlayment and under the edges of the shingles. In these valleys, the shingles don’t overlap but instead form a thin gap that exposes the flashing. This helps the water to run down to the gutters and away from your roof.
2) BASE AND STEP FLASHING
Flashing is needed where the vertical walls of the house intersect the surface of the roof deck. The solution here is base and step flashing.
- Base flashing gets installed along the front walls. It gets installed underneath the siding and shingles but over the underlayment.
- Step flashing is used where the roof meets a side wall. Pieces get bent at an angle to match the roof pitch, and it is installed along the full length of the side wall. Step flashing is visible, so you can opt for a particular color to match your roofing material.
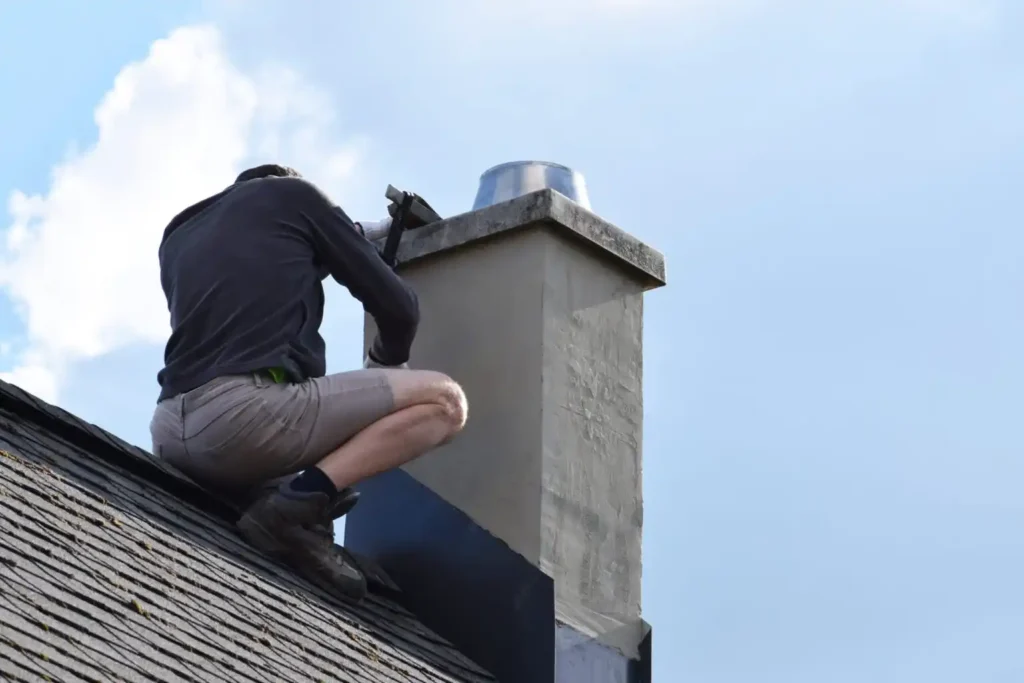
3) CHIMNEY FLASHING
If you have a chimney, it’s, unfortunately, a hot spot for roof leaks. Chimney flashing is the best way to create a water-tight seal around the area. Other roof penetrations like vents and dormers will also need waterproof flashing.
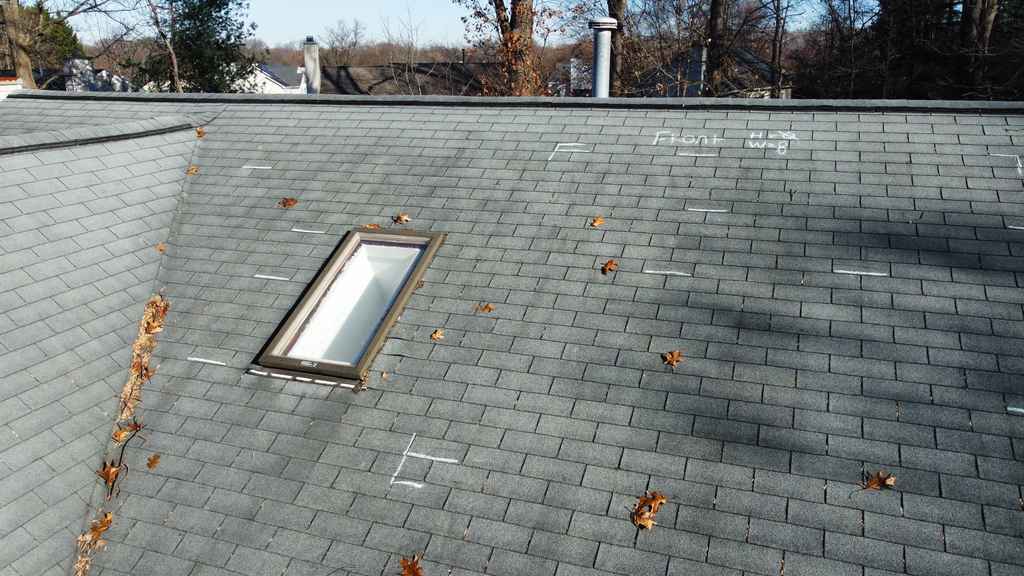
4) SKYLIGHT FLASHING
Skylights are a wonderful feature to have, but they’re also another spot that’s prone to water leaks without the proper installation protocols. Without skylight flashing, your skylight can quickly cause a myriad of issues, such as:
- Roof rot
- Mold
- Water seepage
- Structural damage
5) DRIP EDGE FLASHING
We can’t forget about drip edge flashing! The drip edge is vital at the edges of your roof in order to direct water into your gutters and away from your roofing materials. This also helps prevent ice dams in winter.
Intense wind can lift shingles at the edges of your roof, so drip edge flashing is the next line of defense when this occurs.
DAMAGED FLASHING OR TIME FOR A ROOF REPLACEMENT? CALL MARS!
If you’re due for a total roof replacement soon, or if you need a flashing repair, trust a local, professional roofing company like Mars Restoration. With our detailed inspections, we’ll be able to pinpoint any flashing damage and create a clear description of the recommended repairs.
Call Mars today to schedule a free roof inspection!
Jan 22, 2023 | Blog
Have you ever needed a backup plan? It’s always wise to cover your bases in case your first plan falls through.
Our roofs also have backup plans in the form of underlayment. If for any reason, the shingles or other roofing materials get damaged, roofing underlayment is an extra line of defense against water damage.
Let’s take a look at:
- What is roof underlayment?
- The differences between the types of underlayment
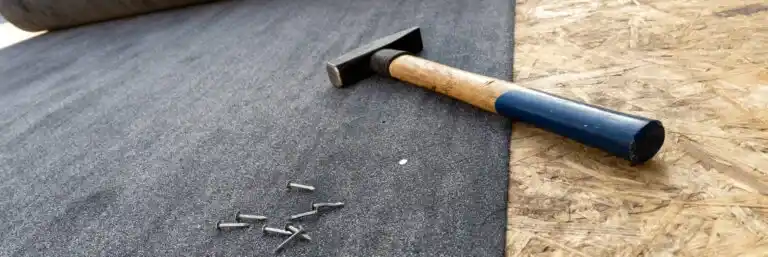
WHAT IS ROOF UNDERLAYMENT?
Roofing underlayment is the material between the shingles and the plywood roof deck. It gets installed directly on top of the roof deck in order to provide an additional layer of protection against:
- Snow ❄️
- Rain 🌧️
- Wind 🌬️
- Extreme heat 🥵
Underlayment should get installed across the entire surface of your roof decking. Additionally, it’s recommended for a waterproof underlayment to be added in the following areas that are prone to water collection and ice dams:
- Valleys
- Eaves
- Chimneys
- Vent pipes
- Skylights
Roof underlayment is an incredibly important component of a complete roofing system that helps keep your home dry. Trust us; you don’t want water damage in your home. It’s an expensive and tedious issue to fix, so always opt to stop the problem at the source by opting for a professional roof installation.
THE 3 MAIN TYPES OF ROOF UNDERLAYMENT
You have options when it comes to choosing the type of underlayment you want for your roof. Historically, roofing felt has been the most popular choice for underlayment, but in recent years, synthetic and rubberized asphalt underlayments have been been on the come up.
Let’s take a closer look at the pros and cons of all three options.
1) FELT UNDERLAYMENT
Felt roofing underlayment is made by saturating a fiberglass mat with asphalt. It’s one of the oldest and most commonly used types of underlayment in the industry. You can find roofing felt in No. 15 felt or No. 30 felt, with No. 30 being the stronger and thicker option.
✅ Felt Underlayment Pros
- Affordable cost
- Easily accessible
- Easy to install
❌ Felt Underlayment Cons
- More prone to tearing
- Weighs more
- Can wrinkle if exposed to moisture
- Less material per roll, leading to more seams

2) SYNTHETIC UNDERLAYMENT
Even though roofing felt has been the go-to choice for many years, there’s a newer product that’s been in the spotlight lately. Synthetic underlayment is made from durable polymers that are actually melted-down recyclable materials. It’s now the preferred underlayment type of most modern roofing contractors.
Different roofing manufacturers usually make their synthetic materials different from one another, so be sure to do your research on the most high-performing brand.
✅ Synthetic Underlayment Pros
- More durable than felt
- Quick and safe to install
- Repels water effectively
- Can handle UV exposure during the installation process
- Lightweight
- Resistant to mold growth
- Easy for roofers to walk on during installation
❌ Synthetic Underlayment Cons
3) RUBBERIZED ASPHALT UNDERLAYMENT
Rubberized asphalt roofing underlayment is made from— you guessed it— rubber and asphalt. Rubberized asphalt is a peel-and-stick material like the other types of underlayments. The sticky, rubbery material allows it to form around nails and staples without causing punctures.
✅ Rubberized Asphalt Underlayment Pros
- Only fully waterproof underlayment
- Easy to install
- Lasts up to 50 years
- Resistant to UV rays
- Easy to repair
- Won’t wear down when roofers walk on it
- Excellent for humid regions and areas with intense winters
❌ Rubberized Asphalt Underlayment Cons
- Highest upfront cost of the three options
- Not all brands are fire-resistant
HOW TO CHOOSE THE RIGHT UNDERLAYMENT FOR YOUR ROOF
Any of these three options will help keep your roof protected against water damage. However, you can decide which underlayment you want based on your:
- Climate
- Roofing material
- Budget
For example, metal roofs can trap more heat, so they do best with synthetic underlayment. If you live in a temperate, mild climate, felt underlayment will serve you well. But if you live in a particularly humid region, you may opt for the extra waterproofing that comes with rubberized asphalt.
Ultimately, have a conversation with your roofing contractor. Feel free to ask them about the options you have and what they recommend. Some roofing companies may have exclusive partnerships with certain manufacturers, while others can install any manufacturer of your choosing. When it comes to an investment as significant as your roof, you deserve to be informed and educated!
GET A TOTAL ROOFING SYSTEM YOU CAN COUNT ON
It’s clear that roofing underlayment is an incredibly vital aspect of a functioning roofing system. To ensure you get a high-quality roofing system when you replace your roof, opt to hire a professional roofing company with many years of experience.
Here at Mars Restoration, we work with the best manufacturers in the roofing industry, and we take the time to educate you on all your options so that you can make an informed decision about your home and finances.
Reach out to Mars today for a free inspection!
Jan 20, 2023 | Blog, Maryland, Roof Repair, Roof Replacement
Did Hurricane Ida in 2021 cause damage to your roof? Are you still deciding what you are going to do in repairing it? Have other storms since then caused more damage, creating larger issues? The fear of cost and the stress behind getting a new roof can drive us to put it off for another day.
The cost of an asphalt shingle roof replacement in Maryland is approximately between $7,500 and $15,000, based on a 1500-square-foot home.
Is your home larger or smaller than that size? To get an accurate cost for your particular home contact MARS Roofing. We have built our reputation as a top roofing contractor in Maryland through exemplary craftsmanship and clear communication. Our work is meticulous, clean, and precise. We can help with all of your roofing needs, and offer peace of mind.
Besides storm damage, what are other reasons to have your roof replaced?
- Missing, broken, or torn shingles
- Curled shingles on the edges
- Heavy growth of mold and mildew on the shingle surface
- Shingles that have lost granules
- Evidence of water damage in your home from a leaking roof
- Spongy areas in the shingles
When you call for a free inspection, what are some factors that must be considered as components of a quote on a new roof? Here is an essential list.
- Roof size
- Type of roofing material
- Labor
- Disposal of old material
- Pitch, overhang, flashing
A trustworthy company will explain each of these items to you in detail and help you understand what they mean. MARS Roofing appreciates taking the time to educate you on each of these details so there is no confusion.
Besides the above list of items that make up the initial cost, other considerations should be discussed.
Underlayment Repair
Underlayment has a very important job and must be inspected when a new roof is installed. Here is the key point of underlayment and its purpose:
- It protects the plywood decking from exterior elements
- Shed moisture to help prevent mold and mildew
- Prevents leaks from entering the home
- Maintains a quality barrier between the actual roof and the decking
Disposal of old material
In most cases, the old roofing material must be removed and discarded before the new can be installed. Please make sure your roofing company places tarps around your landscape and property to ensure simple cleanup and protection of your home. Ask if there are additional fees for the removal and disposal of the old roofing material.
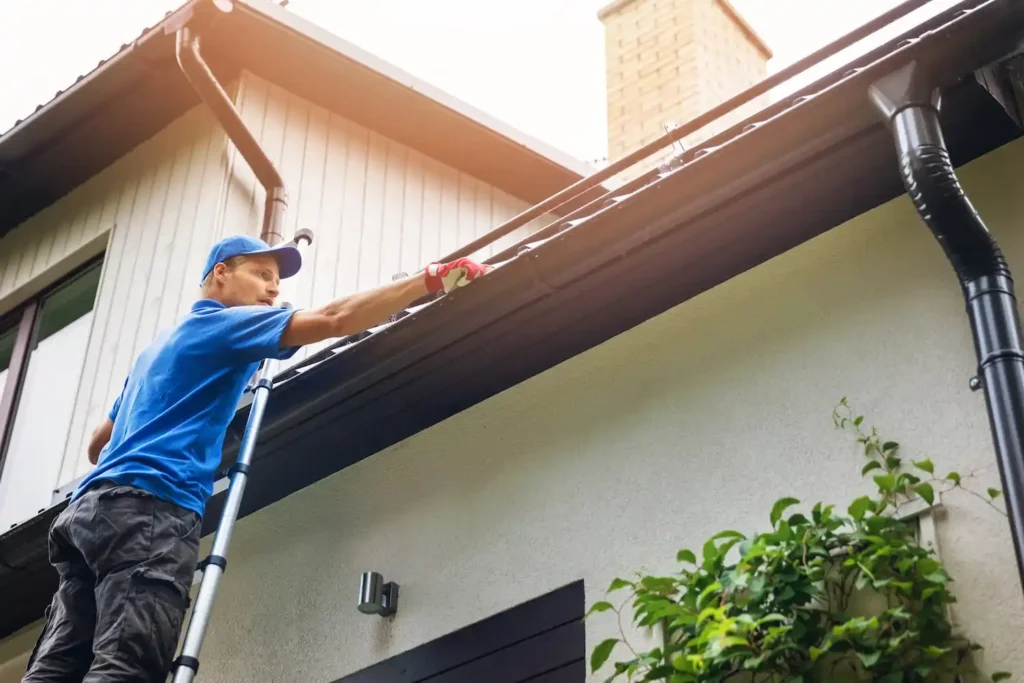
Gutter Inspection
Gutters are a key component of a quality working roofing system. The main purpose of a gutter system is to effectively collect rainwater from your roof, and channel it to the ground through a downspout. When the gutter system fails, the water will seep through holes, and areas of rust, causing potential ice dams in the winter. Those icicles can be pretty in pictures, but they have not welcomed sights on your rooftop.
Our process as a roofing contractor is smooth and simple. You can turn your focus on the things that are most important to you, and leave the roofing job to us! We, at MARS Roofing, a Maryland roofing company, treat your property as if it were our own. Our experts will work with you to find the best solution for your needs.
Call today for a free inspection!
Jan 20, 2023 | Blog
Did you ever take an anatomy class in school? We’re going to wager to guess that you probably didn’t learn about the anatomy of a roof.
You’re definitely familiar with the shingles on the roof, but what about the special layer of shingles called the roof ridge or ridge cap?
Let’s take a closer look at this lesser-known component of your roof system.
WHAT IS THE ROOF RIDGE?
Simply put, the roof ridge is the horizontal line that runs the length of the roof where the two planes meet on the top. It’s the pointed intersection at the highest point of the roof, and it sometimes gets referred to as the peak. Roof ridges only exist on pitched roofs, not flat roofs.
The ridge cap is the layer of shingles that gets installed on the top of the ridge. These shingles overlap the materials on either side of the ridge.
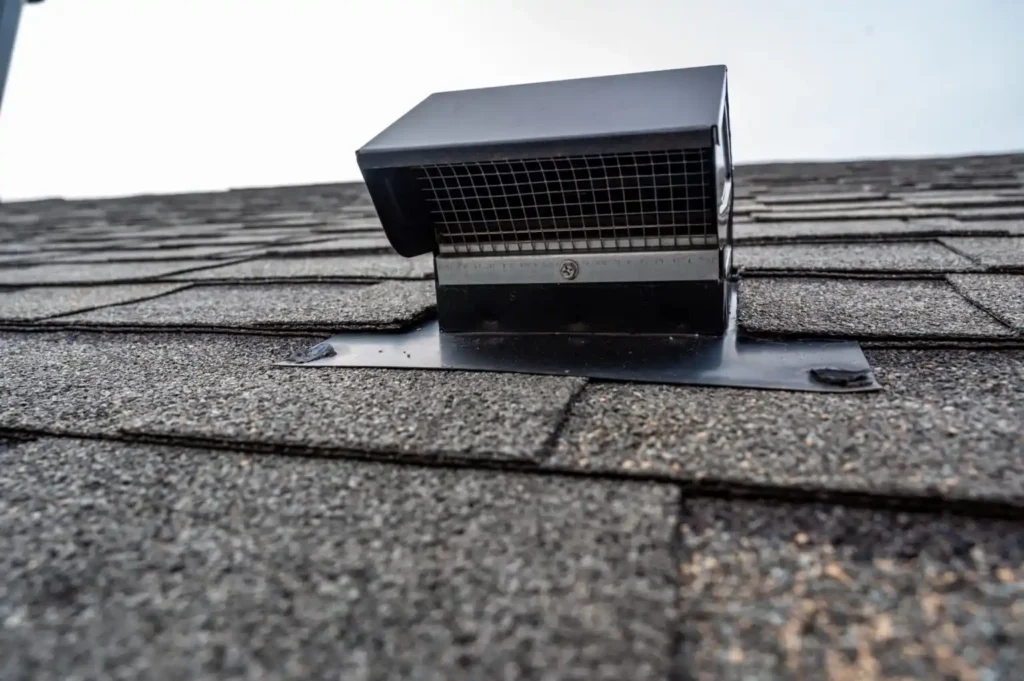
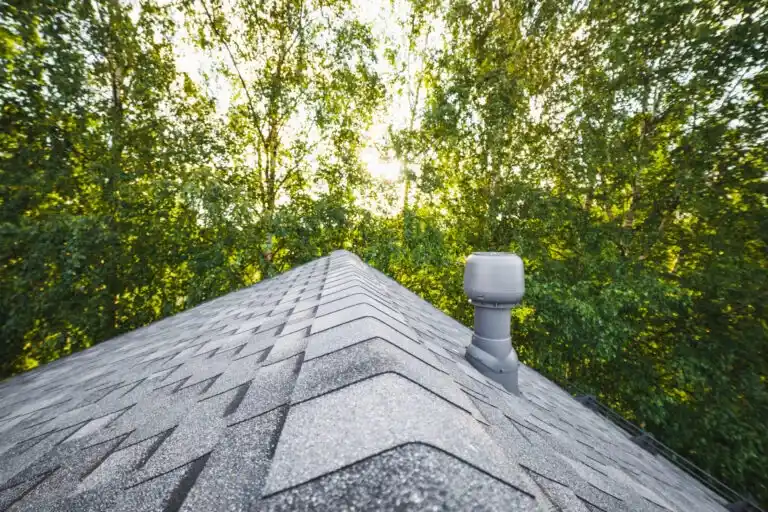
WHAT ABOUT RIDGE VENTS?

Your attic ventilation system is incredibly important, and almost all of the necessary vents should be installed on your roof. Without the proper attic ventilation, you can run into issues such as:
- Ice dams
- Mold growth
- Increased energy bills
- Unpleasant temperatures inside your home
Ridge vents are very popular and are installed on just about every sloped roof. They run the entire length of your roof ridge but aren’t visible from the ground.
There are two types of ridge vents: active and passive. The type installed on your roof depends on the rest of your attic ventilation system.
- Active ridge vents have a baffle (a chute that provides a channel for airflow in the attic). These vents pull fresh air from outside and push the air through the attic. The system works to ensure air is constantly moving, whether or not there’s wind.
- Passive ridge vents don’t have a baffle. Passive ventilation works by letting the air in the attic move around through natural sources like wind.
Both vents will get the job done, but passive vents without a baffle can allow debris, pests, and rain to enter your attic. Because of this, most homeowners opt for an active ventilation system.
When getting a new roof, a professional roofing contractor will follow these steps to install a ridge vent:
- Cut an air slot in the roof’s peak
- Install the ridge vent over the air slot
- Install ridge cap shingles over the vent
Keep in mind that for every 300 square feet of ceiling space in your home, you’ll need at least one square foot of attic ventilation. Ridge vents are intake vents, so they pull air into the attic. Then, the air must be pushed back out of the attic through exhaust vents.
WHAT IS THE PURPOSE OF RIDGE CAPPING?
As we mentioned, the ridge cap is the layer of shingles that goes over the roof ridge. But why does this part need special shingles?
Ridge cap shingles are a vital component for shedding water down to your gutters and out through your downspouts. Ridge cap shingles are specially made to be thicker than normal shingles and pre-bent so that they can form nicely to the ridge.
Properly installing a ridge cap with the correct materials helps prevent roof leaks. Using “regular” shingles as the ridge cap can quickly lead to issues.
If you’re getting a new roof replacement, you can ask the roofing contractor if they plan to follow the manufacturer’s recommendations for the ridge cap. Reputable, professional roofing companies will always do so, but local handymen from down the street may look to cut costs wherever possible.
MARS KNOWS ALL THE DETAILS, SO YOU DON’T HAVE TO
While it’s highly recommended that homeowners get to know the different parts of their roofing system, it can be a little confusing if you’re not a trained professional. We hope this article helped you learn more about the ridge of your roof and the necessary ventilation.
Whether you need a new asphalt shingle roof or want to add more attic ventilation to make your home more energy efficient, reach out to the knowledgeable team at Mars Restoration! Our team pays close attention to detail throughout every step of the roofing process. With 30 years of experience, you can feel confident leaving your roof in our hands.
Reach out to Mars today for a free consultation!

